Thursday, January 29, 2015

A Craftsy Class, a Clean and Simple Valentine and Shopping our Stash Challenge

Happy Hump Day. This week has been crazy here in Connecticut. So far this week we have had three half days of school and a snow day. The forecast says there is more snow due tomorrow so who knows what that will bring.

In the blizzard that wasn't, (and I am NOT complaining nor blaming about this-just thankful) we had a water main leak in front of our house. It just GUSHED water in the middle of the clean up from the storm on Tuesday. Now we have a giant piece of muddy ice in front of our driveway that is quite lovely, as well as a large pothole to the side of the driveway. The water company did a patch and I am hoping they will come back and replace the pipe when the weather is a bit better. It was quite a process to watch, I have to say. I felt bad because the wind was blowing and it was COLD.

While the snowstorm was going on, I watched some videos from a Craftsy class I am taking called "Cards With Dimension" and is taught by one of my favorite paper crafters, Danielle Flanders. She is on the design team for PaperTrey Ink and a few other companies. I took this class because I have a TON of patterned paper and pre-made embellishments left over from scrap booking and love how she uses these type of products on her cards.

In this class, Danielle shows different ways to use these pre-made embellishments on cards, as well as goes over fun techniques for vellum, dry embossing, die cuts, using non paper embellishments and more. It has been fun to watch. I would recommend this to experienced and non-experienced card makers a like. It is helping me jog my mind to use products I have not used in years.

In the spirit of this class, I decided to make a quick card using embossing, some pre-made embellishments and die cuts.


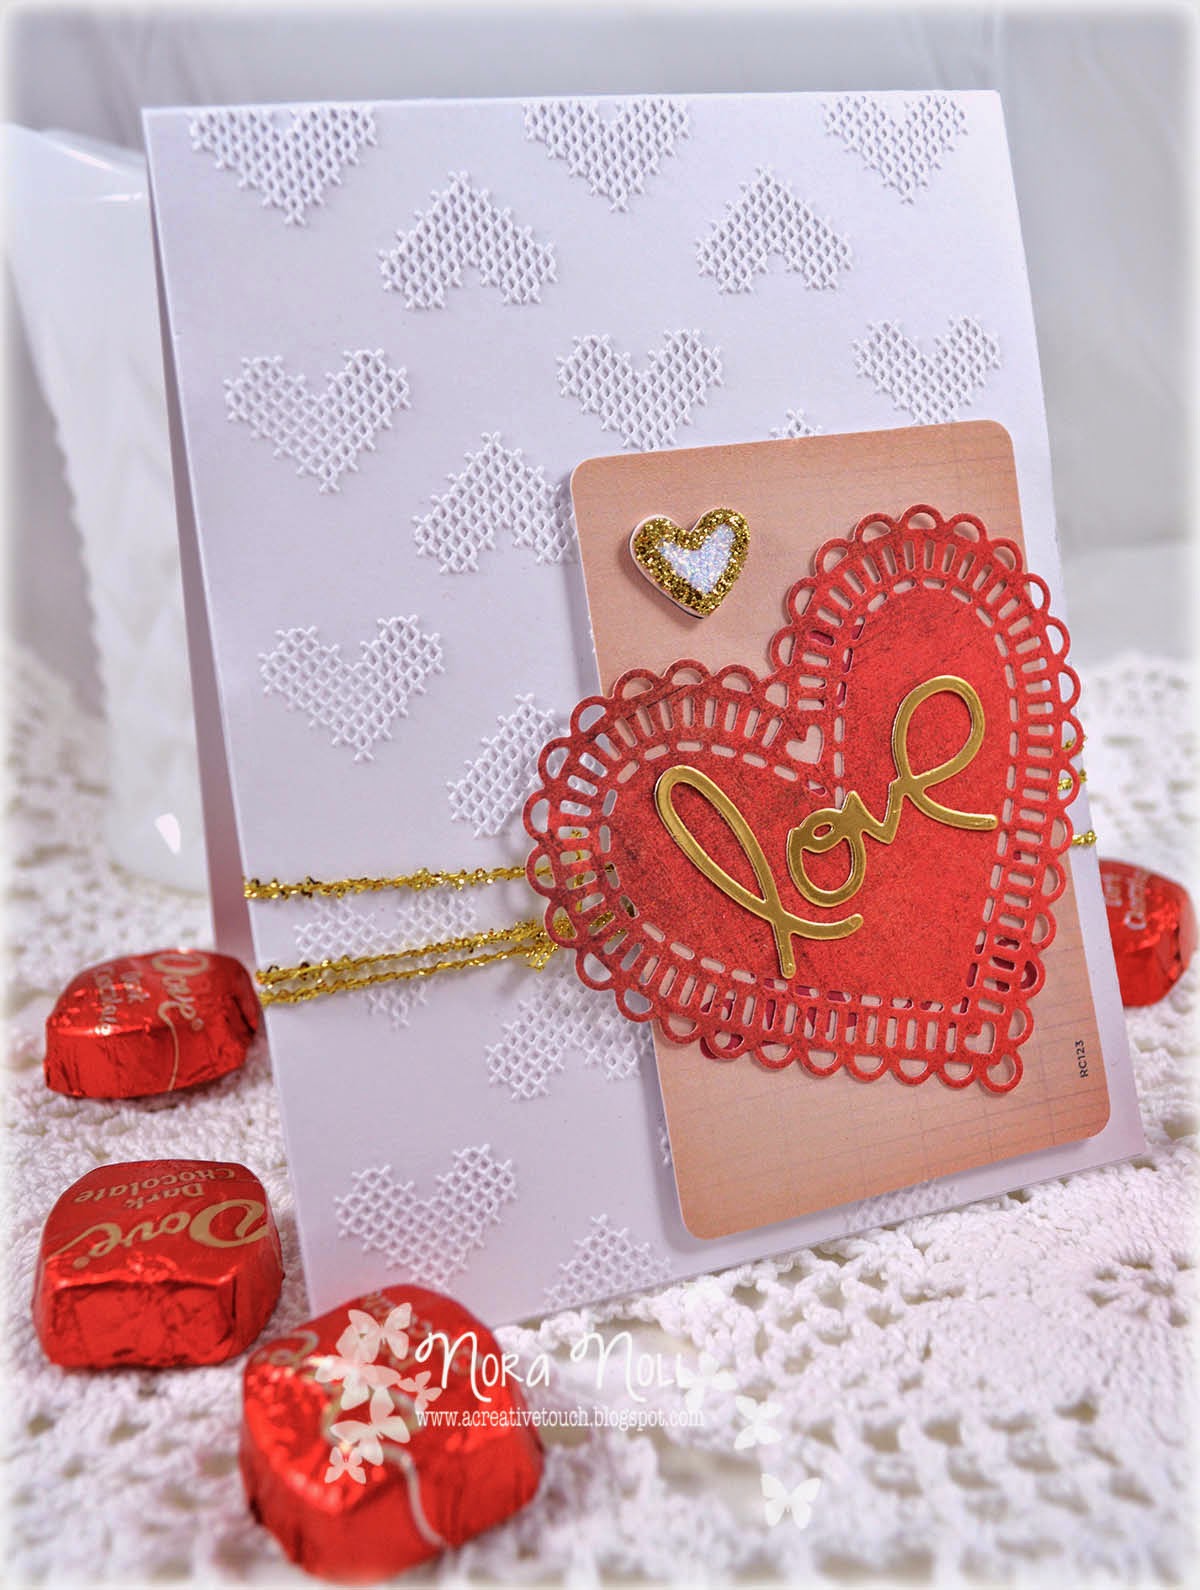
The first thing I did was to emboss a piece of white card stock with a stitched heart embossing folder by Amy Tangerine for American Crafts. I wrapped the embossed panel with gold fiber that I have literally had for almost 15 years. (Yes, I am a hoarder!!) I then adhered this panel to a 5 1/2" by 4 1/4" top folding card.

Next, I used a die cut rectangle from Crate Paper's "Kiss Kiss" ephemera pack and adhered it over the card front using foam adhesive. The tiny heart popped out of this rectangle so I used a thicker foam adhesive to adhere the heart and covered it with Gold and Diamond Stickles for some shine.


I then used a die from Simon Says Stamp to cut out the lace heart from a scrap of red paper and a Paper Smooches die for the "love" sentiment. I adhered the heart over the rectangle and the love over the heart.


I know this looks simple but I have to admit that this was harder then I thought to design. I did not use ONE stamp!! I admire how Danielle uses her supplies. I think that I might go through my scraps and my pre-made die cuts now and match them up to make kits for future cards. A quick and fun way to create a plethora of cards for my stash.

I am entering this card into the "Shopping our Stash" Weekly Challenge Blog. The theme this week is "love."

Thank you for taking the time to stop by today. Be sure to stop by Danielle's blog and take a look at her beautiful projects. Better yet, take her class!!

Supplies:


Friday, January 23, 2015

Winnie and Walter 1st Birthday Bash-Collage Challenge with Laura and NBUS with Darnell

I am back again today with a super quick post. I am trying to post all the cards I did for Winnie and Walter's 1st Birthday Bash. Today I am entering the "Collage Challenge with Laura" and Darnell's NBUS challenge. Here is my card:


I have to admit out of all the cards I made on Saturday, this card is my favorite. It was actually a "happy accident." I only shaded in the background with the gray because I got black ink on my hand and it smudged. I used the pumice ink to hide it!!

Here is the inspiration from Winnie and Walter's challenge that inspired this card:


Here are the instructions to make this card:
  • Stamp the "thank you" sentiment from Winnie and Walter's "Big Bold You" stamp set randomly over the front of a 4" by 5 1/4" die cut piece of white card stock.
  • Using an ink blending tool, blend green ink over the front of the card. 
  • Next, place die cut stars on the front and ink over the with gray ink.
  • Mist Heidi Swapp "Sea Foam" Color Shine mist over the front panel. Let the panel dry and adhere to mint card base.
  • Adhere die cut gray banner to card front
  • Adhere pinked edge embossed circle over banner with foam adhesive
  • Adhere die cut butterfly over circle. Die cut a mint green button, tie a piece of gray twine and adhere over the middle of butterfly using foam adhesive.
  • Adhere white, silver and star sequins randomly on the front of the card.
I have to admit that at first I was intimidated by this challenge. I was not feeling the deer. Instead I just used the color gray from the photo as my inspiration. I brought in the star designs with the embossing, the ink blending and the sequins. I have a few "mistake" background papers that I threw aside but will be using them on different cards. The thank you sentiments that I had stamped were really crooked and it annoyed me. For my design it was important that the sentiment was not too off.


I have found that doing these challenges has sparked my creativity-something that I have been lacking as of late. I know Valentine's Day is around the corner but I just don't feel like making Valentine cards this year. I am just not feeling it this year and that is okay.

Again, I am entering into Winnie and Walter's 1st Birthday Bash Challenge-Collage Challenge with Laura and Darnell's NBUS challenge. I never had used the thank you sentiment or the button die before.


I thank you for taking the time to stop by. Have a wonderful day!!


Supplies:

Thursday, January 22, 2015

Retro Sketch Challenge #149 and Winnie and Walter's Mood Board Challenge with Lea

Hello there!! Another quick post with some challenges I did over the weekend. Today I am entering the Retro Sketch Challenge #149 and Winnie and Walter's Mood Board Challenge with Lea.

I created a very simple card for these challenges.


I used Lea's Mood Board below to come up with the colors for this card. The Teresa Collins gold dot paper was perfect for this challenge. I didn't even have to stamp anything. The bottom right photo has a touch of red and I used this as my inspiration for the red hearts on the card front.


The over all design for this card came from Retro Sketch #149.


I made the doily at the corner a bit smaller then the sketch and elongated the rectangle. Instead of the bow at the left, I chose to fold over a piece of gold glitter tape that thad been sitting on my desk since Christmas. I hate to throw little scraps like that out "just in case."


The only thing I don't "love" about this card is the embossing. The embossing ink smeared a bit when I stamped it. Once again, why I am not a huge fan of heat embossing. It looks okay to a non card maker but it bugs me.

That is all for today. Thank you for taking the time to stop by.

Supplies: