
For the first card, I was happy with the way I colored in the nest and the bird but I definitely need practice with the background. You cannot tell by the picture but I die cut a circle in the patterned paper and pop dotted it over the bird image so that it "peeks" out at the viewer. I finished it off by die cutting a scalloped circle and placing it around the hole.
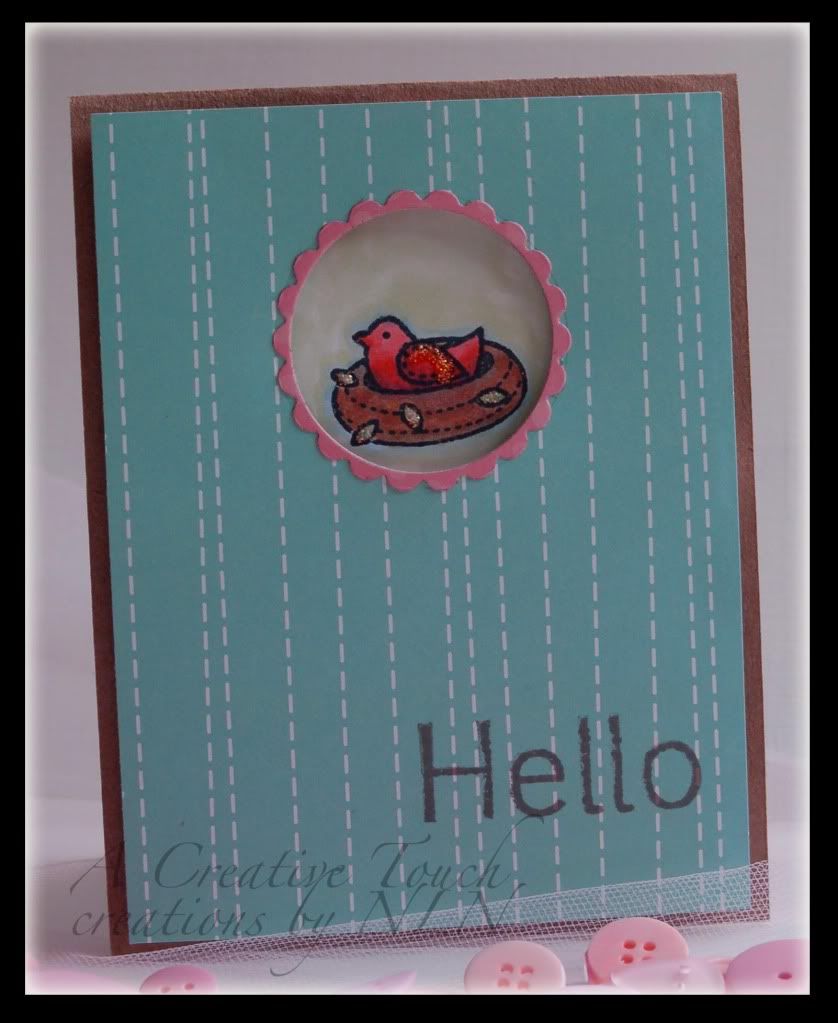
Supplies: Paper-Paper Trey Ink White Paper, Bazzill Kraft, My Little Shoebox Made with Love and Hand Made Die Cuts-Nestabilities Small Standard Circle and Scalloped Circles Die Cut Machine-Big Shot Stamps-My Little Shoebox Home Tweet Home Ink-Tsukineko Memento Rich Cocoa Stickles-Diamond Adhesive Foam-EK Success Markers-Copic G94, B91, B93, E25, E31, E34, E37, G40, G82, R22, R24, R27, YR07
The second card I created came out better then the first. Instead of coloring in the background with the Copics, I chose to wipe the marker a few times on a sponge to pick up some color and then used blending solution on top of the marker. I then sponged the combination over the entire image. This technique looks better but I had to wipe the marker on the sponge a lot to get a deep color. I think if I had the refill of the blue I used to squirt on the sponge it would have been a little easier.
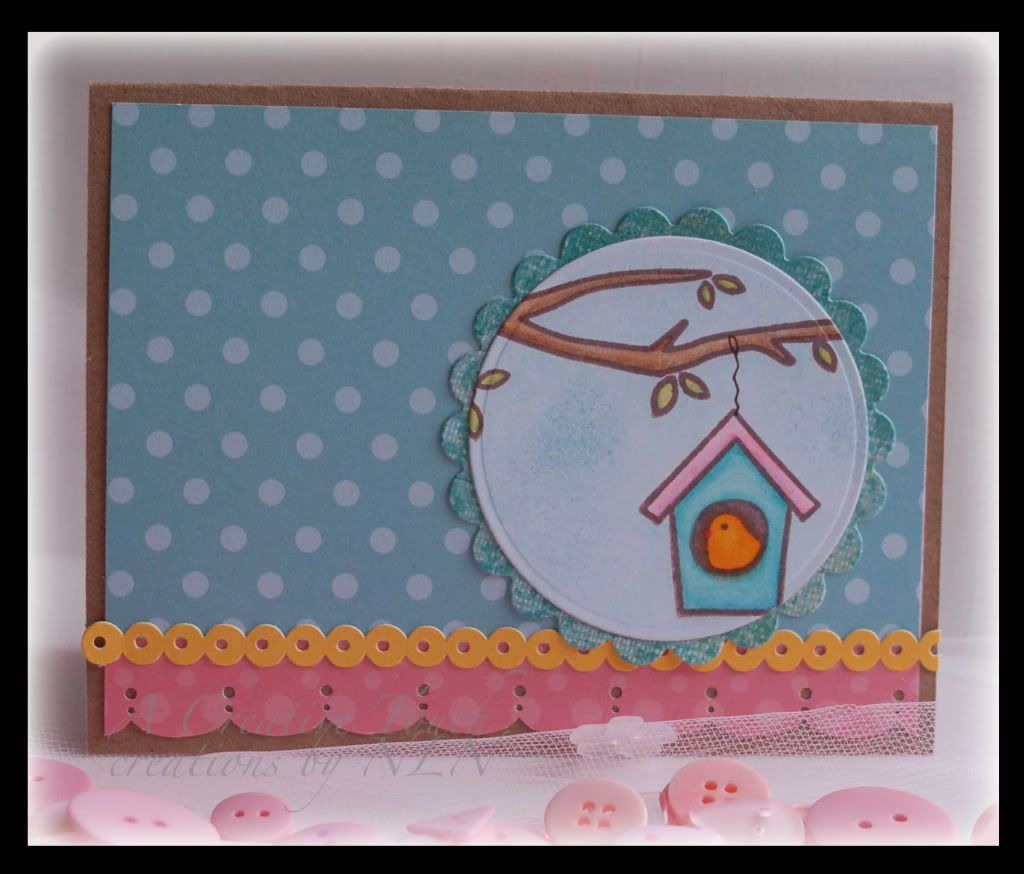
Supplies: Paper-Kraft Cardstock, My Little Shoebox Made with Love and Fields A Bloom, Die Cuts-Nestabilities Small Standard Circles and Scalloped Circle Die Cut Machine-Big Shot Stamps-My Little Shoebox Home Tweet Home Ink-Tsukineko Memento-Rich Cocoa Punches-Martha Stewart Markers-Copic BG10, BG11, BG13, BG18, E31, E34, E37, E44, RV10, RV13, RV14, Y11, Y15, Y17, YG17, YG21, YG23, YR68 Paper Frills-Bumblebee
The last card I am posting today is another simple card. I needed simple after all the coloring I did on the last two cards!! I just embossed a piece of white cardstock for the background and attached three round stickers with pop dots to complete the card. Anyone can do something like this!!
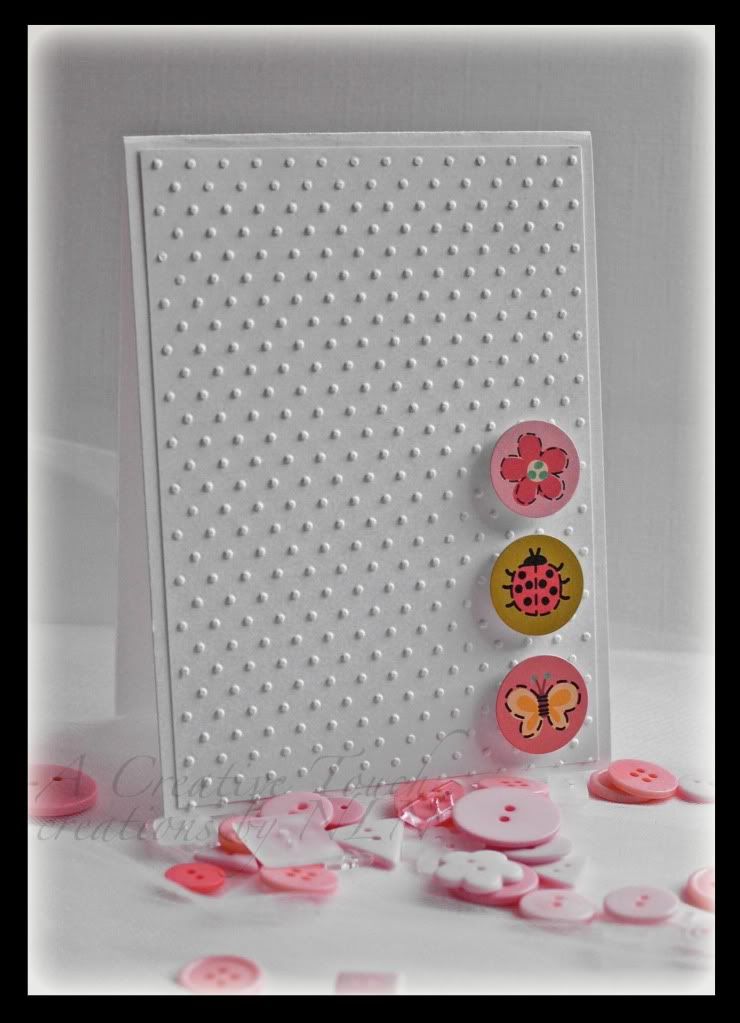
Supplies: Paper-Bazzill White Smooth Cardstock Stickers-My Little Shoebox Garden Party Sticker Collection Embossing Folder-Cuttlebug Love Language Die Cut Machine-Big Shot Pop Dots
Creating anything worth while takes a lot of hard work and practice. I know that I will keep plugging away at my Copic marker technique until I get it perfect. Have a great day everyone!!
Nora
cute cards! And you take such great pics of them! I love how you always 'pose' them.
ReplyDeleteNora these are great cards! I love putting the buttons in the pics with them, it just makes the colors pop so much more. Great work!
ReplyDelete