Showing posts with label Distress Ink. Show all posts

Thursday, May 17, 2018

CAS-ual Fridays Stamps Sneak Peek-Sands of Time 2 and Hour Glass Die

Happy Thursday!!

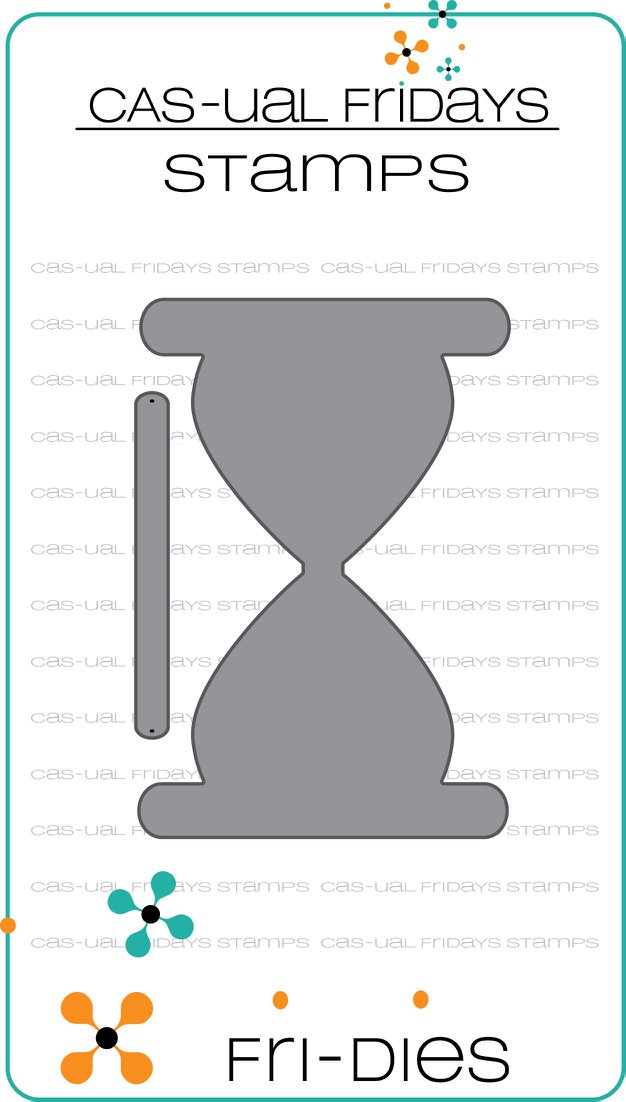
Today is the last day of Sneak Peeks from the Ink Squad for CAS-ual Fridays Stamps. Today we are sharing projects using the "Sands of Time 2" stamp set and the matching "Hourglass Fri-dies."


Here is the card I created using these products:


I started my card off by blending red Distress Oxide ink in the right bottom corner of the card and then spritzing water over the top. When it dried I misted gold over the top of the entire card front.


Next I stamped and heat embossed the sentiment from the "Sands of Time 2" stamp set in gold. I then used foam adhesive to adhere the hour glass that I had stamped and colored in using Copic markers. When I think of hourglasses, I think of the older kind that were made with wood. I tried to make the top and the bottom of the hourglass look like wood.


For my last touch, I wound some gold floss across the top and added a heart that I die cut using the "Fun-Fetti Fri-dies." I covered the heart with glossy accents, as well as some of the hearts in the hourglass.


These new products, along with the whole release is available right now in the "NEW" section of the CAS-ual Fridays Stamp Store. Use my code, NORASENTME to get an extra 15% off your total order!!!


Don't miss out on the other sneak peek projects are available on the CAS-ual Fridays Stamps Blog!

I appreciate you taking the time to stop by!! Have a FABULOUS day!!


Saturday, October 8, 2016

Birthday Inspiration with CAS-ual Fridays Stamps

Hello everybody. Happy Saturday!! Oh boy do I love the weekend!

Today it is my turn for inspiration on the CAS-ual Fridays Stamps blog. This month CAS-ual Fridays Stamps Blog is going pink for Breast Cancer Awareness Month. It is also CAS-ual Fridays birthday. In honor of this birthday, I created a birthday card.


I started off this card by using the largest die from the "Tag Buddies" Fri-dies to die cut a white tag. I then misted the tag with green and pink mist spray. I stamped borders from "Holly Jolly Borders" in black and colored them in with Copic Markers. After the borders were dry, I adhered them to the tag.


I then used foam adhesive to adhere black strips on the tag that I had stamped with CAS-ual Fridays "Shenanigans" set and embossed in white.


I set this aside decided to try to ink blend on a piece of colored card stock with two different pink Distress Inks. It was not as easy to do as on a piece of white Bristol but it was kind of fun to try.


I used foam behind the tag when I adhered it to the card. I then sprinkled silver stars that I had cut with the "Fun-Fetti" Fri-dies. My last step was to adhere sequins in pink around the stars, adding some Stickles over the top.

Well that is all from me today. Thank you so much for stopping by and remember to use my code for some shopping fun at the CAS-ual Fridays Stamps store. Have a wonderful day!!


Supplies:
Stamps-CAS-ual Fridays Stamps "Shenanigans" and "Holly Jolly Borders"
Dies-CAS-ual Fridays Stamps "Fun-Fetti" and "Tag Buddies" Fri-dies
Paper-Stampin Up! white, black and PaperTrey Ink "Hibiscus Burst," Die Cuts With A View silver
Ink-Hero Arts "Unicorn" pigment ink, Ranger "Picked Raspberry" and "Spun Sugar" Distress Ink, Memento "Tuxedo Black"
Other-Big Shot, Ranger "White" embossing powder, pink sequins, "Cotton Candy" and "Glam Pink," Heidi Swapp Color Shine, foam, Ranger Multi Matte, Doodlebug twine

Saturday, December 5, 2015

"Tons of Thoughts" by Paperie Ink

Yesterday I blogged about a card using the stamps and dies "Tons of Thoughts" by Paperie Ink. While I was creating this project, I shot a few photos to create a step-by-step post to share with you. Below is the card I created:


The first thing I did to create this card was to stamp the elephant and the pinwheel onto watercolor paper using archival ink. I then used my big shot to die cut the images out.


Next I used Distress Ink like a watercolor to paint both of the images. I set them aside to dry.


I trimmed a piece of watercolor paper into a 4 1/4" by 5 1/2" piece. I then misted it with "Summer Sky" mist by Prima. I used my heat gun to dry it and blended "Tumbled Glass" Distress Ink over the top. 

I then misted BOTH "Picket Fence" Distress Stain and "Sparkle" Shimmer Spritz over the top. I used my heat gun to dry it.


I then die cut some frames-one out of vellum and one out of a patterned paper scrap-using a PaperTray Ink die. I also did some masking and stamped the sentiment onto two yellow banners. While I was looking at the pieces, I felt there was something missing so I stamped and die cut an additional image from the "Tons of Thoughts" set. I then used the same Distress Marker technique to watercolor the ball that I used to color in the elephant and pinwheel.


I adhered the watercolor panel to a white card base. Next I adhered the two frames over each other, tipping them so that you could see the vellum frame peeking out from the polka dot frame. I adhered the beach ball over the frames and used foam adhesive for the elephant to give it a bit of dimension. I adhered the sentiment banners to the card to finish it off.


I still thought the card needed a few finishing touches. I used clear Wink of Stella on the beach ball and the pinwheel, as well as some enamel dots. I then adhered some clear sequins randomly on the card.

I adore the elephant images from this set and will be trying to use some different mediums to color them in. I also LOVE how my background came out. 

I thank you for stopping by today and hope you have a fabulous weekend!!

Supplies:


Friday, December 4, 2015

Believe in the Impossible-"Tons of Thoughts" by Paperie Ink

TGIF!! Friday is FINALLY here!! Tons of things to do this weekend. We are celebrating Charlotte's 15th birthday with the family tonight. I made my favorite chocolate cake with chocolate frosting for dessert.

Today is my day to share over at the Paperie Ink blog. I used the stamp and dies set "Tons of Thoughts" to make an inspirational card for a friend. Come on over and check it out!!


I will post a step by step tomorrow as to how I created this card!!!


Saturday, November 7, 2015

Freshly Made Sketches #211 Card for a #sharehandmadekindness card

Hello everyone!! It is a dreary Saturday today-the perfect day to stay inside!!

I was quite busy in the craft room yesterday. I made SEVEN cards-which is a total record for me. I am a SLOOOOWWW card maker and sometimes it takes me a couple hours to create one! I think the secret was that over the last few weeks while lying around I have done quite a bit of coloring. I left these bits and pieces all over my desk and now I am using them in some cards. I think I should do this more often because I am so much more productive.

Anyway, today I am sharing a card I created using Freshly Made Sketches #211. I have to admit that it is NOT my favorite card that I have made in a while BUT I had fun putting it all together. That is what counts in this craft, right?


I created this card around the flower. I had these pieces stamped on my desk and it was either throw them away or make a card. I am going to send this to a friend filled with a little surprise this week. Who doesn't like a surprise?

This card is also for Jennifer McGuire's "Share Handmade Kindness" initiative that she has on her blog. I will be doing a lot of cards/card sets in the future toward this. My goal for the next year is to send random acts of kindness to friend, whether it be a friend I know in person or from online. I know plenty of people in need in my real life right now and a card is a wonderful pick me up. I know I LOVE getting a note in the mail saying someone is thinking of me.

Anyway, here is the inspiration sketch:

The pink and purple circle I created by blending Picked Raspberry, Spun Sugar and Wild Violet Distress Ink. I am in LOVE with this new purple ink!!


I added a piece of purple Washi tape under the sentiment strip and decided that my accents would be gold.


I used this new product from Tonic called "Nuvo Crystal Drops" in Carnation Pink for the large dot in the middle of the flower. It actually resembles and feels like an enamel dot when it dries. I have a few other colors and ordered a few more so I will be playing around with it in the future.

That is all for today. I will be showing some other cards on the blog that I made at a later date. I cannot post them all at once as I hardly ever am this productive!!

Thank you for stopping by today. Enjoy the rest of the day!!