Hello my friends!! Today I am on the Kat Scrappiness Blog with a fun Valentine.

Please hop on over to see how I created my card!!
Thank you for taking the time to stop on by!!!


Hello my friends!! Today I am on the Kat Scrappiness Blog with a fun Valentine.
Please hop on over to see how I created my card!!
Thank you for taking the time to stop on by!!!
***The links in this post are Affiliate Links used at no extra cost to you!! All are indicated in bold red.
Happy New Year everyone!!
Here is to 2022 being a year where COVID becomes nothing but a common cold!!
Today I am here with some cards I created for the NEW release over at the Kat Scrappiness Shop. I had SO MUCH FUN making these cards!!!
My first card I created using the new Kat Scrappiness Smooches Coverplate Die.


The set of large lips comes with the die and I knew that I wanted to cover them with a Spectrum Clear Sparkle Marker and Glossy Accents. The sentiment is from KS Say it With Hearts stamp set.
On my second card, I used the left over lips from my card above. That makes the Smooches Coverplate a great bargain because you can make TWO cards easily with die cutting one background!!

I used the Smooches Coverplate die as a template and glued two layers of the lips together-one white and the little die cuts that were from my ink blended panel-onto a white A2, top folding card front. I covered all the lips with Spectrum Clear Sparkle Marker to give them a bit of shine.

I stamped the MWAH! sentiment with black ink using the previously released Valentine Quokka stamp set and the card was complete.
For my THIRD card, I got messy.

I started off by using the new Kat Scrappiness A2 Post Card Die to die cut a panel out of white cardstock. I then used Kitsch Flamingo Distress Oxide to ink blend my background. To give it a bit more oomph, I flicked red and white Distress stain over the pink.

While my background was drying, I die cut a small heart and some "frosting" out of white cardstock using the Kat Scrappiness Heart Donut Builder Dies. I used some brown ink and one of the Mini Ink Blending Tools to blend my heart "donut." I adhered the frosting over the top and added some XOXO Sprinkles over the top.

The sentiment is the new Love You Dies w/Shadow. I adhered this to the front, along with the lips from the Smooches Coverplate, and covered them with Spectrum Clear Sparkle Marker and Glossy Accents.

I adhered the panel over an A2, white card base and added the heart "donut" in the top right corner and my card was complete.
In celebration of the New Year AND the New Kat Scrappiness Release, Kat Scrappiness is having an Instagram Hop #ksvalentinesrelease2022. Hop on over to the Kat Scrappiness IG Account to start this fun hop!!
All the new products are in the shop now so hop on over and start SHOPPING!!!

Thank you so much for stopping by. Have a FABULOUS day!!

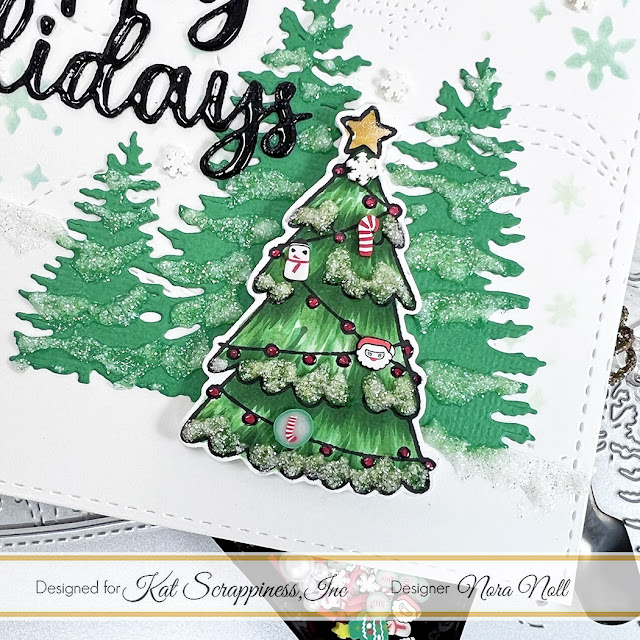
Hello everyone!! I hope you are all doing well. So exhausted here. I am TRYING to get my Christmas cards written and mailed but not sure I will get them all out in time. It is okay if they are late, isn't it? 😟
This is a quick post with a card I created using a bunch of Kat Scrappiness supplies. I am on the Kat Scrappiness Blog with a step by step for this card. I used the actual background die as a stencil!!! I had so much fun making it and so decided to post it here too.
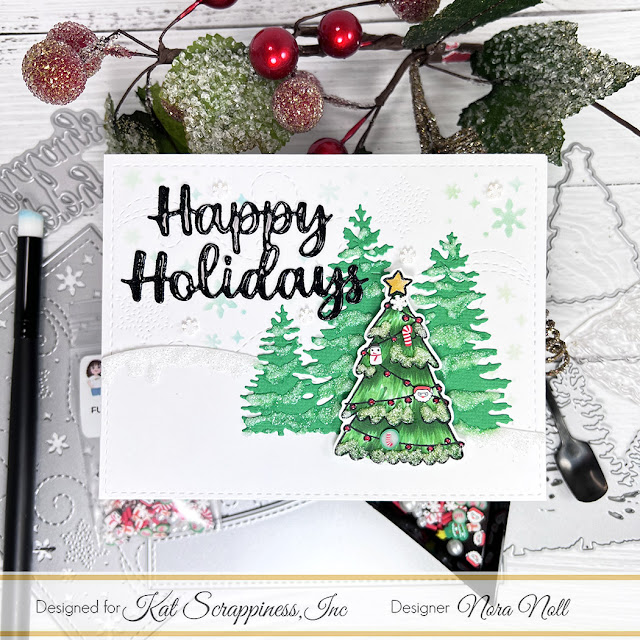
I love the little decorations on the trees. They are from the Christmas Funfetti Sprinkle Mix at Kat Scrappiness!

Hi everyone!! I hope you are all doing FABULOUS!!
This week is Thanksgiving and I cannot wait for the day. On this day, I always make old favorites and sometimes add a new dish. What is your favorite thing about this American holiday?
Today I am popping in with a card for the second week of Cupcake Inspirations Challenge #532.

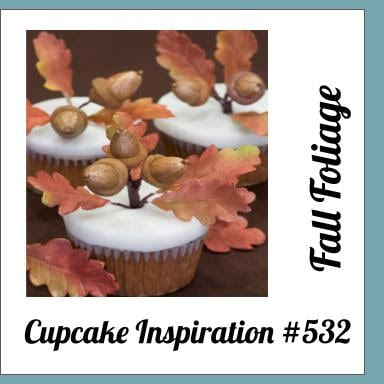 |
| Source |


I thank you for taking the time to stop by!!! Have a FABULOUS day!!

Welcome to my blog!
Kat Scrappiness is pleased to be a returning super sponsor for the Coffee Lover’s Blog Hop for the Fall/Winter 2021. As a design team member, I’m thrilled to show you a project I created using some of the Kat Scrappiness “Coffee” related products. Kat Scrappiness currently has over 100 Coffee themed products available here!

I started my card by ink blending Festive Berries and Walnut Stain Distress Ink over the background. I then flicked three colors of mist over the top.

While the background was drying, I used the Kat Scrappiness Layered Coffee Cup Die to die cut the coffee cup out of Neenah White Cardstock and Kat Scrappiness red Rainbow Confetti Slimline paper. I used Festive Berries Distress Ink to blend the coffee warmer and adhered all the pieces of the cup together.


Some Affiliate Links are used in this post. Please see my Affiliate Policy
Hello everyone!!!
Today I have some exciting news to share. I have been chosen for Kat Scrappiness Blog Design Team!!! I am so excited as there are some really cool dies and stamps at Kat Scrappiness that I cannot wait to try.
Today Kat Scrappiness is releasing some FUN new dies and Ugly Sweater Slimline Paper Pack, along with some new fabulous embellishments.

For my first card, I created my first 5" by 7" card EVER.


I then die cut three wire cover panels using the NEW Kat Scrappiness 5 by 7 Diamond Wire and Woodgrain Die. I adhered all three panels together using Bearly Art Precision Craft Glue and then adhered stacked die cuts over the shaker panel.

I used the new KS Just Have Faith Sentiment w/ Shadow Die for my sentiment. I cut out the word three times-two from white cardstock and once out of mirrored cardstock. I adhered all three layers together, with the mirror cardstock on the top. I had this mirror paper in my stash and I thought it was the PERFECT match to the sequins in my shaker!!! Next, I glued the sentiment over the matching shadow that was die cut from light blue paper and adhered that to my card front.

My last step was to use Sparkling Snow Pearl Mix over the intersections of the diamonds and my card was complete. I LOVE how this came out.
I created a cute Christmas scene for my second card.

I started off by cutting down a panel of a piece of the Ugly Sweater Slimline Papers and adhered it over a Mini Slimline, White Card base. I created a shaker using the middle die of the NEW Reversed Scallop Mini Slimline Dies w/Hello, Mini Slimline Acetate Sheets and the NEW Glistening Tinsel Sequin Mix.

I stamped, colored and die cut two Quokkas using the Dressed Up Quokkas Stamps and Dies. I then stamped, colored and die cut the little elf outfits, the tree, the candy canes and the presents using the Kat Scrappiness Quokka Christmas Costume Stamps and matching dies. In random areas of the stamped images, I used Glossy Accents and a clear sparkle pen.

I then created a little scene across the front of the shaker. I added some tree decorations by adhering some of the new Christmas Funfetti Sprinkle Mix. It was perfect for this sized tree!!!

My last step was to add some Kat Scrappiness Gold Pearls to the hats, belts and shoes of these darling Quokkas. I definatly know who I am sending this card to!
I hope you like the cards I created. To see some other FABULOUS cards by the Design Team and enter to win a PRIZE, hop on over to the Kat Scrappiness Blog!!!
I want to thank you for taking the time to stop by today. Have a FABULOUS Saturday!!
