Showing posts with label Flowers. Show all posts

Monday, April 22, 2024

Just a Reminder-Cupcake Inspirations Challenge #592

 Hey Friends!

Today I am popping in with a card to remind you that there is still time to play with this round of the Cupcake Inspirations Challenge. Challenge #592 is a THEME challenge-FLOWERS.

For my card, I chose to create a birthday card.


I combined the colors of orange and purple for this card. I love how it came out!!

Below is the Cupcake Inspirations Challenge Badge for CIC592.

Source

All my flowers and the stitched letters are from Spellbinders. The sentiment is from my stash.


To break up the plain, white card base, I chose to dry emboss some leaves on a white scrap and place it behind all my elements. I think it grounds the design.


If you would like to join us this week for this challenge, hop on over to the Cupcake Inspirations Challenge Blog for more information.

That is all from me today. I want to thank you for taking the time to stop by. Have a FABULOUS week!!

Nora

Monday, March 13, 2023

Cupcake Inspirations Challenge #564 REMINDER

Hey Friends!! 

I am just popping in with a reminder that there is still time to play with us over at the Cupcake Inspirations Challenge Blog

It is a theme challenge this time around at Cupcake Inspirations Challenge is all about BEES! Isn't this so fun?


Source

The image I used is once again from our sponsor for this challenge-Pixel Paper Prints!!!


 She generously donated the "Busy Bee's" Digital Stamp Set for us to use for the next two weeks!


I used Copic Markers to color in my flowers, the bee hive and that cute little bee. I then did some shading with Distress Inks for the background.


To complete my card, I die cut the panel and mounted it onto an A2, polka dot card. 

 I hope this card inspires you to join us this time around at Cupcake Inspirations Challenge #564. I cannot wait to see what you create!!

I want to thank you for taking the time to stop by today. Have a FABULOUS day!!

Nora

Monday, August 29, 2022

Just a Reminder for the Cupcake Inspiration Challenge #551

Hey Friends!! Just popping in with a reminder for the Cupcake Inspirations Challenge #551

Of course I have a card!! This might be a hard one to guess but it is something that I do as well as cardmaking. 

It is all about FLOWER ARRANGING!!! Have you ever done this? I have created bouquets for events and make wreaths for the seasons. Do you think you can create something this week for Cupcake Inspirations Challenge #551?


I used some stamps and dies from The Greetery. They make the most beautiful stamps. The background die is from Pinkfresh Studio.


The sentiment is from my stash. I have such a hard time embossing in white on black, no matter how hard I try. I had to fill in some of the "missing" white with a gel pen.

Does this inspire you to join us this week for the last week of Cupcake Inspirations Challenge #551? Hop on over to play!!!!

Thank you for taking the time to stop by. Have a FABULOUS day!!

Nora


Sunday, March 7, 2021

A Fun Weekend and Some Cards

Hi everyone!!! I hope you are having a nice Sunday. The sun is out here and I started my day off with a walk with my neighbor. The temperature is a little chilly but the sun just makes it so worth it. 

I am going to share a couple cards today. I apologize to you in advance that they are all sympathy cards. I know people hate making them but I find them so peaceful to create. That is weird isn't it?

I used The Stamp Market's Ready to Bloom Card Cover Die for the white flowers. I used Nuvo Crystal Drops in Crushed Grape Gloss for the flower centers.

I stamped a sentiment from Your Next Stamp onto a die cut oval (retired MFT die) and heat embossed with Rangers Silver Tinsel Embossing Powder

I used a PTI embossing plate to emboss the paper under the flowers and combined sentiments from two different sets on the inside of the card.

I am going to enter this card into The Flower Challenge's #54: Shades of Purple and Simon Says Stamps Wednesday Challenge: Beautiful Blossoms.

My second card I used the same basic supplies as my first card.

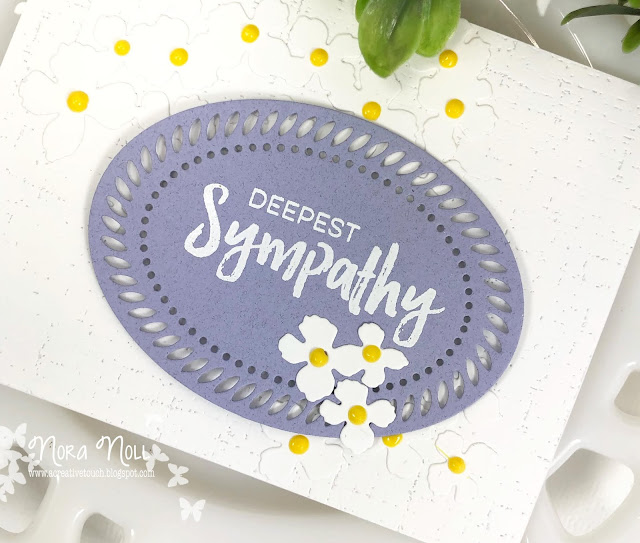
I changed up the sentiment and used My Favorite Things Deepest Sympathy Stamps and heat embossed with WOW! white embossing powder. I stamped this on a Pinkfresh Studio's Braided Oval that I die cut from purple cardstock. 

I used yellow Nuvo Crystal Drops in Dandelion Yellow for the flower centers.

Again, I used the same sentiment stamps for the inside of my card but added a die cut rick rack to hide an ink spot. I was not going to throw it away!!

I am entering this card into The Watercooler Wednesday Challenge #310, All About Occasions and The Paper Players Challenge #531: Spring is in the Air.


My next card is a card I made for someone who lost her baby recently. I was not able to go to the wake as I was not feeling well but I wanted to make sure that she knew how much I cared.

I used Spun Sugar Distress Ink to blend behind the Hero Arts Angel Wings

I used foam adhesive to layer the heart over the wings and added some Prima flowers that I have had FOREVER over the heart. I created leaves using the small flower from CAS-ual Fridays 4 Petals Die


The heat embossed sentiment strip is from Taylored Expressions.

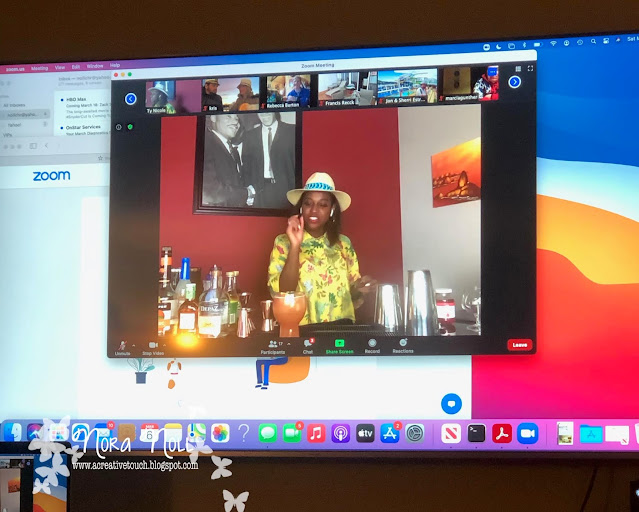
Some fun things to blog about after my sympathy cards is that I went to a "Zoom" birthday party last night. They hired a virtual mixologist and we made drinks. 


Before the party we had a shopping list for things to buy. We are not heavy drinkers so we had a lot to purchase!!! It was a lot of fun and a different idea to make everyone interact virtually.

I also received some purchases this week. I had sold some stuff on Ebay last year and bought myself a 72 ink pad storage from Organize More


I had ordered it a while ago and of course it came when Chris was home alone. I hate when that happens!! I just need to reconfigure my desk so I can put my ink pads in it. I am so excited!!!

I also received an order from Simon Says Stamp. I am a little mad at myself for this one. I am supposed to be on a spending freeze but it IS NOT GOING WELL!!!


A couple things are missing from this photo too that I forgot to put in there.

Well, that is all from me today. I thank you for taking the time to stop by. Have a FABULOUS night.


Sunday, August 2, 2020

Missing You with The Greetery and a Couple of Challenge Cards

Happy Sunday everyone!!!

Have been playing this week in my craft room. I stamped  a BUNCH of images from some sets by The Greetery and some backgrounds using Pinkfresh Studios Pop Out Stamps to create two cards for some challenges. 

For my first card, I used two challenges as inspiration for my card.


I used the sketch from Fab Friday #195 and Watercooler Wednesdays #282 Anything Goes Challenge. 


I created the striped background paper and had fun layering my flowers in The Greetery watering can.


As I was creating this card, I was thinking of "styles" of cards and trying to figure out if I had a set style. I don't think I really do. I like all types of stamps-critters, flowers, solid stamps, line stamps-and adore any kind of paper-colored cardstock, white, pattern paper. I think if I had to pick any kind of "style" that I have is that I layer things. One layer cards are too hard to make because I always mess them up!!


I actually was not sure I was going to even like this card when it was done because of the bold background. However, it has grown on me.

My second card was inspired by my first, no challenges. Instead of the watering can, I used a mason jar for my flowers. 


The frame was die cut with a Reverse Confetti die and was hanging around on my desk so I decided to layer it over the background I created.


The sentiment tag and sentiment is from Mama Elephant.  I just LOVE tiny tags!!


I used a little too much Aqua Clear Shimmer on the flowers. It was a new pen and it kind of globbed out!! You can see it in the photos more than IRL.

Well, that is all from me today. I hope you all have a great night!!


Supplies:
(Some links are affiliate links at no extra cost to you. Affiliate links in bold)

Stamps: Pink Fresh Studios Pop Out Diagonal Stripes and Chevron Background, The Greetery Budding Beauties Summer, Budding Beauties Spring, Budding Beauties Winter, Sprinkled With Kindness, Just Mason AroundThe Ink Blot Shop Sentiment Label Blocks, Mama Elephant Mini Everyday Messages
Dies: Reverse Confetti Frame, The Greetery, MFT
Ink: Hero Arts Soft Pool, Tide Pool, Ocean, Lemon Yellow, Pinkfresh Studios Island Oasis cubes and Morning Sky cubes
Other: MISTI, 3M Foam Adhesive, Nuvo Crystal Drops Gloss White, Sequins, Ranger Multi Matte

Tuesday, June 21, 2016

Just Believe-CAS-ual Fridays Stamps Inspiration

Happy Tuesday everyone!!

It is my turn for a little inspiration for the CAS-ual Friday's Stamps Blog. Since it is the summer time, I have a bit more time to play so I decided to do a little painting on my card.


I started out by cutting down a piece of watercolor paper into a 4" by 5 1/4" piece. I then used some pink paint to water color my pink stripes along the front.

I set that aside to dry and then started to work on my flowers. I stamped each flower from CAS-ual Fridays "Wallflower" stamp set in white pigment ink and used white embossing powder to heat emboss each of them. I then painted them in orange, purple and green. I had to dry these for quite a while before I die cut them with their matching dies. I had a little "uh oh" moment with one the flowers I colored in green but it was all okay!!

While the flowers were drying, I stamped and heat embossed a sentiment in white onto vellum with CAS-ual Friday's "Dream then Do" stamp set.


All my pieces were set and the next step was to put the parts together!! I die cut a circle into the striped panel and adhered the stamped vellum sentiment under it. I then put a bunch of sequins that were the same color as the flowers under it and adhered another piece of vellum over the first to make a pocket. I then used foam adhesive to adhere the striped panel onto a white A2 card base.


I then started layering the die cut flowers around the sentiment circle. The tiny flowers I popped up with foam adhesive. I fussy cut the flowers I made in green to use as leaves.

To finish the card off, I adhered some clear gems in different sizes in the middle of the flowers, as well as some random sequins.

If you would like to do some crafty shopping, hop on over to CAS-ual Friday's Stamps Store and use the code nora2016 to get an extra 15% off. Who doesn't like a coupon?


Thanks for stopping by!! Have a FABULOUS day!!


Supplies:
Stamps-CAS-ual Friday's "Wallflower" and "Dream then Do"
Dies-CAS-ual Friday's Stamps "4 Petal Set" Fri-Dies
Paper-Master's Touch Watercolor Paper, Recollections White, Bazzill Vellum
Paint-Twinkling H20's
Ink-Hero Arts Unicorn White
Other-Big Shot, Foam Adhesive, Sequins, Ranger White Embossing Powder, Heat Gun, Ranger Multi-Matte Adhesive


Thursday, July 11, 2013

My Homework for Day 3 of the Summer Card Class II

I am exhausted today from staying up late. I was too busy yesterday to do my homework so I was up last night until midnight making this card!

My assignment last night was to create a card inspired by one of four cards that they had on the classroom site yesterday. All of the cards inspired me in some way but since I only had time to make one, I chose the designer Laura Bassen's card. Her blog, Doublestick Heaven, is a must see. You can get lost in it. Her creative use of supplies and thinking outside the box is amazing!!


Laura's original card was simple in nature. The card itself was white and it contained six banners in different colors. There was a large flower element and a sentiment over the banners. Here is the card I created:


I liked the banners on the original card but since I am not one to copy a card exactly, I chose to die cut a border using an MFT border die and fill it with colored squares. My main element is a large flower, like Laura's, and I did stamp a sentiment on a banner to kind of keep the flavor of the original card.


I am happy with how this came out since I was up so late but once again, there are things that I will change when I repeat this design. (and I cut out a ton of borders so I will be repeating this!!) The original card banners were smaller and I think that I might cut my borders a bit smaller. I also am not sure I like that I started so close to the bottom. I also might put some glossy accents over the paper squares but I would have to experiment with that first.

I am off to go look at the class for today. Thank you for taking the time to look at my card.

Nora

Supplies