Showing posts with label Lawn Fawn. Show all posts

Saturday, July 2, 2016

Freshly Made Sketches #243, As You See It Challenge #138 and SJ Card Kit "Extras"

Hello everyone! Was able to get into my craft room today after a very long week.

My stepmother lost her mother this week. It was very sad all around, though a blessing as well. My stepmother is a fabulous person and I just hated to see the pain she was going through. I cannot say that she was not prepared as her mother was 93 and had been ill but I don't think that you ever are fully prepared for a death, especially your mother.

On top of that, I have been searching for a dress to wear to a wedding next week. Nothing I try on is doing it for me. Hate shopping but I have been more then I like to this week!!

So today I am showing you a card that I created for "Freshly Made Sketches Challenge #243" and "As You See It Challenge #138," which was to use the colors red and white. I have played with the "Freshly Made Sketch Challenge" before but this is a first for me to enter the "As You See It Challenge."

This is the card I created for both challenges:


I had a picture in my head of how I wanted this card to come out but could not execute it. I knew when I saw the red and white challenge that I wanted to use my My Favorite Things "Etched Flower" stamp and heat emboss it with my American Crafts Zing embossing powder in "Rouge." 

My first three tries at doing this were not so hot-even though I did all the correct steps. It was MADDENING!! I finally switched the ink I was using from Versamark to Hero Arts Pigment Ink in "Unicorn White." It made all the difference! I then die cut my panel using an Avery Elle "Wonky Stitched" die and adhered it to my card using foam adhesive.


I die cut a leaf out of vellum using PaperTrey Ink's "Turning a New Leaf" die and a butterfly out of patterned paper using Memory Box's "Pippi Butterfly." I then adhered them to my card front.


I embossed a sentiment from My Favorite Things "About Sympathy" stamp set in white on a strip of "Red Hot" card stock. I then adhered it to my card front  using foam adhesive to finish it off.

I really like how it came out but am not happy that it took me so long to do. I am not a huge fan of heat embossing so just doing that technique stressed me out! Who wants to stress when they are supposed to be having fun?

Again, I am entering this card into "Freshly Made Sketches # 243", as well as "As You See It #138."


On another note, I created three cards out of extras that I had left over from my card kits. I was supposed to blog them on Thursday but could not due to searching for that dang dress and the wake. Better late then never I guess!!

The first two are very similar. Everything came in the kits with the exception of the teal card stock. 


I wanted to jazz up the card front a bit so I used my Martha Stewart mini scorer to score some lines on this card.


My second card I did some die cutting for the oval and on the sentiment, and layered everything in a cluster.


This card is my favorite. I did some ink blending behind the deer, as well as some stenciling. I then blended the same ink on the sentiment block.


I had colored the deer with Copics and layerd that over the sentiment.


My last step was to adhere the sun, which was a die cut scrap that I already had in my stash.

That is all for today. Hope you have a fabulous night!!


Thursday, June 23, 2016

AAA Cards #67-Googley Eyes

Happy Thursday everyone. This week has flown by!! I want the summer to go a bit slower as I love having it off!!

Today I want to show you three cards that I created with BoBunny Emoji stamps. These have been sitting in my stash for months because I was not really happy with them when I got them.

These were not very expensive and made from acrylic-something I just need to stay away from. I prefer photopolymer clear stamps. Acrylic never stamps very crisply, even with my MISTI tool. I really liked the expressions on their faces, though, so tried to work around the cons of these stamps.

For each of the emojis, I stamped in black and colored in with Copic markers. I added google eyes in different sizes to make them more festive.


Each of these cards I decided to make really clean and simple. For the first card, I just die cut a square of white card stock and used foam to pop it off the card.


I then just layered the emoji over it, again using foam adhesive. The sentiment is from the Lawn Fawn set "Into the Woods."


For my second card, I decided to make a get well card. Again, same basic design but I chose a distress faced emoji and used a larger square, as well as a more prominent word bubble. 


Again, I chose a Lawn Fawn sentiment, this time using the set "On the Mend." I also altered the die cut from Lawn Fawn's "A Little Birdie Told Me" set to fit the sentiment in. 


My last card I added a piece of red patterned paper behind the emoji for a POP of color. Instead of using an all white square, I framed the heart paper with a white frame that I die cut and then used foam adhesive to give it some dimension.


It is hard to see but I added red gel pen to the heart eyes rather then google eyes and stamped a sentiment from Lawn Fawn's "Woodgrain Backdrops" in red

I am entering the first two cards in AAA Cards Game #67-Googley Eyes. Have not entered many challenges of late and thought this would be fun.


I thank you for stopping by today. Have a fabulous night!!


Friday, April 22, 2016

Vacation and some Lawn Fawn "Little Bundle" Cards

Happy Friday everyone!! It is my last day of vacation before the weekend. Charlotte and I spent it home as Chris was away on business.

I was a bit sad that we were not able to go away somewhere this year but it was a beautiful week weather wise and Char and I got to hang out together. I even spent one day in my pjs just watching television. Why? Because I COULD!! Here are a few random photos from the week.


We went shopping and Target was one of our stops. I made Charlotte pose with the Target dog!!


The weather has been nice and my tulips have opened up. I LOVE spring!!


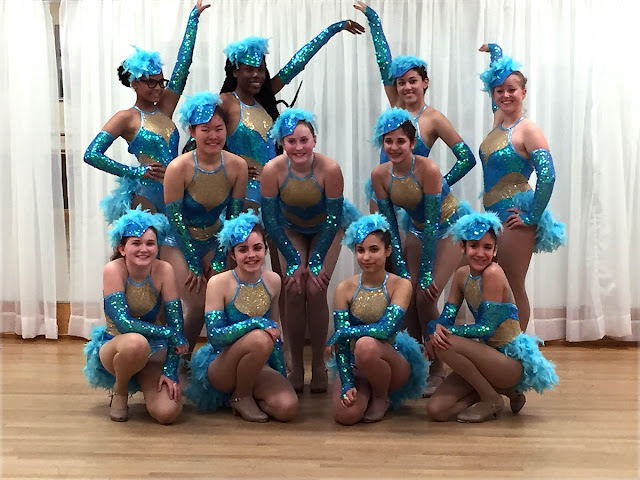
Charlotte had a costume fitting on Wednesday. The studio owner let the parents take photos of the girls all dressed up. She would kill me if she knew I revealed the costumes before the recital!!


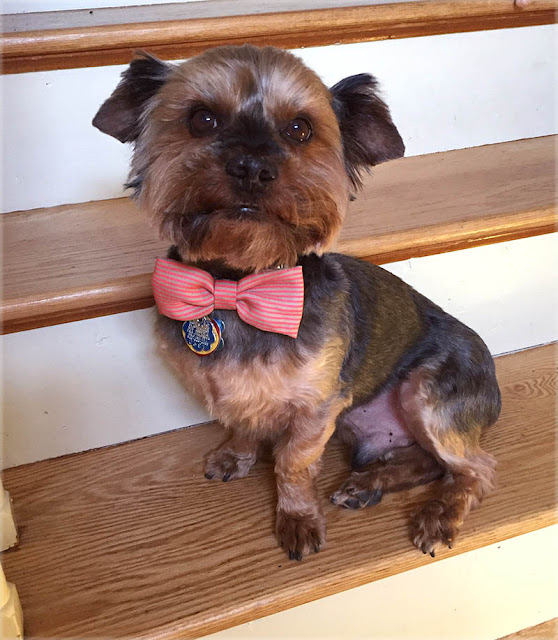
One of our impulse buys at Target was this bow tie for Zack. Doesn't he look adorable?


I never take selfies but had to send a photo to my husband of my hair. I lightened it yesterday. One thing about dying your grays-you can go any color you want!! (Within reason!!)

I have been kind of quiet here on my blog as of late not because I have not been busy in my craft room but because I have been creating up a storm for a bunch of DT assignments. Next week there will be plenty of posts!!

However, I did want to post my cards that I created with Lawn Fawn's "Little Bundle" stamp and die set. I kind of became obsessed with using it.


My first card I used the stamps and dies to make a simple boy card.


One thing about this set is that I was able to use a TON of scraps.


I think my favorite thing about this card is the overalls!! I used Nuvo Gloss White Crystal Drops for the buttons and now I am obsessed with the stuff!!

For my second boy card, I used the new My Favorite Things "Blueprints 27" and the Lawn Fawn set to create the card.


Again, I utilized pattern paper scraps with the stamps for the clothes and the blanket.


I then made some baby girl cards. I have to give both sexes equal opportunity!!


LOVE the patterned paper I used for the background!! I am so bummed that Basic Grey is closing its doors!!


I did a little fussy cutting for the bow on the jumper.


For baby girl card #2, I stamped a background in pink with the images from "Little Bundle."


The tag was created using CHRISTMAS paper!! I have been trying to utilize my holiday paper for more then just what it was made for.


I am adding a third baby girl card that was the first card I created using the "Little Bundle" set but never posted.


I adore the gray paper I used for the background but alas, have no idea what company it is from. If I did, I would buy more. It is perfection!!


Again I used Nuvo Crystal Drops in "Red Berry" to create the buttons, as well as the trim on the sleeper. 

Well, that is all for me today. Thank you for stopping by!! I hope you have a FABULOUS weekend!!


Tuesday, October 20, 2015

Lawnscaping Challenge #116 and Getting my Ghoul on with Lawn Fawn's "Happy Harvest" set

One of the things about being laid up is that I have been able to view a lot of videos. One of the videos that I thought was SO COOL was from "Just One More Card" and it was on "How to Zombie-fy Your Stamps." Julia did a video taking an ordinary, cute stamp from My Favorite Things and making it into a stamp fit for Halloween. Her shattered glass background she did BY HAND!! It looks so cool!!

Anyway, she inspired me to look at my stamps and see what I could do. I had the Lawn Fawn set "Happy Harvest" on my desk and I thought it would be fun to Zombie-fy the scarecrow and the crows!

I stamped the scarecrow and the two crows using a bit of masking. I then went on the internet for some zombie images and made some strategic marks on the images with a pencil. I then used a Copic Liner pen to outline where I placed the pencil marks. I then colored the images in with Copic markers and die cut the images out with the matching dies. I added details using a white gel pen and a red Spica marker.


Next I stamped a bunch of corn stalks all over a white piece of paper and masked off a circle using a piece of masking paper. I then blended Distress Inks in Chipped Sapphire, Wilted Violet and Smoked Hickory to create the blue background. I then sprayed some water into my hand and I flicked it onto the background to make "stars." It made the corn stalks look like they were in shadow, which I thought was so cool!!


I then created a bit of a scene with all my images under the moon. I LOVE how this came out and it was the most fun I have had making a card in ages. It took a bit of time to figure out where I wanted to place all my hand drawn pieces into the image but I think it was worth the time.

I am entering this into the Lawnscaping Challenge: Too Cute to Spook at the Lawnscaping Challenge blog.

I want to thank you for stopping by today. Have a great day!!


Sunday, September 20, 2015

Freshly Made Sketches #204, The Paper Players Challenge PP263, Zig Clean Markers and Lawn Fawn's "Happy Harvest" Set

What a beautiful day this Sunday is. The sky is so blue and the weather has just a touch of coolness to it. A perfect day to apple pick!! (I caution you-this post is a little heavy on the photos. I apologize but I just had to do it!!)

Chris, Charlotte and I took a drive to Lyman Orchards and picked Macoun apples, which are my favorite. We have numerous orchards in our town but I had heard good things about the shop Lyman has on their property and the rumors were true. We bought some pot pies for dinner tomorrow and some FRESH cider donuts. 

Here are a few photos that Charlotte and I took at the orchards. I took the first and the last, Charlotte took the middle three.


Charlotte is taking a photography class in school and her subject this week was either to photograph a toy or leaves. She is not happy about either assignment but has chosen leaves. However, the leaves have not turned here yet. I suggested this photo because of the red and green against the blue.


Charlotte was trying to get the birds in flight in this photo!!


Here is where her camera broke so she had to borrow mine for the rest of the visit. She has my old DSLR and it really needs to be replaced. She does not like my lens, though!!


So today I am going to show you two cards I created using Lawn Fawn's "Happy Harvest" set.


I received a HUGE order from Scrapbook.com this week and this stamp/die set was just one of my many purchases. Shhh-do not tell Chris!!

I did something that I have not done before when making a card. I stamped the SAME image on two pieces of card stock and used my Zig Clean Clean Color Real Brush Markers to color them in. However, I did two different techniques using these markers.

For my first card, I am playing along with the Freshly Made Sketches Blog and using Sketch #204. I am kind of obsessed with sketches as of late. I can use my own supplies but the layout often jump starts my creative juices. 

Here is the fun sketch I played with:


I am also entering my card into The Paper Players Clean and Simple Challenge-Create a Fall Scene. I think my card is perfect for this!!


 Here is my card that I created:


For this card, I stamped the the pumpkins and the wagon using a lot of masking. I then colored them in with my Zig Clean Clean Color Real Brush Markers. I have been watching different ways to use the and one way is to color with them like a Copic. This is what I decided to do on this image. 


After coloring, I masked off the stamped images and created a background with distress inks. I then stamped the corn stalks and the sentiment. Next I die cut the stamped scene and adhered it over a card base and a piece of patterned paper.


My last step was to stamp, die cut and adhere some leaves from the same stamp set. 

On my second card, the scene is pretty similar. I did not use the sketch, though, but decided to layer my scene over some patterned paper rectangles.


I did all the same things with the masking and distress ink background BUT I used my Zig Clean Clean Color Real Brush Markers with water. I would color a bit of two colors on whatever I was painting and then blend it together. I think this gives the image a bit more dimension but painting takes longer then coloring!!!


I added a banner rather then stamping the sentiment directly on the scene and added a few more stamped leaves. I am not sure if you can see it or not but I also added some clear Wink of Stella onto the wagon to make it "shiny" like metal. Okay, it really IS NOT shiny like metal but that is what I was going for.

What I learned:
  • I like coloring better then using water with these markers. HOWEVER, I think that I would use them up really fast if I colored in images with them and you cannot refill these.
  • I think using the markers with water gives the image a bit more dimension then blending the colors without water. 
  • It is VERY EASY to reactivate the colors when using water with the distress ink background!!! I did figure this but was not careful and had to "fix" some mistakes with more painting.
Okay-I am at the end!! If you made it to this point, thank you!! I appreciate you taking the time to stop by!!

Have a wonderful night!!


Supplies:

Zig colors I used:
Pumpkins-052, 070
Wagon-020, 022
Wheels and Handle-091, 094
Stems-041, 044