Tuesday, June 28, 2016

CAS(E) this Sketch #178, MFT Sketch Challenge and a Park Day

Happy Tuesday everyone!! We have been a little busy at our household. I am feeling so much better after surgery. It was not as bad as I thought it would be, thank goodness!!

Charlotte and I had a FABULOUS day together today. She had an MD appointment today so I got her up early and we went to breakfast. After the doctors, we took the dog to the park, walked around and took some photos. It was so much FUN!!! Please note that that this post is picture heavy!!


Zack gave us a hard time when we were trying to take photos of him. We bribed him with cut up carrots but he still wanted to pee on everything rather then get treats!!


Now that she is a teen, Charlotte RARELY lets me take her photo so I had to get in what I could!! If you have a teen age daughter or were one, I am sure you can relate. I know I still hate to have my photo taken.

Now for the real reason I wanted to post!! First, I am sharing a card I created for CAS(E) this Sketch #178. I have been "trying" to clean off my desk by using images that I have colored and die cut and are just sitting there. Does anyone else do this? I am so bad!! So here is the card I created:


Isn't this Mama Elephant bunny cute? I love this set!! Here is the sketch that I used as inspiration for this card:


I decided to use a technique that Dawn Woleslagle, owner of WPlus9 showcased here. Definitely click on the link because it was a FUN technique and was very addicting!!


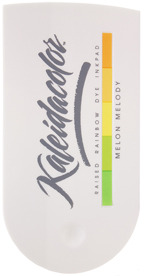
To start off the card, I blended the green from the "Melon Medley" Kaleidacolor ink pad and "Salty Ocean" Distress Ink on a white card base. I then "stamped" both ink pads separately on an acrylic block, misted water on top and flicked the watered down ink on the card base with a paint brush. I also misted water over the top of the colors too. When the panel dried, I adhered it to a top folding A2 card base.


I then adhered the stump image from Mama Elephant's "Pix's Favorite" set that I had colored in with Copic markers and die cut with the coordinating die. I adhered the rabbit from the same set over the stump with foam adhesive. I added the flower, which was a scrap on my desk and is from Sunny Studios "Backyard Bugs" set. The stamped sentiment was the last addition to the card. 

I LOVE how this came out and you will be seeing some other cards that I created using this fun technique at a future date. 

For the second card today, I used an MFT Card Sketch. I meant to post this yesterday but just was not feeling up to it so I missed the deadline. I am a day late and a dollar short on so much these days!!

Here is the card that I created using the sketch:


I started off the card by masking off a section on white card stock and blending Hero Arts "Soft Pink" dye ink and "Picked Raspberry" Distress Ink. I then misted water, Prima Color Bloom "Chrome" Spray, and "Picked Raspberry" Distress Spray over the front. When everything dried, I adhered the panel over a "Raspberry Fizz" A2 card base.


Next, I stamped the sentiment from My Favorite Thing's "Sweet Succulents" stamp set with PaperTrey Ink's "Smokey Shadow" dye ink. A pinked circle and a pierced circle in white were then adhered to the card. The pierced circle was adhered with foam adhesive to give it a bit of dimension  


Images from My Favorite Thing's "Sweet Succulents" set that I had colored in using Copic Markers and die cut using the coordinating dies were then adhered over the circles. A scrap of patterned paper from Basic Grey was adhered below the pink section. My last touches were to adhere sequins in colors that matched the card, as well as using a bit of Diamond Stickles on the cactus flower. 

Like my bunny card, this was a lot of fun to create. I used up images and scraps that were on my desk, as well as got messy!!

That is all for tonight. Please excuse the length of this post. Thank you for stopping by!!


Inspiration Post for Challenge #12 at Stamping Smiles Designs Tic-Tac-Toe Challenge Blog

Hi everyone!! I just wanted to let you know that it is my turn over at the Stamping Smiles Designs Tic-Tac-Toe Challenge Blog with a little inspiration for Challenge #12.


I had a lot of fun creating a card with a piece of cork as the inspiration for the whole card.


For all the details, please hop on over to Stamping Smiles Designs Tic-Tac-Toe Challenge Blog and let me know what you think.

Have a great day!!

Saturday, June 25, 2016

CAS-ual Fridays and Imagine Crafts Blog Hop

Happy Saturday everyone!! I hope you are all enjoying your summer. I know I am but it is slipping away TOO FAST!!!

Today I am excited to share some cards that I created using CAS-ual Fridays Stamps and Imagine Crafts supplies for our BLOG HOP!  You should have come here from Mary's Blog. Please be sure to hop and comment on each Design Team members blog post to be eligible to win two amazing prizes up for grabs.

Imagine Crafts was generous enough to send us some goodies of our choice. I chose the "Melon Medley" Kaleidacolor ink pad and the Fireworks! Spray in "Tangelo" and "Lady Bug."


On my first card, I chose to use just the Kaleidacolor "Melon Medley" ink pad with my stamps. The card may be bright but it reminds me of sunshine and the colors are perfect to cheer up a sick friend.


I used CAS-ual Fridays "Wallflower" stamp set to stamp the flowers down on the bottom of the card with the "Melon Medley" ink. I made sure that I was able to get two different colors on each of the flowers when I stamped them.


Next I used a sponge dauber to add the "Daffodil" color from the Kaleidacolor pad. I made sure that the yellow covered all of my stamped flowers. I then dabbed a bit of the "Cantaloupe" on to a piece of acetate, misted the ink with some water and then splattered orange on to the back of my card.


I did not have the right color orange paper that I wanted to use on this card so I created my own. I cut a strip of white card stock and used the "Cantaloupe" ink from the Kaleidacolor pad to blend the perfect match. I then stamped a sentiment from CAS-ual Fridays "Pretty Posies" set with Memento "Tuxedo Black" ink.


I enjoyed making the outside of my card so much that I decided to stamp a panel for the inside of the card. I used a different flower from CAS-ual Fridays "Wallflower" set to stamps flowers in "Carrot," and the flower middles with "Chartreuse." I then blended "Cantaloupe" ink all around the edges.

For my second card, I chose to use the Kaleidacolor ink pad and the "Tangelo" Fireworks! product for my card.


The first step on this card was to mist the "Tangelo" spray onto a Kraft A2 note card. I have never used this mist before and boy does it pack a punch. It was hard to photograph but it gives a nice shimmer to the kraft card base, which surprised me. I set this aside to dry while I worked on the rest of the card.


I worked on the focal point of the card while the background was drying. I stamped and embossed images from CAS-ual Fridays "Pretty Posies" set onto a small rectangle of white card stock. I then blended the inks from the "Melon Medley" Kaleidacolor over the panel. For the tiny spots in the large flower, I used Q-tips to blend the small spaces. I then mounted the panel onto a piece of black card stock to make it pop.


I created a banner from a green scrap of patterned paper and adhered it to the card front. I then added the matted flower panel using foam adhesive. I embossed a sentiment from CAS-ual Fridays "Wonderful Words" set in white on a black scrap of card stock and adhered it over the inked panel with foam adhesive. My last step was to adhere some sequins in orange and yellow on the stamped rectangle.

On my last card, I wanted the color to be toned down a bit.


First I sprayed a bit of each of the mists onto a piece of acetate, added a bit of water and used the Fireworks! sprays like a watercolor. I painted both colors randomly onto a piece of watercolor paper. I also took the paintbrush and flicked it over the panel using some "Ladybug" Fireworks! to get some splatters.


I used a heat gun to dry the background. I then stamped the "happy" sentiment from CAS-ual Fridays "Shenanigans" stamp set in "Delicata" "Golden Glitz" pigment ink and the "Carrot" color in the Kaleidacolor ink pad. I used foam adhesive to layer the completed panel onto a white A2 card base.


Next I made a nest of gold thread where I wanted to put my sentiment block. I used glue dots to adhere it to the card front. I then stamped the "birthday" sentiment from the CAS-ual Fridays "Shenanigans" stamp set onto a red card stock strip using the "Delicata" pigment ink and heat embossed with gold embossing powder.


I used foam adhesive to give the large sentiment a bit of POP from the card. My last step was to adhere a few gold sequins onto the card front.

I had such fun using all of the Imagine Crafts products with the CAS-ual Fridays stamp sets. I love that the Kaleidacolor pad has so many options on ways to use it. I also loved the Fireworks" sprays. I will definitely getting a few more colors to play with in the future!!

If you like any of the CAS-ual Fridays Stamp sets, please head on over to the CAS-ual Fridays Stamps Store and use my code nora2016 to get 15% off your purchase!!


New up is Katherina's Blog. If you get lost along the way, hop on over to CAS-ual Fridays Stamps Blog or the Imagine Crafts Blog for a complete set of links for the hop.

I thank you for stopping by and making it through this long post. I hope you have a FABULOUS Saturday!!


Supplies:
Imagine Crafts-"Melon Medley" Kaleidacolor ink pad, "Tangelo" and "Ladybug" Fireworks Spray, Memento "Tuxedo Black," Delicata "Golden Glitz" pigment ink, Versamark ink
CAS-ual Fridays Stamps-"Wallflower," "Pretty Posies," "Wonderful Words," and "Shenanigans" stamp sets
Other-Kraft, White, Black, orange and Red card stock-Bazzill, Thread-DMC, Ranger Multi Matte Adhesive, 3M Foam adhesive, Sequins, Sponge Daubers, Q-tips, Ranger gold and white embossing powder, heat gun


Thursday, June 23, 2016

AAA Cards #67-Googley Eyes

Happy Thursday everyone. This week has flown by!! I want the summer to go a bit slower as I love having it off!!

Today I want to show you three cards that I created with BoBunny Emoji stamps. These have been sitting in my stash for months because I was not really happy with them when I got them.

These were not very expensive and made from acrylic-something I just need to stay away from. I prefer photopolymer clear stamps. Acrylic never stamps very crisply, even with my MISTI tool. I really liked the expressions on their faces, though, so tried to work around the cons of these stamps.

For each of the emojis, I stamped in black and colored in with Copic markers. I added google eyes in different sizes to make them more festive.


Each of these cards I decided to make really clean and simple. For the first card, I just die cut a square of white card stock and used foam to pop it off the card.


I then just layered the emoji over it, again using foam adhesive. The sentiment is from the Lawn Fawn set "Into the Woods."


For my second card, I decided to make a get well card. Again, same basic design but I chose a distress faced emoji and used a larger square, as well as a more prominent word bubble. 


Again, I chose a Lawn Fawn sentiment, this time using the set "On the Mend." I also altered the die cut from Lawn Fawn's "A Little Birdie Told Me" set to fit the sentiment in. 


My last card I added a piece of red patterned paper behind the emoji for a POP of color. Instead of using an all white square, I framed the heart paper with a white frame that I die cut and then used foam adhesive to give it some dimension.


It is hard to see but I added red gel pen to the heart eyes rather then google eyes and stamped a sentiment from Lawn Fawn's "Woodgrain Backdrops" in red

I am entering the first two cards in AAA Cards Game #67-Googley Eyes. Have not entered many challenges of late and thought this would be fun.


I thank you for stopping by today. Have a fabulous night!!


Tuesday, June 21, 2016

Just Believe-CAS-ual Fridays Stamps Inspiration

Happy Tuesday everyone!!

It is my turn for a little inspiration for the CAS-ual Friday's Stamps Blog. Since it is the summer time, I have a bit more time to play so I decided to do a little painting on my card.


I started out by cutting down a piece of watercolor paper into a 4" by 5 1/4" piece. I then used some pink paint to water color my pink stripes along the front.

I set that aside to dry and then started to work on my flowers. I stamped each flower from CAS-ual Fridays "Wallflower" stamp set in white pigment ink and used white embossing powder to heat emboss each of them. I then painted them in orange, purple and green. I had to dry these for quite a while before I die cut them with their matching dies. I had a little "uh oh" moment with one the flowers I colored in green but it was all okay!!

While the flowers were drying, I stamped and heat embossed a sentiment in white onto vellum with CAS-ual Friday's "Dream then Do" stamp set.


All my pieces were set and the next step was to put the parts together!! I die cut a circle into the striped panel and adhered the stamped vellum sentiment under it. I then put a bunch of sequins that were the same color as the flowers under it and adhered another piece of vellum over the first to make a pocket. I then used foam adhesive to adhere the striped panel onto a white A2 card base.


I then started layering the die cut flowers around the sentiment circle. The tiny flowers I popped up with foam adhesive. I fussy cut the flowers I made in green to use as leaves.

To finish the card off, I adhered some clear gems in different sizes in the middle of the flowers, as well as some random sequins.

If you would like to do some crafty shopping, hop on over to CAS-ual Friday's Stamps Store and use the code nora2016 to get an extra 15% off. Who doesn't like a coupon?


Thanks for stopping by!! Have a FABULOUS day!!


Supplies:
Stamps-CAS-ual Friday's "Wallflower" and "Dream then Do"
Dies-CAS-ual Friday's Stamps "4 Petal Set" Fri-Dies
Paper-Master's Touch Watercolor Paper, Recollections White, Bazzill Vellum
Paint-Twinkling H20's
Ink-Hero Arts Unicorn White
Other-Big Shot, Foam Adhesive, Sequins, Ranger White Embossing Powder, Heat Gun, Ranger Multi-Matte Adhesive


Sunday, June 19, 2016

Freshly Made Sketches #241, Seize the Birthday Challenge and a Bit About Me

Happy Sunday everyone!! It is Father's Day in the states but since my husband is a Type A personality, he has been busy doing chores all day!!

I have been off for a whole week now and my vacation is not going as I had planned. I wanted to do a ton of little projects in my house, as well as have more fun doing blog challenges but it just has not worked out that way. Isn't that how it always is?

We did go away last weekend, so that did not help but had a fabulous and a much needed get away to see family in upstate NY. We laughed the whole time and it was so much fun!

Tomorrow I go in to fix a complication that was a result of major surgery that I had in October. It is not supposed to be as long a recovery but I am nervous none the less. For those of you that say prayers, please put me on your list that everything goes well!!

I did get in the craft room a tiny bit this week and played along with Freshly Made Sketches Blog with Sketch #241 and Seize the Birthday Blog-Theme: Anything Goes. It felt so good to get my hands dirty again!!

I actually created two cards for this challenge. Here is my first card:


This card started because I wanted to use my new Lawn Fawn "Let Me Smile" die. I paired it with some Echo Park "Party Time" papers and stickers, as well as CAS-ual Fridays Stamps "Shenanigans" stamp stamp set for the sentiment.


 I added some paper behind the smile on the little face, as well as Nuvo Crystal Drops in black for the eyes. To make the hat sticker more festive, I added Stickles in Peacock Blue.

I even created a festive inside panel:


My next card was one of the EASIEST cards I have created in a very long time.


I mainly used Echo Park Party Time "Elements Stickers, " as well as the matching 6" by 6" paper pad.


I added some Stickles in different colors to give the top of the cup cake a little bit of sparkle.


I need to make more cards like this for my stash!!

Again, I am entering this card into the following two challenges:


Thank you for stopping by!! Have a great night!!


Supplies (please click on link below):
Birthday Card 1
Birthday Card 2