Friday we picked up Chris' new truck, yesterday I went to a Robotics competition for Charlotte and today I have a wedding shower. I did fit in a bit of crafting time, though, as I had to get two cards done for some gifts!!
My cards for this post were made with a kit that I received from Jenny for the SJ Card Kit Club.
I am going to admit that I augmented this kit a lot with what I created. Since I needed what I made for my specific purpose, I totally cheated. That and my mojo has run away so I needed help!!
My first card I used Freshly Made Sketches #230 for my inspiration.
Here is my card:
I die cut the piece of green paper using MFT's Blueprints #13 and adhered it over a white card base. I then used PaperTrey Ink's Basic Bookmark #3 Die to cut out the white tag placed it in the middle of the green background.
I then die cut the umbrella from the flowered paper that was in Jenny's kit using the Paper Smooches Wedding Shower Dies. I layered it over the white, using foam for some dimension. I used my umbrellas as the white piece from the sketch.
I then layered the little chick from the kit one the umbrella and added "baby" which I die cut out of blue card stock with PaperTrey Ink's Modern Alphabet Dies.
I then created the inside of the card using Lawn Fawn's "Little Bundle" stamps and dies.
I adhered this panel into the card after photographing. I always have such a difficult time photographing the inside of the card after I complete it!
For my second card, I used an older Retro Sketches sketch as my inspiration.
Here is my card:
I started by die cutting a white panel for the background and shading it with distress ink. I then adhered torn pieces of patterned paper that came with the kit. I masked and stamped an envelope at the bottom, as well as the sentiment. I then used foam adhesive to adhere the "happy mail" envelope that came with the kit and I colored with Copic markers. The last step was to adhere sequins.
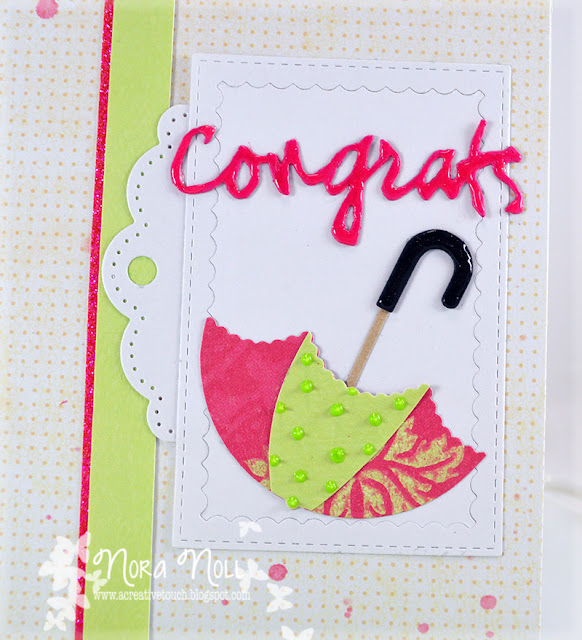
My last card I created yesterday for the shower I have today. I used Sketch Saturday #406 as my inspiration.
I tweaked it a bit to make it my own, leaving the flower elements off and using the top of the bookmark die instead and only have one strip down the left side.
The background paper, which came from Jenny's kit, I misted with white, blush and primrose Colorshine. I then adhered it to a white background. I added a piece of pink glitter tape and a strip of green that I had left over from the background of the baby card on the left side of the background.
I die cut the white rectangle using an MFT die and adhered it over the front of the card, tucking the left over top of the bookmark die under it. I then die cut the sentiment and used glossy accents to give it a bit of dimension.
I die cut the umbrella from paper included in Jenny's kit using the Wedding Shower die from Paper Smooches. I adhered it to the card and used some Nuvo Apple Green crystal drops to give the middle of the umbrellas some polka dots. I covered the end of the umbrella in Wink of Stella and Glossy Accents.
Well, that is all from me for today!! I hope you enjoyed these cards. Please hop on over to the SJ Card Kit Club Blog to see more from the ladies. Many are card newbies and would love you to stop by!!
Supplies:
Baby Card-


