Showing posts with label Butterflies. Show all posts

Sunday, August 22, 2021

My Turn on the CAS-ual Fridays Blog

Happy Sunday everyone!! Tomorrow is the first day I go back after summer break. I so don't want to!! I will be honest, I am a bit nervous due to the Delta variant going around. We will be starting off again with masks in school but not the social distancing in the classrooms. I am keeping my fingers crossed that it goes as well as it did in the spring.

Today I am over on the CAS-ual Fridays Blog with a card I created by looking at my supplies in a different way.

Can you guess what product in the CAS-Friday Shop that I created these butterflies from??? Hop on over to my BLOG POST to find out!!!

I want to thank you for taking the time to stop by today. Have a FABULOUS day!!


Sunday, September 8, 2019

A Card for AAA Card Challenge and a Few Photos

Hey Peeps!! This is my second post for today. I have had a great weekend and am awful chatty today so I apologize ahead of time. I should probably have picked up a phone to one of my friends to talk but instead I just rambled on to all of you!!

I had a bit of mojo today so I decided to run with it. I used the sketch from this weeks AAA Card Challenge #148 as my jumping off point and the photo from the Paper Craft Crew Challenge #349 for my card.


Here is the sketch from the AAA Card Challenge that I used and the Butterflies and Blooms Challenge #349 from the Paper Craft Crew.


Since I had my design inspiration set, I picked what type of occasion to make by thinking about what I needed at the moment. I had two thank you cards that needed to be made so this was the theme of the card.

I am going to admit something here. I usually send out store bought thank you's I buy at TJ Maxx. Yup, I am lazy like that!! I always need one and they are not my favorite cards to make so buying them is just easier.

Anyways....I used the My Favorite Things "Beautiful Butterflies" stamp set with "Golden Sunset" and "Pocketful of Sunshine" ink cubes from Altenew for my butterflies.


I then masked off a border with Post It tape and blended the lightest color orange ink above and below the butterflies.


I added a skinny piece of orange pattern paper above and below the blending, as well as a popped up sentiment strip to complete the card. Oh, and the sentiment strip? A mistake as well. I had originally stamped it right on the card but even with a MISTI, it was crooked!! I had to cover up this mistake with that darn strip.

In other news, I was busy cleaning this weekend. My dog was mad at me for leaving him yesterday when I went to the gym and peed on the floor. I took the opportunity to wash my kitchen and downstairs bathroom floor on my hands and knees. It was a feat!!


My kitchen is long and has a lot of tile. I scrubbed it with a scrub brush, mopped it, THEN rinsed it and dried it with an old towel. It took me about two and one half hours when all was said and done.

Before you think I am crazy, I don't do this often. When I was younger and at home, I would wash the floor like this once a month. Now it gets done when I am in the mood. I do wash it (or more like Chris does!) but with a Swiffer Wet Jet after we have vacuumed the dirt up sometimes twice a week. It does not get as clean as when you do this, though.

In other news, Charlotte FINALLY decorated her walls on her side of the dorm room. It was looking like a prison when she FaceTimed me, so I am glad that she put in a bit of effort!!


Notice the Micky Mouse Ears to the left on the command hooks. Thought she was going to use those in her bathroom but she put them to an alternate use!!

Last night I couldn't sleep so stayed up binging on Netflix and die cutting until 3:00 a.m.


Am I the only crazy person that does this? I sometimes die cut different dies in white all at once so when I am making a card, I just pull them out, color them up (or leave them white) and voila, instant gratification. Some I put on Press'n Seal wrap to keep pieces together.

I wish I could say I slept late today but woke up coughing from allergies at 6:00 in the morning. I did go back to sleep for a bit but was up by 8:30 because went for a walk with a friend at 9. Glad this happened on a weekend and not a workday!!

Anyway, that is enough from me today. I thank you for taking the time to stop by and read this long post or just skim, as the case may be. Have a FABULOUS night!!


Wednesday, June 1, 2016

Stamping Smiles Design Tic-Tac-Toe Challenge #11

It is finally JUNE!!! I am so happy!! I have nine more days of work and then I will be on vacation for the summer and am SO EXCITED!!

Know what else I am excited for? To show you the card that I created for Stamping Smiles Designs Tic-Tac-Toe Challenge #11.


I chose to use the last row across for my card-inlaid design, mono-chromatic and scalloped border.


I started off my card by going through my scraps and die cutting butterflies using PaperTrey Ink's "Bitty Butterflies" Cover Plate out of various pink scraps to use for my "monochromatic" color scheme. I then stamped a sentiment using the matching "Bitty Butterflies" stamps in persimmon ink on a "Sweet Blush" card stock panel.


I layered the panel over a white card base and then did a combination of "inlaying" the die cut butterflies into the panel and popping them out of the card front using foam adhesive.


To emphasize the greeting, I used a Lawn Fawn die to cut a "scalloped" border to adhere below the sentiment.


My last step was to adhere a few pink sequins over a few of the butterflies.

I plan on giving this to my cousin for her wedding shower in June. It goes perfectly with her invitations!!

I thank you for stopping by today. Be sure to hop over to Stamping Smiles Designs Tic-Tac-Toe Challenge Blog to see what the other members of the design team created!!

Have a fabulous day!!


Supplies:


Wednesday, March 26, 2014

Simple Class Homework-Day 9-Textural Effects

Happy Hump Day!!

Blog, create cards, blog, create cards-that is the dilemma for me these days. Also, having a concussion and still feeling the effects of it has kept me off of the computer for the most part. I did want to share some of the cards I made using techniques from the Clean and Simple 3 Class I just completed. What a fun class!! I would definitely recommend taking one of these classes if you ever get the chance.

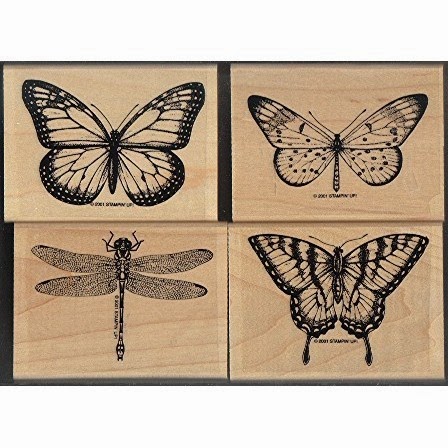
For the first card, I used Debbie Hughe's embossing technique to create my card. Her beautiful butterfly card inspired me to make a card using a butterfly stamp. This stamp is from Stampin Up!'s "Wonderful Wings" set-one of the oldest stamp sets I own. I rarely use wooden stamps anymore but this stamp set is still one of my favorites!


Here is the card I created:


Unlike Debbie, I chose to emboss in black rather then in white for this card. I think that the black suited this butterfly rather then the white. I then colored in the butterflies with Copic markers.


I generally like the way they came out BUT they did pick up some of the black embossing powder and sent it through the coloring to mottle it a little. It made the butterflies a bit dark. I then used a Wink of Stella pen to go over all the butterflies to make them shine. It is a little hard to see in the photos I took, though.

I then sprinkled green and orange mist on the card. Debbie showed how she does "controlled" sprinkles but I threw that out the window and just went for it. I am in that mode these days of just going full out.

The embossing paste technique was the last step. I used a stencil I cut out of white card stock using my Silhouette digital cutter. After the embossing paste dried, I covered it all with a little Wink of Stella.


The second card I created I decided to leave the embossing paste off but started off trying the "controlled" misting. Once you see the card, you will see I did NOT control my spraying in any shape or form!!!


I decided to used white embossing powder for this card and pulled out some Radiant Pearls paint-something I have had in my stash FOR YEARS to paint the butterflies.


Can I tell you how disappointed I am that they don't make these anymore? They are so fun to work with and I only have about 7 colors. It is hard to tell from the photo but the butterflies are shiny from the paint-no glitter pen needed. 


I have to admit, that I liked this card better then the first…until I screwed it up with the darn greeting. I messed up the stamping-one reason I rarely make one layer cards. I tried to "fix it" by stamping over it in black and then using my glitter pen over the black. I wish I had just used a gray or black ink for the greeting in the first place instead of getting fancy with a color. 


I also went around the outside with Hero Art's gold ink. I thought that it was a nice touch. I added sequins too because I thought it needed a "bit" more. Sometimes knowing where to stop is so difficult!!

Things I learned from this class:
1. Masking takes a bit of time. For this card, I had to make four separate masks using masking paper. Each of the butterflies needed a mask, as well as the sentiment.

2. Also, I need to get a palate knife for the embossing paste. I used a plastic knife for it on the first card and you can see the ridges from where I went over the paste with that knife. I also was kind of sloppy but since I have only ever used this technique once before, I know that I just need to practice.

3. Black embossing powder is not color fast. I think this is the greatest lesson!!

4. When you make a mistake on a one layer card, you have to figure out how to "fudge it" to make it better or throw it away. Sometimes you don't want to throw all that work away so you make do.

Well, that is all. I thank you for looking at my cards. I have had a blast at looking at all yours. Have a great day!!

Nora


Tuesday, March 25, 2014

Simon Says Stamp Wednesday Challenge-Glitter It!

I hate to post two in one day but I needed to do this to enter the Simon Says Stamp glitter challenge for tomorrow.


I created this card using the Stampin Up! "Stipple Butterfly" stamp. This was a case from a Debby Hughes card from the Clean and Simple 3 Class that ended last week. (My last butterfly card was inspired by the same card, as were the two that I will be posting for my homework tomorrow.) This is one of the OLDEST stamps I own. I never use wood stamps anymore but I never got rid of this because I LOVE butterflies. Every card I made this weekend I was thinking of my late mother. Her birthday was yesterday and I think I just had it on my mind. 


I had fun pulling out old supplies, using my "new" embossing paste, and spritzing mist spray every which way. 


I colored the butterfly in with Copic markers. I used a photo off the internet as a "model" for the coloring. Blue butterflies are my favorite!!


I then stamped a thank you from Simon Says Stamp "Thanks" set from September. I LOVE this stamp set!!


I masked the butterfly and sentiment off using the paper mask but as you can see, it wasn't 100% successful. I used a Wink of Stella glitter pen on some of the embossing paste, as well as the butterfly. It is so hard to see in the photo, though.


That is all for now. Thanks for stopping by.

Nora
Supplies:
Stampin Up! Stipple Butterfly