Showing posts with label Christmas. Show all posts

Monday, December 1, 2014

My Favorite Things "Jingle All The Way" Santa and the Tag Your It Challenge #11

Happy Monday!! Today I am sharing a quick tag I created using a Santa from My Favorite Things that I created for the Tag It Your It Challenge #11.

I sat down one day a while ago to stamp, die cut and color one of all the images in the "Jingle all the Way" stamp set from MFT. I tend to do this so that I then when I want to make a tag or a card, I have a bunch all ready made to pull from. It makes things so much easier.

Here is the tag I created for the challenge:


Here is the inspiration piece:


The tag die I used is the same that is on the card above. I chose to make one with a Christmas theme. I stamped, die cut and colored in the Santa with Copic markers. (I went out of the lines in part of it-hard to shade in such a tiny space!) I then used a Wink of Stella clear glitter pen over the pom pom and the edge of his white hat. (This is after getting the glitter all OVER my hands. Don't even ask how that happened!!)


I then die cut two tags out of patterned Christmas paper from Elle's Studio. I used a sentiment stamp from Simon Says Stamp's "Holiday Labels" for the sentiment on the front tag. I then used foam adhesive to adhere the Santa.

Next I use green ribbon and some green twine for the top of the tag. The last step was to glue some sequins on the tag to give it a little extra sparkle. 

I thank you for stopping by today. Have a Happy Monday!


Supplies:
My Favorite Things-"Jingle All the Way" stamps and dies
Elle's Studio-Good Cheer Collection-"Merry Christmas" and "O Christmas Tree"
Ribbon-Michael's


Friday, October 24, 2014

Lawn Fawn "Monster Mash" Fun

Hello everyone!! Long time, no post. I have not been in the crafting mood as of late. Not sure why since I have new goodies to play with. However, my mojo has been on the fritz. Don't you hate when that happens?

I did create two projects with the Lawn Fawn "Monster Mash" sets stamp and die set. One project I totally LOVE, the other-not so much. However, I had fun making both so that is what counts.

My first project is a scrapbook layout that I created. This is my daughter five years ago on Halloween. I cannot believe how fast time has flown. She is thirteen this year and insists that she is not going out trick or treating so she isn't getting a costume.


I had a TON of fun creating this page. I started by misting the background with different mist sprays and layered a bunch of different patterned papers before placing the photo on top. I then embellished with stickers and the "Monster Mash" stamps that I colored in using Copic markers.

(Supply List)

My second project using the Lawn Fawn set was a Christmas tag. I REALLY want to use these on Christmas projects for some reason. I had this brilliant idea to color some of the monsters in green and then layer them over each other like a Christmas tree.


Aren't they cute? I LOVE how the coloring came out on each of these. I added some Stickles to jazz them up too. However, below is how the shaker tag actually came out.


Extremely disappointing! You can only see the big one eyed monster peeking out through the sequins. Oh well. Experiments are not always going to come out but at least I tried!

(Supply List)

Well, that is all for tonight. I thank you so much for stopping by to visit me. Have a great night!!


Wednesday, December 4, 2013

Day 4 of Christmas Fun…Yet Another Tag

Happy Hump Day!! I hope you are all having a great Wednesday morning. The work week is halfway over!!!

Are you sick of my Christmas tags yet? I hope not!! Here is another one I created.


I have to admit something on this tag. I had stamped and colored this little bear a couple years ago. I then never used it. I found it while cleaning up this weekend so I decided to use it. I cut it out and placed it on a stamped tag. This tag took no time at all because I already had the image. Note to self…stamp and color images ahead of time to use at a later date!!!

Here is a closer look:


Thank you for stopping buy. I hope you have a wonderful day!!

Nora
Supplies:
Stamp-Imaginisce


Tuesday, December 3, 2013

Day 3 of Twelve Days of Christmas Fun

Hello everyone!! I hope you all are having a terrific Tuesday.

Today I am showcasing a paper birdhouse ornament I created. I originally was going to make this for last month's Paper Trey Ink's November blog hop but didn't because I really didn't use that many PTI products on this. However, I don't care because I LOVE how this ornament came out.


To begin with, I cut Kraft card stock into two  4" by 8 1/2" pieces and then adhered the pieces together.  This probably wasn't necessary but I wanted to make sure that this ornament was as stable as I could make it. I then adhered a house template I had cut out on top of the Kraft paper using temporary adhesive. (Please see this post on Nichole Heady's blog for the template I used.)

Next, I cut the house out of the Kraft paper and, using a bone folder, I creased the areas where the dotted line was on the template.


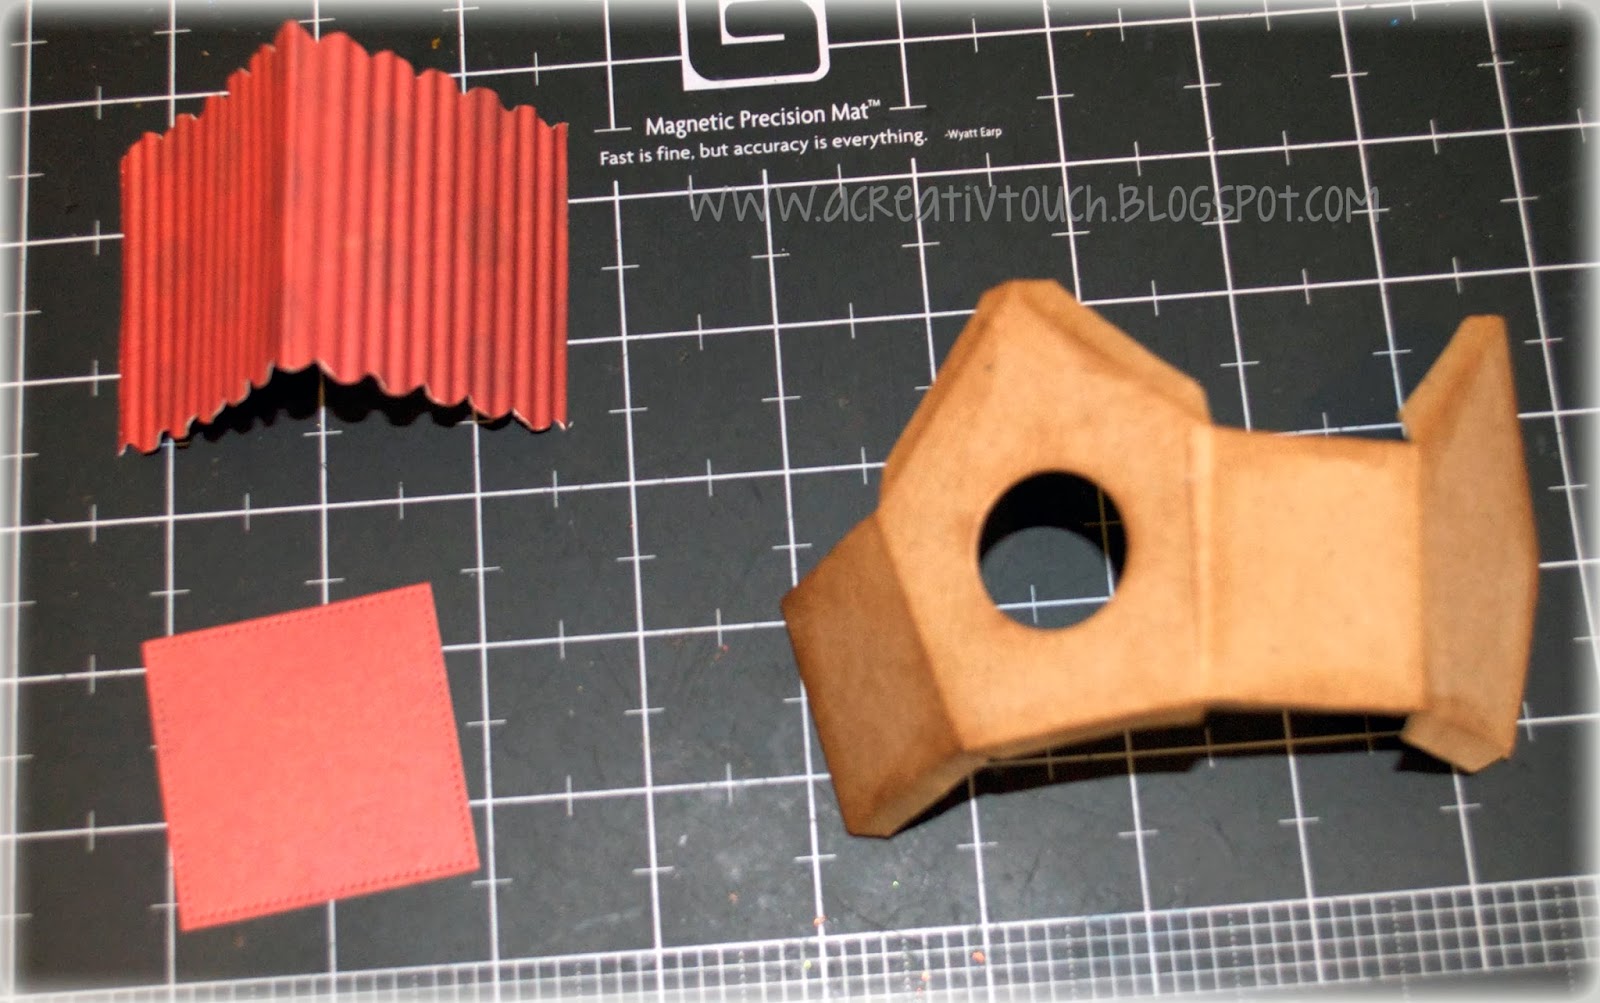
I then took the template off the paper and inked the house using Vintage Photo ink.

My next step was to fold the house in the creased areas and glue it together. I then used a piece of wire that I had threaded through a bell and adhered the wire on the inside of the house. (I apologize for the photo. It was dark outside and the lighting isn't very good in my room. Also, this is not the house I made for the post but another one I put together.)


To create the roof, I cut out a 4" by 2" piece of patterned paper, punched the sides using a scalloped punch and then ran it through a paper crimper. I punched two holes in the top and laced a piece of jute through, knotting it on the bottom so that I wouldn't be able to see it.


I then adhered the roof on to the house. I cut another piece of patterned paper into a 2" by 2" square and adhered that to the bottom. Now that the house was together, the fun part was to start!!

I then die cut a piece of holly from green paper and adhered that over the bell, covering up a piece of the wire that was peeking out. I then used red Stickles glitter glue to create the berries. I set it aside for a little while to dry before I used embossing paste around the whole house to recreate "snow." Before the embossing paste was dry, I sprinkled fine glitter to give the ornament some holiday sparkle. The last step was to tie a green bow on top of the house.


I had so much fun creating this ornament that I cut out a few more to make and give away as gifts.
I wish I could find the little red birds I used to have to add to this house but I can't find them anywhere!! If you saw my craft room, this wouldn't surprise you, though.

Thank you for letting me share this project with you. Stop by tomorrow for a fun card!

Nora

Supplies:
Bell-Michael's
Ribbon-seam binding died with mist spray