Showing posts with label My Little Shoebox. Show all posts

Saturday, July 23, 2011

Another Long Hot Day!!!

I cannot wait for this weather to break. As my husband will tell you, I am AWFUL in the heat. I get ugly and complain a lot. Don't hate me but I really prefer the cold. I very rarely complain about winter, unless we have TOO MUCH snow. It sure beats being hot in my book!

Today I am  uploading some layouts that I have created over the last few months. There is not particular rhyme or reason to them. I just create what photos strike me at the moment.

The first page is a rare 8 1/2" by 11" creation for my "Book of Me." My mother LOVED butterflies so every time I see one, I think of her. Charlotte and I scout butterflies out and she says "Grandma Mary Ann is watching out for us today" when we do see one. This photo was taken at Wickham Park in Manchester last year.


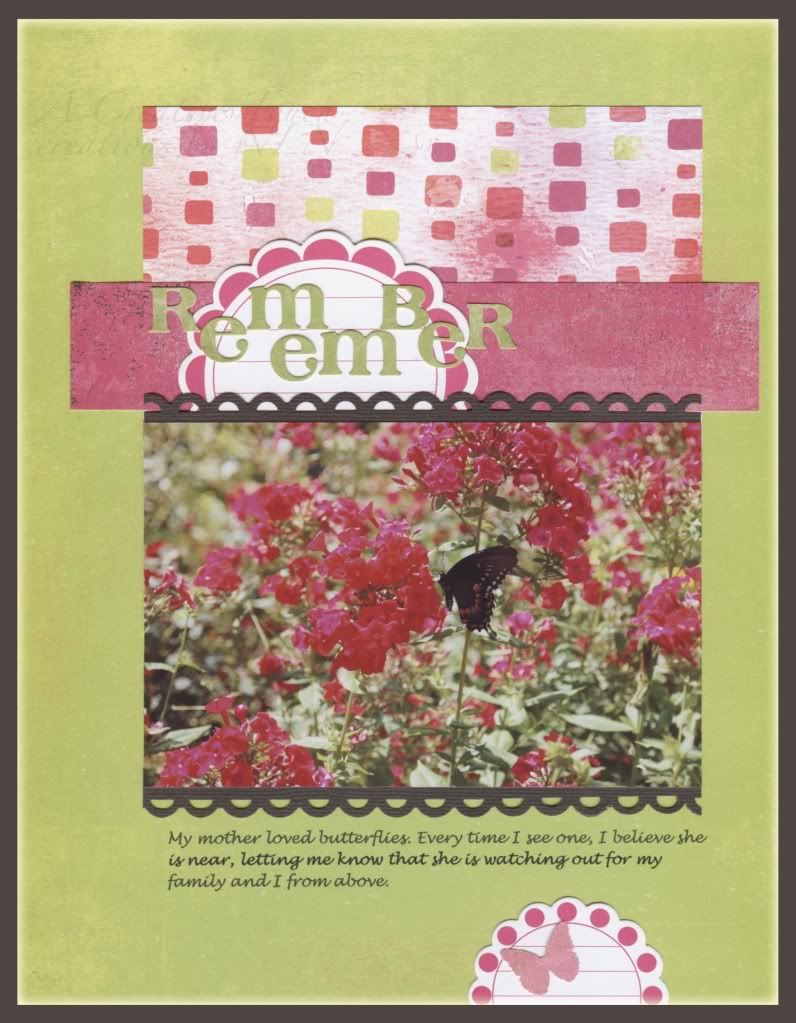
Supplies: Paper-Basic Grey Lauderdale-Rose Colored Glasses and Clam Bake, and Basic Grey Gypsy Collection (background Green), Bazzill Brown Cardstock Punches-Matha Stewart 3-in-1 Classic Butterfly and Fiskars Apron Lace Border, Stickers-Basic Grey LilyKate Alphabet Stickers, Font-Lucida Handwriting, Other-Jillibean Soup Journal Spots 


The next page I created is all about Charlotte's "rivalry" with our dog Zack. They literally fight over me. It can be funny but it usually winds up with the dog being yelled at and Charlotte running to her room crying. I guess I should have had another child and then maybe this wouldn't happen!!


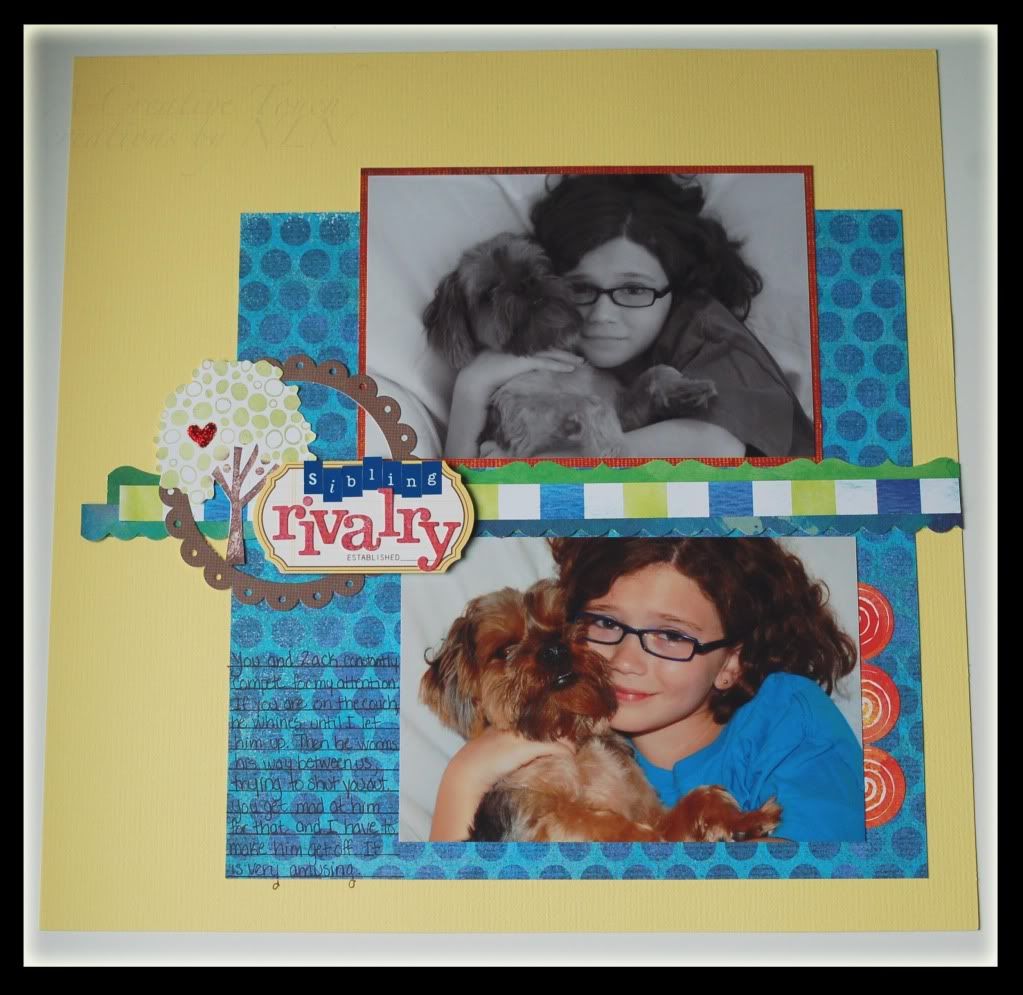
Supplies: Paper-Bazzil Frosted Yellow Cardstock, Basic Grey Lauderdale Collection-Wavelength, SPF, Bikini Time, Coastline and Clear Water, Punches-Fiskars Scallop Sentiment Border,  Paper Shaper Medium Circle Punch, and EK Success Bracket Edger Punch, Stickers- Basic Grey Lauderdale Alphabet and My Little Shoebox Mini Alphabet-Indigo, Die Cuts-Jillibean Soup Dutch Mustard Soup Die Cut Pieces, Christmas Red Stickles, Stamp-Unity Stamp Bella Blvd Collection Family Tree, Zig Pen and various colored inks.


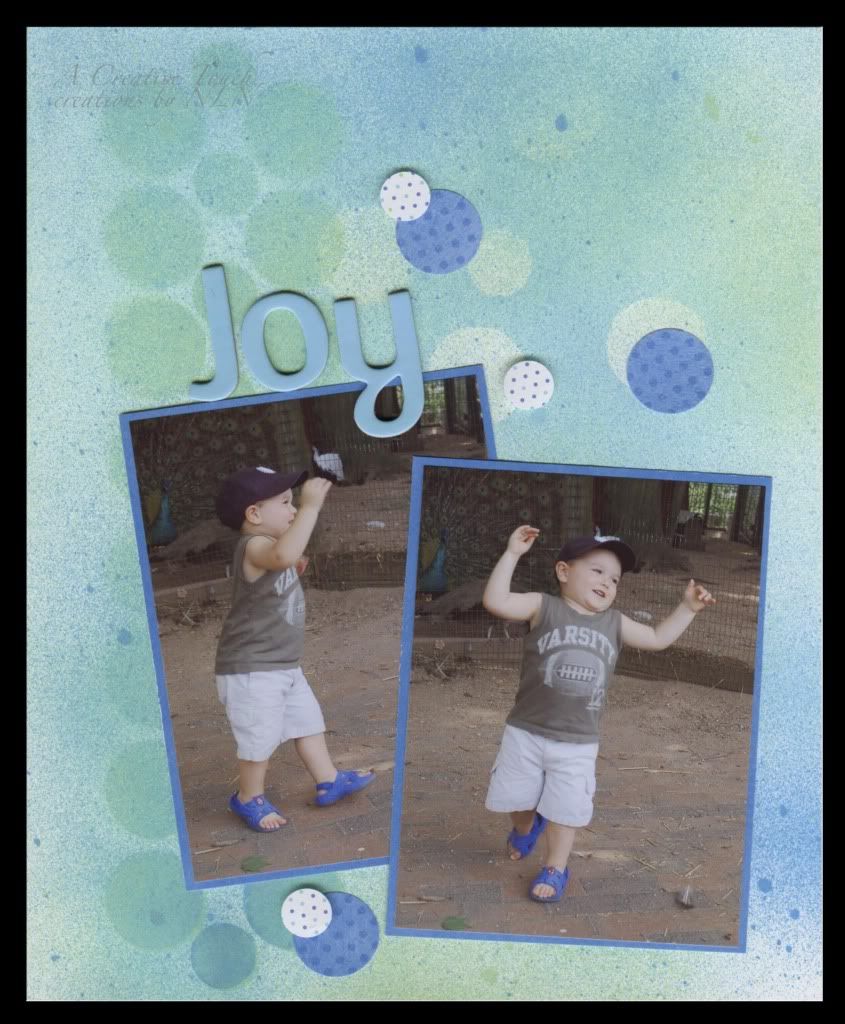
The next layout is Charlotte swinging at the park last summer. I had fun distressing the edges of all the papers on this page and then "messed it up" using Stickles like a paint to "splatter" in strategic areas on the layout. It was an experiment that I will be repeating because it was so fun.


Supplies: Paper-Bazzill White, Basic Grey Lauderdale-Bikini Time, Coastline and Cut OffsDie Cuts-Jillibean Soup Blossom Soup Die Cut Pieces, Stickers-Basic Grey Lauderdale Alphabet StickersMy Little Shoebox Mini Alphabet-Sky and Glitter Alphabet, Sassafras Lass Cherry Delicious Collection Alphabet Stickers, Fontwerks Label, Punches-Martha Stewart Heart Confetti and Large Monarch Butterfly, Stickles-True Blue and Orange Peel, Zutter Distress It All Machine, Stamps-Stampin Up! Chicken Wire Stamp and Paper Trey Ink's Basic Label Die and Stamp, Black Zig Writer and Memento Orange Ink.


The last page I created is going to be framed for my friend. I caught her son dancing on film when we went to the park one day last year. I used spray mists on this to get the effects I wanted. I had never used them before and had a lot of fun!!


Supplies: Paper-Bazzill Smooth White, Doodlebug Design and Bo Bunny Press, Mist Sprays-Tattered Angels Sweet Clover, Jazz Blue and Electric Blue, Punches-Paper Shaper Small Circle and 7/8" nesting punch, Silhouette Die Cut Machine.

I hope you enjoyed my pages and are keeping cool!!

Nora

Tuesday, April 5, 2011

Practicing with Copic Markers

     I have to admit that I have quite a few Copic Markers. I don't use them that much, though, because I have not perfected my technique. I took a class a few months ago to make me feel more comfortable creating with these alcohol based markers but didn't pick them up again until a couple weeks ago in an attempt to practice. I cannot say that I love how both these cards came out but I did learn a few things.

     For the first card, I was happy with the way I colored in the nest and the bird but I definitely need practice with the background. You cannot tell by the picture but I die cut a circle in the patterned paper and pop dotted it over the bird image so that it "peeks" out at the viewer. I finished it off by die cutting a scalloped circle and placing it around the hole.


Supplies: Paper-Paper Trey Ink White Paper, Bazzill Kraft, My Little Shoebox Made with Love and Hand Made Die Cuts-Nestabilities Small Standard Circle and Scalloped Circles Die Cut Machine-Big Shot Stamps-My Little Shoebox Home Tweet Home Ink-Tsukineko Memento Rich Cocoa Stickles-Diamond Adhesive Foam-EK Success Markers-Copic G94, B91, B93, E25, E31, E34, E37, G40, G82, R22, R24, R27, YR07

     The second card I created came out better then the first. Instead of coloring in the background with the Copics, I chose to wipe the marker a few times on a sponge to pick up some color and then used blending solution on top of the marker. I then sponged the combination over the entire image. This technique looks better but I had to wipe the marker on the sponge a lot to get a deep color. I think if I had the refill of the blue I used to squirt on the sponge it would have been a little easier.


Supplies: Paper-Kraft Cardstock, My Little Shoebox Made with Love and Fields A Bloom, Die Cuts-Nestabilities Small Standard Circles and Scalloped Circle Die Cut Machine-Big Shot Stamps-My Little Shoebox Home Tweet Home Ink-Tsukineko Memento-Rich Cocoa Punches-Martha Stewart Markers-Copic BG10, BG11, BG13, BG18, E31, E34, E37, E44, RV10, RV13, RV14, Y11, Y15, Y17, YG17, YG21, YG23, YR68 Paper Frills-Bumblebee


     The last card I am posting today is another simple card. I needed simple after all the coloring I did on the last two cards!! I just embossed a piece of white cardstock for the background and attached three round stickers with pop dots to complete the card. Anyone can do something like this!!


Supplies: Paper-Bazzill White Smooth Cardstock Stickers-My Little Shoebox Garden Party Sticker Collection Embossing Folder-Cuttlebug Love Language Die Cut Machine-Big Shot Pop Dots


     Creating anything worth while takes a lot of hard work and practice. I know that I will keep plugging away at my Copic marker technique until I get it perfect. Have a great day everyone!!


Nora