Showing posts with label Stampin Up!. Show all posts

Thursday, November 13, 2014

Lawnscaping Challenge, Throw Back Thursday and Happy Mail

Hello readers!! It is finally Thursday. One more day until the weekend and my night to go see the play "Wicked." I am so excited!!

Before, that, though, I am going to post a quick project I created for a blogger that has been having a tough time. It is just a few things that I picked up and one thing I ordered online when I put in an order for stamps last week. Sometimes getting a package with a card helps when you are down in the dumps. I am hoping this puts a smile on her face!!

I am not going to show the contents but here is what it looks like when I was done packaging it up.


I wrapped the gift in white tissue and put it in a glassine bag. I then put a few sequin leaves and stapled the bag shut. I used yellow wired ribbon I had for the bow. The tag was created using the retired "Season of Thanks" set from Stampin up! that was colored in using Copic Markers. If you remember, I used the same set for the card I created in this blog post.

I then die cut the image out with an MFT die that I adjusted to fit the image. I layered it over a plethora of leaves that I die cut with the Lawn Fawn "Stitched Leaves" die and a pre-cut doily from the craft store. This leaf set is one of my absolute favorites!!!


I adhered the embellishment to the ribbon using a tiny clothes pin. I really LOVE how this little gift came out. I am hoping that it gets to my blog friend in one piece!!

Thank you for browsing today. Have a great day!!


Thursday, November 6, 2014

Retro Sketch #139, The Card Concept #22 and Throw Back Thursday

Happy Thursday!! I am so glad that the week is almost over. I need some time to relax.

Today  I am posting a card that I created using this weeks Retro Sketch #139 and The Card Concept #22: "Thank Fall" as my inspiration. I am also calling it a "Throw Back Thursday" card because I used a 2001 Stamping Up! retired stamp set "Season of Thanks" as the focal image. It definitely screams fall to me and is one of my favorites from the old sets that I still have from when I was a demonstrator.


I had fun using Copic Marker's to color in this image. I really had to stretch myself to get all those different browns in there. I was able to practice a bit of Copic coloring too. The sentiment strip from the sketch actually worked out well because it covered up some of the green that went a little bit wild that I couldn't quite fix!!

Here is the sketch and the image I used as my inspiration:


I used distress ink all around the edges of the patterned paper, colored image and card base to give it a more rustic feel. I have to pick a style to fit it into for the Card Concept challenge and I would say it was a "Clean and Layered" style. (Okay, minus the distress ink edges.)


That is all for tonight. I thank you for looking!!

Supplies:
Paper: My Minds Eye, Hero Arts, Basic Grey and Echo Park
Stamps: "Season of Thanks"-Stampin Up! (Retired) and "Talk Bubbles"-Simon Says Stamp!
Dies: Paper Trey Ink
Other: Memento Black Ink, Copic Markers, Jute

Wednesday, March 26, 2014

Simple Class Homework-Day 9-Textural Effects

Happy Hump Day!!

Blog, create cards, blog, create cards-that is the dilemma for me these days. Also, having a concussion and still feeling the effects of it has kept me off of the computer for the most part. I did want to share some of the cards I made using techniques from the Clean and Simple 3 Class I just completed. What a fun class!! I would definitely recommend taking one of these classes if you ever get the chance.

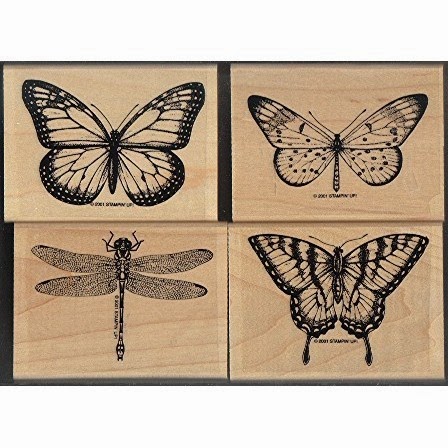
For the first card, I used Debbie Hughe's embossing technique to create my card. Her beautiful butterfly card inspired me to make a card using a butterfly stamp. This stamp is from Stampin Up!'s "Wonderful Wings" set-one of the oldest stamp sets I own. I rarely use wooden stamps anymore but this stamp set is still one of my favorites!


Here is the card I created:


Unlike Debbie, I chose to emboss in black rather then in white for this card. I think that the black suited this butterfly rather then the white. I then colored in the butterflies with Copic markers.


I generally like the way they came out BUT they did pick up some of the black embossing powder and sent it through the coloring to mottle it a little. It made the butterflies a bit dark. I then used a Wink of Stella pen to go over all the butterflies to make them shine. It is a little hard to see in the photos I took, though.

I then sprinkled green and orange mist on the card. Debbie showed how she does "controlled" sprinkles but I threw that out the window and just went for it. I am in that mode these days of just going full out.

The embossing paste technique was the last step. I used a stencil I cut out of white card stock using my Silhouette digital cutter. After the embossing paste dried, I covered it all with a little Wink of Stella.


The second card I created I decided to leave the embossing paste off but started off trying the "controlled" misting. Once you see the card, you will see I did NOT control my spraying in any shape or form!!!


I decided to used white embossing powder for this card and pulled out some Radiant Pearls paint-something I have had in my stash FOR YEARS to paint the butterflies.


Can I tell you how disappointed I am that they don't make these anymore? They are so fun to work with and I only have about 7 colors. It is hard to tell from the photo but the butterflies are shiny from the paint-no glitter pen needed. 


I have to admit, that I liked this card better then the first…until I screwed it up with the darn greeting. I messed up the stamping-one reason I rarely make one layer cards. I tried to "fix it" by stamping over it in black and then using my glitter pen over the black. I wish I had just used a gray or black ink for the greeting in the first place instead of getting fancy with a color. 


I also went around the outside with Hero Art's gold ink. I thought that it was a nice touch. I added sequins too because I thought it needed a "bit" more. Sometimes knowing where to stop is so difficult!!

Things I learned from this class:
1. Masking takes a bit of time. For this card, I had to make four separate masks using masking paper. Each of the butterflies needed a mask, as well as the sentiment.

2. Also, I need to get a palate knife for the embossing paste. I used a plastic knife for it on the first card and you can see the ridges from where I went over the paste with that knife. I also was kind of sloppy but since I have only ever used this technique once before, I know that I just need to practice.

3. Black embossing powder is not color fast. I think this is the greatest lesson!!

4. When you make a mistake on a one layer card, you have to figure out how to "fudge it" to make it better or throw it away. Sometimes you don't want to throw all that work away so you make do.

Well, that is all. I thank you for looking at my cards. I have had a blast at looking at all yours. Have a great day!!

Nora


Saturday, February 8, 2014

Flash Back Friday…a Day Late

What a crazy week this has been!! Snow days, doctors' appointments for both Charlotte and I, minor surgery on Charlotte's ear and a girls night out hosted at my house last night. No wonder I am late with this post!!

I am actually disappointed in myself because I issued the challenge over at Scrapjazz.com. It was to create a card using any OLD supply that you had. It could have been paper, stamps, stickers, etc. To say I am a bit of a "collector" is an understatement. I have a store in my room. So for me, this challenge was quite easy.


I modeled my card over an old Nichole Heady card that I saw on Pinterest. However, I had to make it my own. First, for my OLDEST supply, I used one of the first stamps I ever bought from Stampin Up! (Script-retired) with Kraft ink stamped onto vanilla card stock. I then cut the piece of stamped paper into a 2" by 4 1/4" strip and adhered it onto an Aqua Mist card base. I then cut a few scraps from my drawer into small strips, inked them and adhered them to the card.

Next I cut a 3" by 3" of Kraft card stock and stamped a Mehndi Medallion using Kraft ink. Next I layered images and a sentiment using Aqua Mist, Pure Poppy and Smokey Shadow ink. Using foam adhesive, I then adhered the square to the background card. My last step was to use Diamond Stickles o add a little more zing to the inside of the flowers.


This card is for a dear woman who lost her husband this week to leukemia. It was very unexpected and I have been heart sick over her loss all week. How I detest cancer and cannot believe with all our science we have not figured out a way to prevent it. I know that each case is unique but I can still wish!

Thank you for stopping by today. I will be posting another project momentarily to join in for Paper Trey Ink's seventh anniversary.

Nora
Supplies:
Script Stamp and Vanilla Card Stock-Stampin Up!
Striped Paper-My Minds Eye


Thursday, October 31, 2013

Throw Back Thursday and a Happy Halloween!!!

Happy Halloween!! 


Is everyone ready for some Trick or Treating? I know my daughter is. She will be dressing up as a medical officer from the original Star Trek. Her father has her hooked!!

To commemorate Halloween AND it being Thursday, I thought I would create a card using a Halloween Stamp from my archives. This stamp was from Stampin Up! set "Costume Bears." It was retired years ago but I thought it was so cute that I kept it. I have so many sets of stamps that I barely use that I am going to try to dig them out and do a series of "throw back" Thursdays using my older stamp sets.


I first stamped the bear and then cut it out using the end of one of the PTI Half and Half Die. I then colored in the bear using various Copic Markers. I then layered patterned paper and card stock in yellow, black, and purple on the front of a card. Next I adhered the stamped image using foam adhesive. I die cut three stars and adhered two with foam tape and one with general adhesive in a random way across the card. The last step was to cover the stars on the stamped bear's costume and the three die cut stars in diamond Stickles. I LOVE the way this turned out. Isn't it so cute?

I hope you all have a fabulous Halloween!! Don't eat too much candy! (I know I will. I made the mistake of buying the kind I like!)

Nora


Supplies: