Showing posts with label Valentine's Day. Show all posts

Wednesday, February 4, 2015

Virginia's View Challenge and My Shaker Card Attempt

I know the rage in card making right now is shaker cards but I want to start off by saying that these are my LEAST favorite cards to make. I browse online and see all these lovely creations, with fabulous frames and sparkly sequins that make me drool. "I can make that!" I think to myself. However, when I actually attempt to create one, I get adhesive on the acetate or my glitter falls out of my card at a slow, but sure, rate from the tiny hole that I missed with the adhesive, even though I cannot find that hole. I cannot tell you how many completed shaker cards I have thrown out that have literally taken HOURS to make, no matter what tried and true technique of someones I try.

I bit the bullet this weekend and tried to make yet another shaker card, just for Virginia's View February challenge. Yes, it is a Valentine, and no, it was NOT an epic fail. I think the reason it wasn't is because I kept it small. No covering an entire front of a card but big enough to be a main element. Here is what I came up with:


I will be honest, I did a lot of things on this card that made me uncomfortable. I used three different patterned papers, as well as used a border die at an angle and a banner that sticks up-no way!! That is not me. You know what? It was kind of fun. To have my shaker not leak was just icing on the cake.

To start with, this card is a bit bigger then an A2 card. I just figured if I was going to go all out, I might as well try a larger canvas too. The first thing I did on the white background is to round the corners. Then I die cut some patterned paper scraps into rectangles and adhered them at an angle.


Next, I adhered a xoxo border from Simon Says Stamp and then adhered the shaker box I created over them. I topped the shaker box with a red glitter die cut note.

I stamped a few pink hearts randomly over the card. I die cut, stamped and embossed the sentiment banner and adhered it under my shaker box. I didn't even make sure it was straight!


The last step was to adhere some die cut gold hearts. Simple and easy and so not my style. However, I had fun. Who could ask for more? Maybe next time I will even attempt to go a little bigger on the shaker!

I am entering this card in Virginia's View Shaker Challenge. Thank you Virginia for actually kicking me in the pants showing me I CAN make a shaker card if I really want to!!


I appreciate you stopping by. Have a fabulous day!!

Supplies:


Thursday, January 29, 2015

A Craftsy Class, a Clean and Simple Valentine and Shopping our Stash Challenge

Happy Hump Day. This week has been crazy here in Connecticut. So far this week we have had three half days of school and a snow day. The forecast says there is more snow due tomorrow so who knows what that will bring.

In the blizzard that wasn't, (and I am NOT complaining nor blaming about this-just thankful) we had a water main leak in front of our house. It just GUSHED water in the middle of the clean up from the storm on Tuesday. Now we have a giant piece of muddy ice in front of our driveway that is quite lovely, as well as a large pothole to the side of the driveway. The water company did a patch and I am hoping they will come back and replace the pipe when the weather is a bit better. It was quite a process to watch, I have to say. I felt bad because the wind was blowing and it was COLD.

While the snowstorm was going on, I watched some videos from a Craftsy class I am taking called "Cards With Dimension" and is taught by one of my favorite paper crafters, Danielle Flanders. She is on the design team for PaperTrey Ink and a few other companies. I took this class because I have a TON of patterned paper and pre-made embellishments left over from scrap booking and love how she uses these type of products on her cards.

In this class, Danielle shows different ways to use these pre-made embellishments on cards, as well as goes over fun techniques for vellum, dry embossing, die cuts, using non paper embellishments and more. It has been fun to watch. I would recommend this to experienced and non-experienced card makers a like. It is helping me jog my mind to use products I have not used in years.

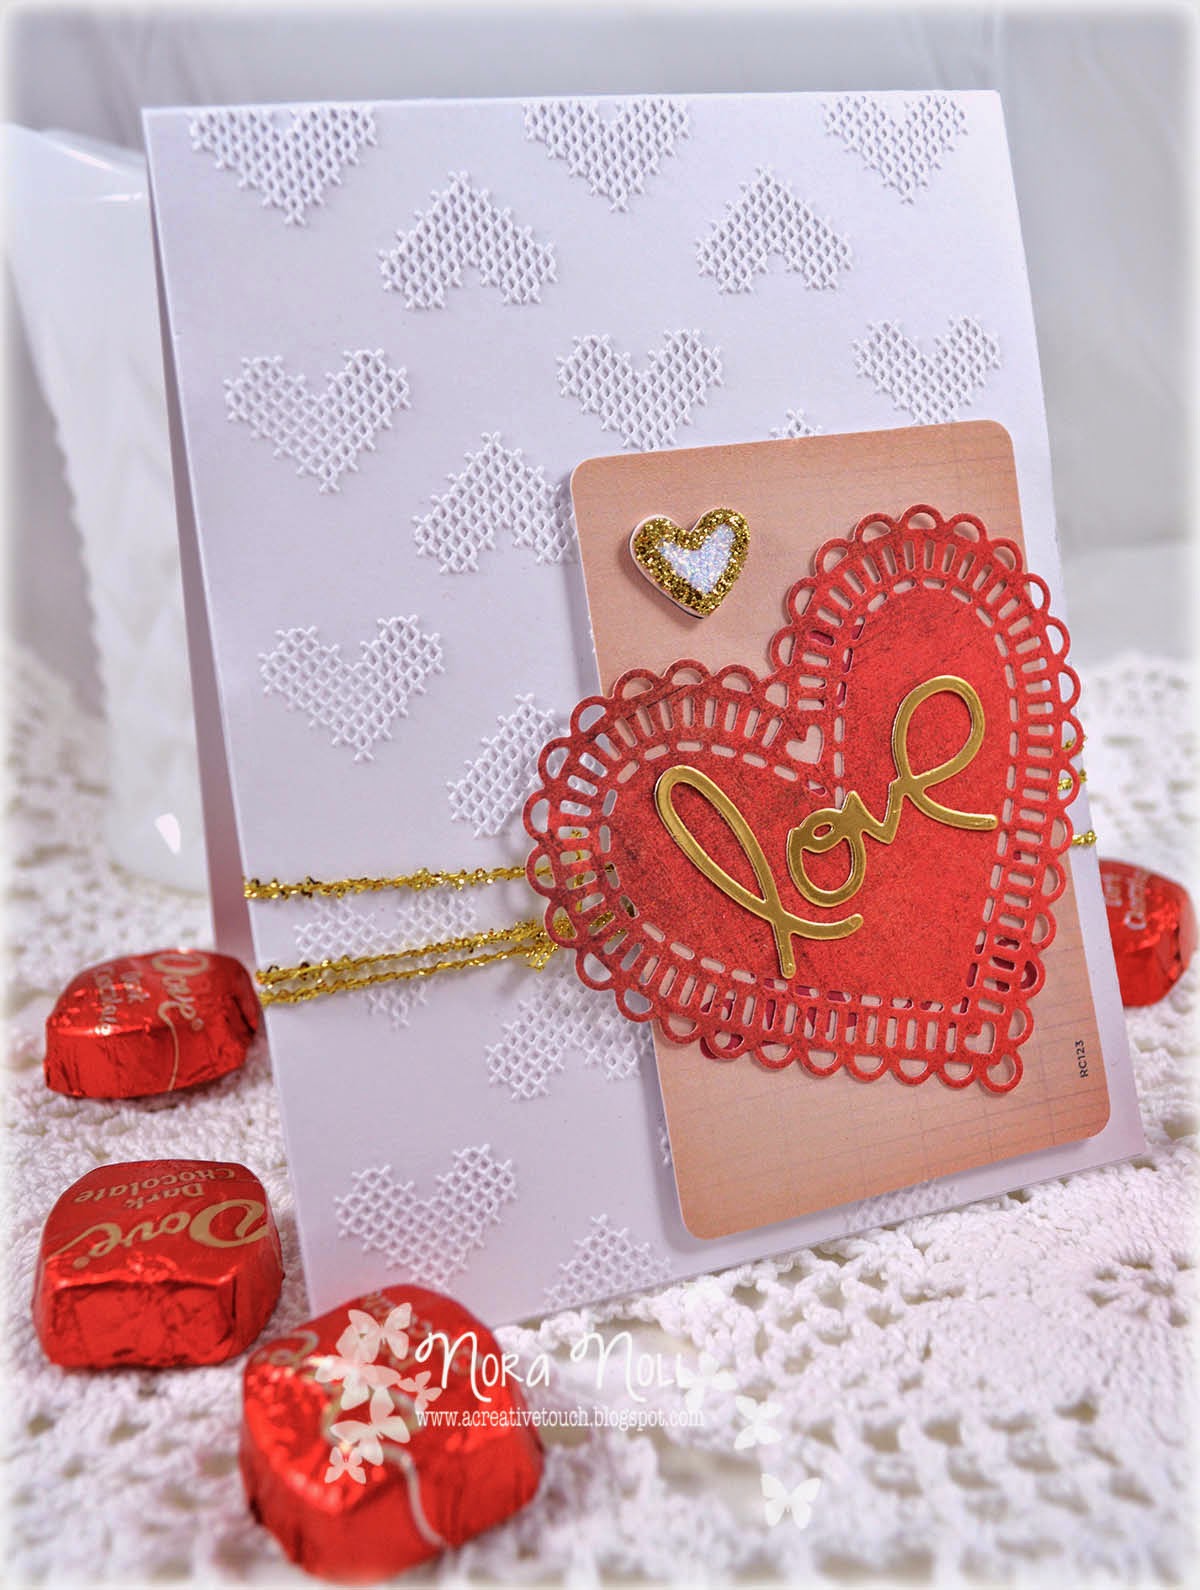
In the spirit of this class, I decided to make a quick card using embossing, some pre-made embellishments and die cuts.


The first thing I did was to emboss a piece of white card stock with a stitched heart embossing folder by Amy Tangerine for American Crafts. I wrapped the embossed panel with gold fiber that I have literally had for almost 15 years. (Yes, I am a hoarder!!) I then adhered this panel to a 5 1/2" by 4 1/4" top folding card.

Next, I used a die cut rectangle from Crate Paper's "Kiss Kiss" ephemera pack and adhered it over the card front using foam adhesive. The tiny heart popped out of this rectangle so I used a thicker foam adhesive to adhere the heart and covered it with Gold and Diamond Stickles for some shine.


I then used a die from Simon Says Stamp to cut out the lace heart from a scrap of red paper and a Paper Smooches die for the "love" sentiment. I adhered the heart over the rectangle and the love over the heart.


I know this looks simple but I have to admit that this was harder then I thought to design. I did not use ONE stamp!! I admire how Danielle uses her supplies. I think that I might go through my scraps and my pre-made die cuts now and match them up to make kits for future cards. A quick and fun way to create a plethora of cards for my stash.

I am entering this card into the "Shopping our Stash" Weekly Challenge Blog. The theme this week is "love."

Thank you for taking the time to stop by today. Be sure to stop by Danielle's blog and take a look at her beautiful projects. Better yet, take her class!!

Supplies:


Friday, February 14, 2014

Happy Valentine's Day!!

The day is finally here. Happy Valentine's Day!! I am going to post the last two cards for this "holiday."

The inspiration for both these cards were Cameo die cuts that I bought from the Silhouette web site. These cards are for Project Life but I think they are perfect for cards.

My first card I combined Bo Bunny and Doodlebug products to create a cute Valentine card. The main image is a die cut that I overlaid on a piece of white card sock and then filled with the red sequins.


I used a Doodlebug Valentine ticket with a Bo Bunny sticker mounted on adhesive foam for the sentiment. This card was so simple but has a big impact, don't you agree?

Supplies:


My second card was a bit more time consuming. Again, I die cut the main image. I laid it over a piece of card stock that had different patterns of Washi tape that were adhered to it in an ombre color scheme. Light pink at the bottom with red at the top.


The heart die cut was adhered with foam adhesive so the tape is more in the background.


I then looped pink twine around the card, tied a red tag and button. I then mounted the whole thing against a white card that I had adhered Doodlebug heart paper too. The card needed a little something so the last thing I did was to adhere a flag to the front. I LOVE how this card came out!! I think it is my favorite of all the ones I created this year.

I hope this day is filled with love and chocolate!! Happy Valentine's Day!1

Nora

Supplies: