Monday, April 10, 2017

Playing along with the As You See It Challenge #147

"Chirp, chirp, chirp." Crickets have taken over my blog of late. A lot of personal stuff has taken over my crafting time so my blog has suffered the last two weeks. When I have had time, my mojo has seemed to disappear. I know we all go through it but it is so annoying!!

I had a little time to actually play yesterday and made two different cards for the "As You See It Challenge #147." I used the sketch and pulled from the pile on my desk for the first card.


The sketch that I pulled this from is below. There is also a kind of "theme" to go with it to interpret the sketch: Lacey and Lovely. It is up to you to interpret what goes across the top-lace or patterned paper?


I chose yellow gingham patterned paper as the large panel that goes partially across the top. This was actually my second choice. I first used a stencil and stenciled some lace BUT as it often is with me, I messed up and went out of the lines. So my second choice was my yellow paper. It went well with the yellow flower and was a good contrast to the red.


I added a vellum die cut underneath the circle for some intent and instead of stamping a sentiment underneath the patterned paper, I stamped it ON the paper. I just couldn't find a sentiment that looked good in the space underneath.


The stamp I used is "Beautiful Bouquet: Ranunculus" from WPlus9 and colored in with Zig Clean Color markers.  I have a love/hate relationship with these markers as I cannot seem to make them work like other people do. I added a layer of Spectrum Noir Sparkle over the top. The sentiment is from PaperTrey Ink's "Pretty Peonies" set (retired).


I loosely used the sketch for the second card. I also used a card by my CAS-ual Fridays Stamps Design Team Mate, Shona Chambers, as inspiration. When I saw her black and white card I was blown away!!


I used CAS-ual Fridays Stamps "Modern Petals" stamp in blue as my focal point for this card. I knew when I saw Shona's card that I wanted to use blue ink for my version.


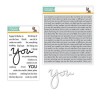
I also decided to use the sentiment as my focal point. I used Simon Says Stamps "You Matter" stamp set and matching die for the sentiment. The added touch of red really popped off the blue.


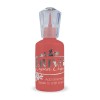
I also covered the die cut with Glossy Accents to give it a bit of shine. I also stamped a matching envelope. I did not line it up as well as the card but kind of like the look. I added some Nuvo Crystal drops in the middle of the flowers on the envelope in red to match the red on the card.

I thank you for stopping by today. I hope your day is as beautiful as mine has been!!

Card #1 Supplies:
PaperTrey Ink "Pretty Peonies" set (retired),


Card #2 Supplies:


SaveSaveSaveSaveSaveSave

Friday, March 31, 2017

CAS-ual Fridays Stamp Release Blog Hop!!

Happy Friday everyone!!  What better way to kick off the weekend with a BLOG HOP!!! Just warning you, this post is a bit photo heavy so be prepared!!

CAS-ual Fridays Stamps has a new mini release that we have been seeing sneak peeks from all week on the designers blogs. Today we are hopping along for some prizes!!!! Five random winners will be picked from the comments on the designers blogs to win $20 gift certificates to the CAS-ual Fridays Stamps Store and ONE random winner will be picked from the CAS-ual Fridays Stamps Blog comments to win a $50 gift certificate. How is that for a celebration?

You should have arrived here from Lisa's blog but if you have gotten lost along the way, the complete list of all the designers participating  blogs are below.

Today I am sharing cards I created with the new "Rad" stamp that is available NOW at the CAS-ual Fridays Stamp Store. These stamps screamed more "boy" to me so I wound up creating four masculine cards with them.


My first card is a graduation card. I created this card for my nephew for his high school graduation this spring.


I started off by stamping some of the sentiments in the "Rad" set in light gray on a white panel. (really hard to see, but it is there!!) I layered the stamped panel over a white, A2, top folding card base.


I then stamped "grad" in red over the gray words. Next I used foam adhesive to adhere a silver embossed sentiment strip above the "grad" sentiment.


I finished the card by adhering some "Fun-Fetti Fri-Dies" stars and sequins onto the card front.

My second card I used the "Rad" set along with the new "Modern Petals" stamp set to create a simple, masculine card.


I started off by stamping the funky squares from the "Modern Petals" stamp set in different greens on a scrap of white card stock . I then adhered the white panel onto an A2 sized, green card. I adhered a scrap of green patterned paper over the stamped panel, topping it off with a strip of gold. (hard to tell in the photo but it has been as gloomy as can be and this was the best I could get!!)


I finished off the card by stamping and embossing a sentiment in gold that I created from the plethora of words in the "Rad" set. So simple yet a perfect masculine card!!

The third card I created I just used the "Rad" set to make a simple, graphic birthday card.


I stamped sentiments from the set in kraft and red onto a Kraft card base. I then added some "Fun Fetti" stars that I had left over from the first card to fill in some empty space in the sentiment block.


I used a scoreboard to make a score above the top of the sentiment block and then added a piece of Washi tape and a scrap of patterned paper to the bottom to finish off this simple card.

For my last card, I experimented a little bit.


I used some Colorburst in two different greens on watercolor card stock to create the background. I then splashed a bit of mist spray in gold over the top.


While this was drying, I stamped and embossed a sentiment strip in green using "Rad." I also die cut some stars using the "Fun Fetti Fri-Dies" out of gold paper.


I adhered the dried, green background I created over an A2 card base. I then made a nest out of some gold floss and layered the sentiment over it. To complete the card, I adhered the die cut stars and a few sequins to the card front.

Has this hop inspired you to shop? Use my code nora2017 to get 15% off your total order.


Next stop will be Kimberly's blog. Don't forget to leave some comments for a chance to win!!

Here is the complete blog list if you have gotten lost along the way!!

Special Guest: Nicole Picadura
Special Guest: Irit Shalom
Nora Noll<(You are Here)

Thank you so much for stopping by!! Have a GREAT WEEKEND!!!


Supplies:


Sunday, March 26, 2017

CAS-ual Fridays Stamps Sneak Peek "Floating"

Happy Sunday!!  I hope you are all having a nice weekend. Today is my husband's birthday. We celebrated last night at a French Restaurant  that he wanted to try. Everything was delicious-especially the profiterole I had for dessert!!

Today I am excited to bring you a sneak peek to "Floating" one of the new CAS-ual Fridays Stamp sets that will be released on March 31, 2017.


I had fun creating a simple card with it this weekend. I should not call it simple, though, because it took me over an hour to color!!


I started by stamping the balloon from the set onto a piece of white card stock. I then used Copic Markers to color in all the different flowers, as well as the basket.


I then took a brush and lightly brushed Distress Ink in "Tumbled Glass" around the background for sky. I apologize for the photo as it is pretty gloomy here and hard to get a great photo.


I mounted the stamped panel onto an A2, top folding aqua card and added a sentiment that I had embossed onto a piece of black card stock.


Next I used Glossy Accents, Stickles and Nuvo Crystal Drops inside the flowers to give them a bit of zing.

Like this sneak peek? There will be more from the Ink Squad all this week with the rest of the release.


On Friday, we will have a blog hop and every designer will use a new CAS-ual Fridays Stamp set in their designs. There will be prizes, fun projects and special guests. Please join us at the CAS-ual Fridays Blog for all the festivities!!

I thank you for stopping by today. Have a  FABULOUS day!!

Supplies:
Stamps-CAS-ual Fridays Stamps "Floating"
Paper-Neenah Solar White, PaperTrey Ink "Aqua Mist," and Bazzill Black
Ink-Memento "Tuxedo Black," and Hero Arts Unicorn "White" Pigment Ink, Ranger "Tumbled Glass" Distress Ink
Other-Wagner Heat Tool, Sizzix Big Shot, Wow Opaque White Embossing Powder, Stickles in "Cool Mint" and "Glam Pink," Nuvo Crystal Drops in "Dandelion Yellow," "Red Berry," and "Ripened Pumpkin," Glossy Accents, 3M Foam Adhesive, Ranger Multi-Matte Adhesive, Scotch Dot Adhesive, Ink Duster Blending Brush
SaveSaveSaveSave

Thursday, March 23, 2017

On the Blog With CAS-ual Fridays Stamps: Stretching Your Stamps

Happy Thursday everyone!! It is my turn on the CAS-ual Stamps Blog. I created a card that took a look at my stamps in a different way.

As a crafter, I am sure you have oodles of supplies. However, what if you didn't? Would you be able to look at the stamps sets you have and create something that you didn't have? I sometimes challenge myself to do this to see what I could come up with. I wanted a large butterfly so I looked through my CAS-ual Fridays Stamp sets and used "Sassy Smiles" and "Pretty Posies" to create one.


I started off this card by stamping four leaves from the "Pretty Posies" stamp set with white pigment ink onto vellum and heat embossing with white embossing powder. I then colored the leaves in with gold and green sparkle markers. I cut the leaves out and gave them a second layer of color. I set them aside to dry.


While the leaves were drying, I stamped the heart from "Sassy Smiles" in black, overlapping to create the butterfly body. I then used scissors to cut the body out.


On the card base, I used embossing paste and a stencil to get a lace overlay. I then flicked green and gold mist spray over it to get a "messy" look. I placed a blended panel that had a sentiment from CAS-ual Fridays "Be" stamped in black.


I took the leaves and arranged them to look like the top and bottom of butterfly wings and adhered them to the sentiment panel. I adhered the body over the wings and used floss to make some antennae. The body needed a bit of oomph so I added some clear sparkle marker on top and then covered it with Glossy Accents.


My last step was to adhere some sequins on the butterfly wings, as well as on the card front.

Do you like the stamps I used? Use my code nora2017 to get 15% off your next order at CAS-ual Fridays Stamps.


I thank you for stopping by and hope that this helps you look with a new eye at your stamp sets.


Supplies:


Stamps-                                       "Be"                                "Pretty Posies"                       "Sassy Smiles"


Ink-Tim Holtz Distress Ink "Squeezed Lemonade," "Scattered Straw," and "Spiced Marmalade," Hero Arts Unicorn "White" Pigment Ink, Hero Arts "Black"
Embossing Powder-Ranger Detail "White"
Paper-Neenah Solar White, PaperTrey Ink Vellum
Other-Tim Holtz "Ornate" Stencil, Wagner Heat Tool, Prima Mist Spray "Emerald" and "Gold Foil," Spectrum Noir Sparkle-"Gold" and "Blue Ocean," Ranger Small Blending Tool

Sunday, March 19, 2017

Tag You're It Challenge #67

Hello! I hope you all had a wonderful weekend. Ours was surprisingly quiet. We started off by going to Cirque du Soliel on Friday night. We saw "Toruk." It was a more theatrical production then I expected but really good. The sets for the show were AMAZING!


It was a good ending to a very bad week. It was a great way to set up the much needed weekend.

Today I had some time to make a tag for the "Tag You're It Challenge: #67." I had colored in the flowers that I wanted to use over the week but never had the time to put together the tag.


Please excuse the bad lighting on this photo. Once again I was playing around with lighting and still do not have it right. I only have so much time these days so re-taking photos is not a priority!! The tag that this was inspired by is below.


The inspiration tag had a flower so I decided to use the Altenew "Beautiful Day" set to stamp and color in. I have had this set sitting on my desk for a while but never cracked it open.


The inspiration tag also had a blue background with a doily like element. I used Tim Holtz's "Ornate" stencil with Hero Arts "Tide Pool" dye ink.


I layered everything on the tag and used Altenew's "Label Love" stamp set for the sentiment. I finished off the tag by covering all the flower elements with Spectrum Noir "Clear" Sparkle Marker.

I thank you for stopping by and I hope you have a fabulous week!!


Supplies:
Stamps-Altenew "Beautiful Day," and "Label Love"
Paper-Neenah Solar White
Ink-Memento "Tuxedo Black," Hero Arts "Tide Pool"
Dies-Altenew "Beautiful Day," and CAS-ual Fridays "Tag Buddies Fri-Dies"
Other-Copic Markers, Prismacolor Pencils, Pretty Pink Posh Sequins, Ranger Multimatte Adhesive, Spectrum Noir Clear Sparkle Marker, 3M Foam Adhesive, Seam Binding, Sizzix Big Shot, Seam Binding, Tim Holtz "Ornate" stencil by Stamper's Anonymous
SaveSaveSaveSaveSaveSave

Friday, March 17, 2017

Calling All Sistahs!

Hello everyone!! It is the 17th of March and that means another CAS-ual Fridays Stamps "Calling All Sistahs" Blog hop!! You should have come here from Mary's blog.


This blog hop is to encourage women to remember to get their yearly mammograms. One in eight women in the United States will develop invasive breast cancer. Early detection is so important for treatment. Make sure to make appointment to get the girls SQUEEZED!

The owner of CAS-ual Fridays Stamps, Michele, is a Breast Cancer survivor herself. She developed a line of stamps to promote Breast Cancer awareness. Fifty Percent of the proceeds of the "Calling All Sistah's" product line will be donated to causes that promote Breast Cancer awareness, as well as research for a cure.

Along the way their will be prizes!! Three Random commenters will be picked from the comments on the hop to receive a prize but you must comment by March 19, 2017 to be eligible.

Now that the particulars are done, lets get on with the details about the card I created for the hop!!

I chose to create a simple card and used two CAS-ual Fridays Stamps sets on my card-"Be" and "Word Ribbon."


I started off by stamping a white A2 card base with two sizes of butterflies from the "Be" stamp set using three types of pink dye ink. To be honest, this was the second card base I stamped for this card due to the dropping of a stamp. Hate when that happens!!


I then used a sentiment from "Word Ribbon" and stamped it over the butterflies in black dye ink. I layered a scalloped die cut panel in white wrapped with metallic floss over the pink, using foam adhesive to give it a bit of dimension.


I finished the card off with a few sequins from the "Sistahood Sparkle," an exclusive mix of sequins made for CAS-ual Fridays Stamps by Pretty Pink Posh.

The next blog on this hop is Ceal's blog. If you get lost along the way, the complete blog list for the hop is at CAS-ual Fridays Stamps.


Would you like to go on a shopping spree? Use the code nora2017 to save 15% off your total order! Have fun hopping!!


Nora
SaveSave
SaveSave