Showing posts with label #alloccasion card. Show all posts

Wednesday, August 2, 2017

CAS-ual Fridays Stamps August Reveal Day Two-"Tutu"

Happy Wednesday!! Today I have another new stamp set to reveal from CAS-ual Fridays Stamps.

I created two cards with the new "Tutu" stamp set. I have to admit that this set is my favorite!!

On my first card, I used a pigment ink and magenta embossing powder to stamp and heat emboss one of the ballerinas from the set on black card stock.


I then die cut the circle and arranged it over an A2, top folding card that I had covered in striped pattern paper.


To give the ballerina a bit of pop, I die cut and punched different sized circles out of pieces of pink pattern paper that I had in my scrap pile.


I stamped the sentiment, also from the "Tutu" set onto a white paper strip and then cut it up to disperse the sentiment over the front of the card.

On my second card, I decided to do a bit of coloring. I stamped one of the ballerinas from the set with black dye ink and used gel pens in pink and purple to color in the flowers in her skirt. Gel pens are great for these flowers as they can get in the small, tight spaces.


I then used glitter glue and Nuvo crystal drops for the middle of each flower. Doesn't the skirt almost look 3D?


I tied a piece of twine around the panel and adhered it to an A2 card base that I had covered in pink patterned paper. So simple!!

Here is a sneak peek of the complete stamp set:


This stamp set will be for sale on Friday, August 4, 2017 at the CAS-ual Fridays Stamp Store. Don't forget to use my code-nora2017-to get 15% off your total order-including sale items!!


To see some more projects using this stamp set, hop on over to the CAS-ual Fridays Stamps Blog. Michele has posted the entire list of the Design Team's blogs for more "Tutu" fun!! Also, do not forget to post a comment for a chance to be entered into a random drawing to win this fun stamp set.

Thanks for hopping over today. Tomorrow there will be another stamp set revealed so remember to stop on by!!


Supplies:

Tutu Embossed Card
Stamps-CAS-ual Fridays Stamps “Tutu,”
Paper-Stampin Up! Basic Black
Ink-Hero Arts Pigment Ink “Pastel Pink”
Other-Ranger Ink “Magenta” Opaque Shiny Embossing Powder, Wagner Heat Tool,

Tutu Gel Pen Card
Stamps-CAS-ual Fridays Stamps “Tutu,”
Ink-Ranger “Jet Black” Archival Ink
Markers-Kaisercraft Gel Pens “Kaisercolour 24
Other-Stickles Glitter Glue-“Magenta,”“Lavender,” Ranger Enamel Accents-“Gumball


SaveSave

Thursday, March 23, 2017

On the Blog With CAS-ual Fridays Stamps: Stretching Your Stamps

Happy Thursday everyone!! It is my turn on the CAS-ual Stamps Blog. I created a card that took a look at my stamps in a different way.

As a crafter, I am sure you have oodles of supplies. However, what if you didn't? Would you be able to look at the stamps sets you have and create something that you didn't have? I sometimes challenge myself to do this to see what I could come up with. I wanted a large butterfly so I looked through my CAS-ual Fridays Stamp sets and used "Sassy Smiles" and "Pretty Posies" to create one.


I started off this card by stamping four leaves from the "Pretty Posies" stamp set with white pigment ink onto vellum and heat embossing with white embossing powder. I then colored the leaves in with gold and green sparkle markers. I cut the leaves out and gave them a second layer of color. I set them aside to dry.


While the leaves were drying, I stamped the heart from "Sassy Smiles" in black, overlapping to create the butterfly body. I then used scissors to cut the body out.


On the card base, I used embossing paste and a stencil to get a lace overlay. I then flicked green and gold mist spray over it to get a "messy" look. I placed a blended panel that had a sentiment from CAS-ual Fridays "Be" stamped in black.


I took the leaves and arranged them to look like the top and bottom of butterfly wings and adhered them to the sentiment panel. I adhered the body over the wings and used floss to make some antennae. The body needed a bit of oomph so I added some clear sparkle marker on top and then covered it with Glossy Accents.


My last step was to adhere some sequins on the butterfly wings, as well as on the card front.

Do you like the stamps I used? Use my code nora2017 to get 15% off your next order at CAS-ual Fridays Stamps.


I thank you for stopping by and hope that this helps you look with a new eye at your stamp sets.


Supplies:


Stamps-                                       "Be"                                "Pretty Posies"                       "Sassy Smiles"


Ink-Tim Holtz Distress Ink "Squeezed Lemonade," "Scattered Straw," and "Spiced Marmalade," Hero Arts Unicorn "White" Pigment Ink, Hero Arts "Black"
Embossing Powder-Ranger Detail "White"
Paper-Neenah Solar White, PaperTrey Ink Vellum
Other-Tim Holtz "Ornate" Stencil, Wagner Heat Tool, Prima Mist Spray "Emerald" and "Gold Foil," Spectrum Noir Sparkle-"Gold" and "Blue Ocean," Ranger Small Blending Tool

Monday, March 6, 2017

CAS Colors and Sketches Challenge #212

Happy Monday!! I hope you are all having a start to a great week.

Today I have a quick card that I created for the CAS Colors and Sketches blog challenge #212. This is a new to me challenge and I decided to give it a try.

I had time to play around this weekend with things I had bought but never used. I seem to have a lot of this. Every time I say I am going on a no buying challenge I cannot stick to it because of all the cute stuff. I am really going to adhere to it, though, after this weekend. I have more then I will ever be able to use and I HATE to get rid of my craft stuff. (other stuff, yes, craft stuff no.)

So I FINALLY used my PaperTrey Ink "What The Doodle: Tea Time Die" and matching stamp set for this card.


I stamped the tea cup on Canson watercolor paper and heat embossed in white. I then used the dies to cut the cup out. I dusted off my Zig Clean Color Markers and used a brush to watercolor the teacup.


While it was drying, I die cut a pinked edged circle out of pink paper and a Spellbinders "Circle Delight" doily out of white card stock. I adhered it where the large circle was placed on the sketch.


I then added the tea cup for one of the circles and hearts for the other circle that I die cut out of a paper scrap using Simon Says Stamps "Large Holiday Shapes" dies.


I used a combination of a sentiment from the tea time set and My Favorite Things "Sending Hugs" die-namics for the sentiment. The last touch was to add Spectrum Noir Clear Sparkle Marker over the hearts and "hugs" sentiment, as well as a few sequins.

This was a simple card but I liked the way it came out. I used a pre-made card for the back, something I have a bunch of but never use. I decided I need to start digging them out instead of saving them for I don't know what!

I thank you for taking the time to stop by today. I hope you have a FABULOUS day!!

Nora


Supplies:
Stamps-PaperTrey Ink "What The Doodle: Tea Time"
Dies-PaperTrey Ink "What The Doodle: Tea Time Die," My Favorite Things "Sending Hugs" and "Pinked Edger Stack," (retired) Simon Says Stamp "Large Holiday Shapes, Spellbinders "Circle Delight"
Paper-Bazzill Gray and White, Neenah Solar White Card Stock, Canson, Echo Park "Dark Pink" from the Love Story Collection (hearts), 
Ink-PaperTrey Ink "Smokey Shadow," and Hero Arts "Unicorn White"
Other-Wagner Heat Gun, Zig Clean Brush Markers, Clear Sequins, Spectrum Noir Clear Sparkle MarkerSizzix Big ShotScrapbook Adhesive FoamRanger Multi-MatteGlossy Accents

SaveSave

Wednesday, March 1, 2017

CAS(E) This Sketch #210

It is Wednesday-halfway through the work week and the first day of MARCH!! Yeah!! Spring is around the corner!

Chris is away and Char and I have had a lot of quality time together. She found all her baby home videos this weekend and we have been having mini film fest the last few nights. I love my teenager but so miss my toddler!! Her little giggle, her smile and so full of self confidence. School ruined that giggle, as well as her self esteem. In third grade she stopped laughing because the kids made fun of it. This also chinked her self confidence. Makes me sad and I have shed a tear or two over the last couple of days over it.

Anyway, today I am posting a card I created for CAS(E) This Sketch #210. At first, I was flummoxed by this sketch. Then I looked at tons of CRAP on my desk (it is VERY messy right now) and had a light bulb moment.


Here is the card that I came up with. The frame, the flowers and the leaves were all sitting in a big pile on my desk so this came together so easily!!

Here is the sketch that inspired me:


I started off this card by stamping the leaves from PaperTrey Ink's "The Sweet Life" in "Jellybean" ink from Simon Says Stamp and then layered PaperTrey Ink's "New Leaf" dye ink over it.


Then I stamped the white panel with a sentiment from PaperTey Ink's "Choose Joy" sentiment set. The panel was a scrap from another card where I had used only part of the die cut from PaperTrey Ink's "Pretty Frame Die." I masked the sentiment, using two  ink colors-WPlus9's "Silver Lining" and My Favorite Things "Persimmon." I also used My Favorite Things "Coral Crush" ink to blend on the outside frame.


I adhered the sentiment panel and coral frame to the stamped card front. I then adhered the stamped roses and leaves over the panel. I covered the images and coral frame with Spectrum Noir Clear Sparkle Pen to give each a bit of shine.


My last step was to adhere a few sequins around the roses. I am SO HAPPY with how this whole card came out. Isn't it pretty?

That is all from me today. I hope you all have a FABULOUS first of March.

Nora
SaveSaveSaveSaveSaveSave

Sunday, February 26, 2017

Freshly Made Sketches #276 and a PaperTrey Ink Anniversary Card Posted Too Late

Hello everyone!! It is Sunday night and I am posting a couple of cards I created.

The sound of crickets were here on my blog last week as I was not feeling the creativity bug. Then on Thursday night I came down with hives and was a little sick to my stomach. Think I had an allergic reaction to something I ate-but still trying to figure it out!! Yesterday Charlotte and I went shopping with my niece who had come down on Friday. She took Char to a Panic at the Disco concert. Both had a BLAST.

I was able to play a little last night, though. My first card I created using Freshly Made Sketches #276 my inspiration.


My card is not as clean as the sketch but it has the elements.


I combined Simons Stays Stamp! images from "Time for Wine" with a sentiment from Paper Smooches "Free Spirit" stamp set. Las time I used this set, I made my wine purple, but today I played with it being a "white" wine. The color is not perfect but close to what I wanted!!


The background was created by watercoloring Ranger "Twisted Citron" and "Mowed Lawn" Distress ink onto watercolor paper and then pairing it with a little Kraft card stock.


Love how it all came together and know I could send this to several of my friends.


My next card I actually created last week for the PTI 10th Anniversary Challenge but never got around to photographing it. It was also EXTREMELY simple. I rarely enter PTI Challenges as I can never make my cards look as good as so many other contributors!!


I was inspired by the "2015 Birthday Tags" stamp set and my favorite DT member, Dawn McVey. While I do not have that set, I do have the "2012 Birthday Tags" (The Vault) set and used that instead.


I stamped the green and white patterned paper using "Ombre Builders" and used "Edgers #3" die to die cut the scalloped edge. I thought the colors were perfect for a more masculine card.

Of course I am a day late and a dollar short for entering this but that is okay. Any card made is a good thing!!

I am also entering this into Simon Says Stamp! Wednesday Challenge "Anything Goes."


I thank you for stopping by today. Have a great night!!

Nora


Supplies:
Stamps-Simon Says Stamp! "Time for Wine" and Paper Smooches "Free Spirits"
Dies-My Favorite Things "Blueprints 13," Simon Says Stamp! "Time For Wine"
Ink-Memento "Tuxedo Black," Ranger Distress Inks in "Twisted Citron" and "Mowed Lawn"
Paper-Neenah Solar White, PaperTrey Ink "Green Parakeet," Recollections "Kraft"


Supplies:
Stamps-PaperTrey Ink "Ombre Builders," "2012 Birthday Tags" (The Vault)
Dies-PaperTrey Ink "Edgers #3," "Limitless Layers 2 1/4" Ovals"
Paper-PaperTrey Ink "New Leaf," and "Classic Kraft Polka Dot," Recollections "Kraft," Neenah Solar White
Ink-PaperTrey Ink "New Leaf"

SaveSave
SaveSave

Friday, February 3, 2017

CAS-ual Fridays Stamps Sneak Peek Day #3

Happy Friday!! So glad that it is almost the weekend!!

We are day number three for CAS-ual Fridays Stamps Sneak Peek. Tomorrow the new stamp sets will be available in the store.

Today I am showcasing the new CAS-ual Fridays "Franklyisms" and "Tag You're It" stamp sets.

For my first project, I used a sentiment from the "Tag You're It" set on a tag from the "Tag Buddies Fri-dies."


To start with, I used the middle tag from the "Tag Buddies" to die cut a tag out of white card stock. I then used gold pigment ink to stamp some flowers on the edge of the tag using stamps from yesterdays sneak peek. ("Flower Power" and "Peace Out")


Next I stamped the sentiment from "Tag You're It" in gold. I added gold embossing powder to the entire tag and used a heat gun to emboss the images.


My last step was to tie the tag onto a gold box that I bought from the craft store after Christmas. This was the easiest project but it looks like a million bucks!!

Here is a full sneak peek of the "Tag You're It" stamp set:


Aren't these so fun? I can see me making some really fun cards and tags with this set.

My second project I combined the "Franklyism" stamp set with the new "Full On Floral" stamp set that will be officially debuted tomorrow.


I started by stamping the "Full On Floral" in white pigment ink onto a piece of white card stock. I then heat embossed the image using white embossing powder. Next I blended distress ink in four colors over the florals, wiping the card stock with a dry paper towel at the end so the image would pop off the card.


I adhered this panel to a persimmon colored, A2, top folding card base. I added a strip of yellow card stock, as well as a strip of black to the left of stamped panel. I used a clear sparkle marker to add some shine to the black strip of card stock.


I stamped the sentiment from the "Franklyisms" stamp set onto a piece of vellum with white pigment ink and heat embossed it using white embossing powder. I added the square to the card front using some Washi tape.

Here is a sneak peek of the entire set:


I adore this set and will be using this to make birthday cards for my friends. We are of that age!!

All the new sets will be available tomorrow, February 4, 2017 at the CAS-uals Fridays Stamp Store. To get 15% off of your order, please use the code nora2017.


Don't forget to stop by the CAS-ual Fridays Stamps blog. You don't want to miss what the other Girl Friday's created!!

Once again, I appreciate your visit. Tomorrow there is one more day of sneak peeks. Please be sure to stop by!!


Supplies:
Stamps-CAS-ual Fridays Stamps "Tag You-re It," "Flower Power" and "Peace Out"
Paper-Neenah White card stock, Gable box from Hobby Lobby
Ink-Tsuinko Delicata Gold
Other-Ranger Gold Tinsel Embossing Powder and Wagner Heat tool

Supplies:
Stamps-CAS-ual Fridays Stamps "Franklyisms" and "Full Floral"
Ink-Hero Arts Unicorn "White" Pigment Ink, Ranger Distress Ink-"Candied Apple," "Squeezed Lemonade," "Carved Pumpkin," and "Ripe Persimmon"
Paper-MFT "Ripe Persimmon" card stock, Bazzill black,  Stampin Up! Banana, Neenah Solar White, PTI Vellum
Other-Washi Tape, Ranger Multimatte, Spectrum Clear Sparkle Marker, Ranger Ink Blending Tool, Ranger fine white embossing powder, Wagner Heat tool


Thursday, February 2, 2017

CAS-ual Fridays Stamps Sneak Peek Day 2

Hello everyone!! Are you ready for another CAS-ual Fridays Stamps sneak peek? I know you are going to LOVE these two new stamps sets. I know I do!!

Today I am showcasing the new "Flower Power" and "Peace Out" stamp sets.

For my first card, I created a simple card using the "Flower Power" set.


To start off the card, I scored a 1/4" border around the edge of a piece of kraft card stock cut to a 4 1/4" by 5 1/2". I then stamped the word "love" using the "Flower Power" stamp set.


Next I did a bit of masking and stamped "i just" from yesterdays "Heartfelt Sayings" sneak peek set in black ink. I colored the little hearts above the letters with a red gel pen.


I mounted the panel onto a kraft, A2 sized card base. I then used foam adhesive to attach the "you" sentiment that I had stamped and heat embossed on black paper.


My last step was to adhere some red sequins to the card and use some red glitter glue in the center of the heart on the "o."

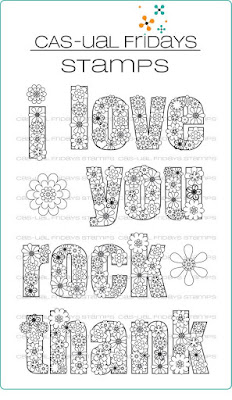
Here is a sneak peek of the whole set:


I plan to make bunch more of these to give away for Valentines day. It was such a fun and easy card to create!!

For my next card, I used the "Peace Out" stamp set and some Distress Ink smooshing to make a tie die card.


I stamped the "peace" sentiment from "Peace Out" with Versamark ink onto a piece of watercolor paper. I then heat embossed with fine white embossing powder.


Next I used four different shades of distress ink and swiped them over a piece of acetate in random areas. I spritzed water over the ink, picking up the acetate so the inks would drip into each other. I then placed the watercolor paper embossed side down and made sure the front was flat on the inked acetate so that the paper would pick up the ink. I LOVE how this came out. It really looks like a tie dye, which is the effect I was trying to get.


When the paper was dry, I adhered it over an A2 top folding card. My last step was to use some glitter glue randomly and in various colors over the middle of the flowers. I was in a hurry to photograph this and will say that the dots got smaller as they dried.

Here is a sneak peek of the full set:

Again, this set was so FUN to use and am going to try to create another tie dye card with the peace sign.

The "Flower Power" and the "Peace Out" stamp set will be available this Saturday, February 4, 2017 in the CAS-ual Fridays Stamp Store. If you use my code nora2017 you can get 15% off your complete order!!


Don't forget to hop on over the the CAS-ual Friday Stamps Blog to see what the other Girl Fridays have created!!

I thank you for stopping by today. Tomorrow there will be another sneak peek so be sure to check back in. Have a GREAT day!!


Supplies:
Stamps-CAS-ual Fridays Stamps "Heartfelt Sayings" and "Flower Power"
Paper-PTI Kraft, Black Bazzill
Ink-WPlus9 "Gala Red," Memento "Tuxedo Black" and Hero Arts "Unicorn White"
Other-Red Gel Pen, White Gel Pen, Stickles "Xmas," Sequins, MISTI, Ranger Multi-matte and Scrapbook Adhesive Foam Squares

Supplies:
Stamps-CAS-ual Fridays Stamps "Peace Out"
Paper-Canson Watercolor Paper, Recollections White
Ink-Versmark, Ranger Distress Ink "Mermaid Lagoon," "Salty Ocean," "Twisted Citron," and "Cracked Pistachio"
Stickles-"Diamond," "Peacock," "Firefly," "Seaglass," "Turquoise," "Frozen," and "Seafoam"
Other-Ranger Fine White Embossing Powder, Wagner Heat Gun, acetate