Showing posts with label #birthdaycard. Show all posts

Wednesday, October 5, 2016

SJ Card Blog for September 2016

Hi everyone!! Today I am showcasing the cards that I created for the SJ Card Blog for September. I meant to have it up the other day but just didn't have time. It was my turn for the kit and I chose a birthday theme.


I created eleven cards, one being the card I created for my Stamping Smiles Designs Tic-Tac-Toe Challenge #19 post. Let me tell you, I have plenty left to make a ton more cards but I got sick of making birthday cards and needed a break.

So without further ado, here are my cards!!


I really attempted to only use the kit on my cards. Sometimes it worked, sometimes it did not!! For this card, I did add some Distress Ink Spray behind the flowers but everything else, minus the white card base, came in the kit.


This was the first card I created. I die cut numbers using old Quickutz dies. The sentiment is from CAS-ual Fridays "Shenanigans" set-one of my FAVORITES!!


For this card I added some iridescent sequins and some Glossy Accents over the glasses to make them more realistic. I also added the white card stock background and inked all of it up.


On this card, I inked the background with Distress Ink in "Wild Violet" and accented it with some Hero Arts "Lavender" ink. The sequins were not part of the kit or the vellum I used behind the green die cut. Ultimate fail on this card for using the kit but sometimes that is where the creativity takes you!


I colored in my pig with Copic Markers and added a hat that I cut out of one of the pieces of patterned paper. I really wanted to add sparkle to the hat but I DID NOT have any Stickles in the green color to match!! Instead, I used Glossy Accents to make the pattern on the hat stick out.


For this card, I just added some red Stickles for sprinkles to the stamped tag.


This card was my favorite from the bunch. I just LOVE how this cake turned out!!

Well, that is all. I urge you to hop on over to the SJ Card Kit Blog to see what my other team mates did with their kits!!

Thanks for stopping by!!


Saturday, October 1, 2016

Stamping Smiles Designs Tic-Toe-Challenge #19

It is October 1st and it is time for a new Stamping Smiles Designs Tic-Tac-Toe Challenge. We are already up to challenge #19-can you believe it?


For my card, I chose the top row across-Color Inspiration, Polka Dots and Birthday. We were able to choose our own color inspiration so I chose the image below that I found on Pinterest.


I started off with a white card base and die cut a panel of orange polka dot paper. I adhered the panel to my card base at an angle.


Next I die cut a piece of white Bristol board and blended Distress Inks in "Spiced Marmalade" and "Carved Pumpkin" along the front to get the orange color from my inspiration image. I misted it with water, then blotted it. I also splattered Distress Spray in "Ripe Persimmon" to get the deep orange color at the bottom of the dress and "Picket Fence" randomly across the inked panel. After the Distress Spray dried, I adhered the panel at an angle over the patterned polka dot paper so it would peek out.


I then used the "Candles and Confetti" Stamp and die set to stamp the cake, cake stand and the flowers. The candles were from the My Favorite Things "Celebrate With Cake" set. I adhered the die cut, stamped images to the card front. The cake was adhered with foam adhesive.


The stamped the birthday sentiment in Memento "Tuxedo Black" ink onto a white card stock scrap using the Paper Trey Ink "Wishes Come True" stamp set. I adhered the sentiment at the top left to balance out the card. 


The last step was to adhere sequins randomly across the card front and use some Stickles and Nuvo Crystal drops to the candles and the flowers. I think this is one of my favorite cards that I have created in a long time!!

I hope you will join us over at Stamping Smiles Designs Tic-Tac-Toe Challenge and give Challenge #18 a try. I cannot wait to see what you create!!

Supplies:
Stamps-Reverse Confetti "Candles and Confetti," My Favorite Things "Celebrate With Cake," PaperTrey Ink "Wishes Come True"
Dies-My Favorite Things "Celebrate With Cake" and "Blueprints #13," Reverse Confetti "Candles and Confetti"
Paper-Recollections white card stock, Bo Bunny polka dots, Strathmore Bristol Board
Inks-Ranger Distress Ink "Carved Pumpkin" and "Spiced Marmalade," Memento "Tuxedo Black," Hero Arts "Soft Granite" and "Bubblegum," WPlus9 "Fairy Dust," PaperTrey Ink "Orange Zest," Simon Says Stamp "Mint"
Other-Big Shot, Pretty Pink Posh "Clear" sequins, Stickles "Orange Zest," Nuvo Crystal Drops in "Ripened Pumpkin," Distress Spray in "Picket Fence" and "Ripe Persimmon," foam adhesive, Ranger Multi Matte

SaveSaveSaveSave

Thursday, September 15, 2016

Stamping Smiles Designs Tic-Tac-Toe Challenge #18

Happy Thursday!! It is the 15th of September and I am here with you with another Stamping Smiles Designs Tic-Tac-Toe Challenge.


There are a TON of fun things on this card and I had a hard time choosing. I chose to do the diagonal from the top left to the bottom right with stencil, blues and greens and texture.


I decided that I was going to dig out a stencil from Heidi Swapp and do a plastic wrap technique to get a faux textured look.

I began this card by using painters tape and masking off a piece of white card stock that was cut to 4 1/4" by 5 1/2."


Next I crumpled up a piece of plastic wrap, dipped it in "Cracked Pistachio" Distress Ink (green) and blotted it over the stencil.


I then used "Mermaid Lagoon" Distress Ink (blue) and repeated the process.

Hint-if there is too much white around your stenciled image, just go over it a second time with your colors until you get it the way you would like.


 I took the stencil off and trimmed my card stock on each side so the panel measured 3 3/4" by 5 1/2."


I wanted the heart and the sentiment to pop a little off the card but since it was only one layer, I needed to figure out how I was going to emphasize it. I decided to use a dry embossing technique and outlined the heart and the "happy" with a stylus.


I flipped the paper over and went over the opposite areas on the back. This popped the edges of the heart out just enough to give it a bit of dimension.


I then embossed (texture) a piece of Paper Trey Ink "Hawaiian Shores" card stock with a We R Memory Keepers Embossing folder. I adhered the folder to a top folding, white, A2 sized card base.


I then adhered the white stenciled panel over the embossed card stock with adhesive foam.


I used foam adhesive to adhere the "birthday" sentiment that I had stamped with Simon Says Stamps "Island Blue" dye ink from Mama Elephants "Happy Everything" set.


To complete the card, I used "Mermaid Green" and "Varsity Sequin Mix"  from SpiegelMom Scraps for a little extra oomph to the front of the card.

This card was so easy and a lot of fun to make. I urge you to give the plastic wrap technique a try!! For more fun inspiration, please go to Stamping Smiles Designs Tic-Tac-Toe Challenge Blog #18.

I thank you for stopping by today.


Monday, August 15, 2016

Stamping Smiles Design Tic-Tac-Toe Challenge #16

It is the 15th of August and you know what that means-another 
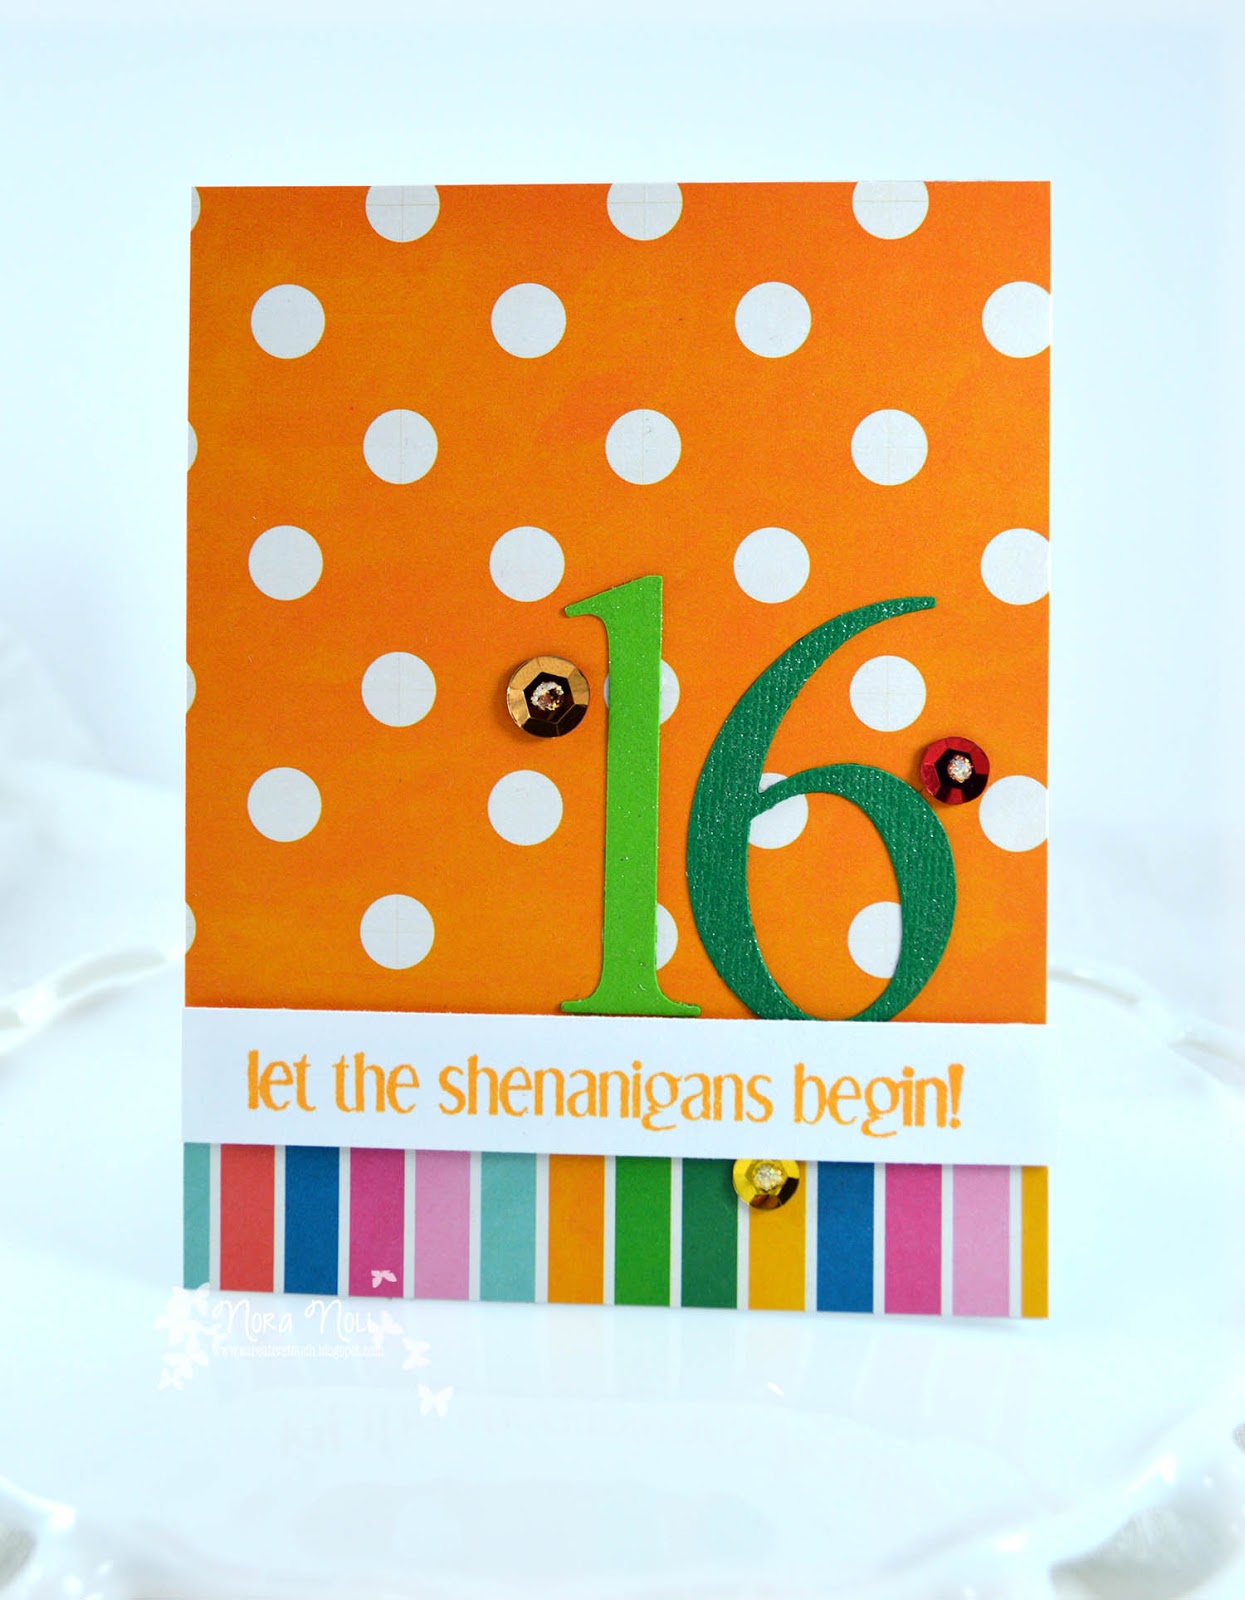
Stamping Smiles Design Tic-Tac-Toe Challenge!! It is Challenge #16 and I have a treat for you-Charlotte, my 15 year old daughter did the challenge along with me for a bonus card.


We both used the middle column down-hexagons, misting and birthday to create our cards.


On my card, I started off by using a PaperTrey Ink "Hexagon Cover plate" die to create a mask from copy paper. I taped the mask over a piece of Strathmore Bristol Board and blended "Abandoned Coral" distress ink through the stencil. I then used a MFT "Blueprints #13" die to cut the card front out.


I used Heidi Swapp "Gold Lame" Colorshine, "Abandoned Coral" and "Twisted Citron" Distress Spray Stain to mist the front of the card. While that was drying, I used MFT's "Celebrate with Cake" stamp set to stamp the cake, the flowers, the leaves and the cake stand. I then used the matching die set to cut them out. I stamped and heat embossed the birthday sentiment onto a scrap of coral card stock in gold.


When the card front was dry, I adhered it to a piece of Stampin Up! "Green Galore" card stock (retired.) Next I used PaperTrey Ink's "Smokey Shadow" ink to stamp the string and embossed the banner in gold for the top of the cake. I used foam tape to adhere the cake and the flowers, as well as the sentiment.


My last step was to use Stickles in "Fruit Punch" to make some pink cake decorations and "Gold" for the middle of the flowers.

This was such a fun card to create and I stepped out of my comfort zone creating my own stencil. I will have to try this more often now!!

Charlotte was in my room as I was creating this card so she decided to make a card too using the same challenge elements-hexagon, misting and birthday.


She used the same hexagon stencil that I had created but used Distress Ink in "Wilted Violet" for her blending. Like my card, the white panel was then die cut using "Blueprints #13" die and then misted with "Twisted Citron" and "Picked Raspberry" Distress Spray Stain, as well as Bo Bunny's "Frost" Glimmer Spray.


Once the panel was dry, it was adhered to a pink, top folding A2 sized card. Next Charlotte stamped the sentiment using Ranger's "Archival Black" ink and a stamp from Paper Smooches "Party Posse" onto a "Raspberry Fizz" banner. She adhered the banner to the card at the top.


The Avery Elle snail (from the "I'm Late" set) was colored in wth Copic markers and on my desk ready to go. Charlotte use foam adhesive to adhere the snail to the card front and decorated the balloon and the shell with "Clear" Wink of Stella. She then used "Diamond" and "Yellow" Stickles on his hat.

This was the first time that Charlotte has shown any interest in stamping and it was really fun to show her how to do some of these techniques. I look forward to doing this with her another time.

I hope you have as much fun creating with this challenge as I did. Please go to Stamping Smiles Design Tic-Tac-Toe Challenge Blog for more detail. I cannot wait to see what you create!!

Have a fabulous day!!


Supplies:
Card #1
Paper-Strathmore Bristol Board, Stampin Up! "Green Galore" Card stock (retired), Coral
Stamps-My Favorite Things "Celebrate with Cake"
Dies-My Favorite Things "Celebrate With Cake," "Blueprints #13," PaperTrey Ink "Hexagon Cover Plate"
Ink-Ranger Distress Ink-"Abandoned Coral," Simon Says Stamp "Jellybean" and "Sunkissed," Hero Arts "Soft Green," WPlus9 "FairyDust," PaperTrey Ink "Smokey Shadow," and Tsuinko "Versamark" ink
Spray Mist-Heidi Swapp "Gold Lame" Colorshine, Distress Spray Stain in "Abandoned Coral" and "Twisted Citron"
Other- Big Shot, Ranger "Gold Tinsel" embossing powder, Stickles in "Gold" and "Fruit Punch," foam adhesive, Ink Blending tool

Card #2
Paper-White Card stock-"Paper Studio", Pink Card stock
Stamps-Avery Elle "I' m Late" and Paper Smooches "Party Posse"
Dies-MFT "Blueprints #13," Avery Elle "I'm Late," and PTI "Hexagon Cover Plate"
Ink-Ranger "Wilted Violet, Memento "Tuxedo Black," Ranger "Archival Black"
Spray Mist-"Twisted Citron," "Picked Raspberry," and "Frost" Glimmer Mist
Other-Stickles "Diamond" and "Yellow," Big Shot, "Clear" Wink of Stella, Copic Markers, Ranger Ink Blender

Monday, August 1, 2016

Stampin Smiles Designs Tic-Tac-Toe Challenge #15

It is August 1st so that means a new Stamping Smiles Design Tic-Tac-Toe Challenge!! It is Challenge #15 and this badge is fantastic. I don't know how Ka does it but each badge gets better and better!!


I decided to chose the middle row across for my project-word dies, sparkle and color blocking.

I went for a very simple design for my card this time. I also decided that I was only going to use minimal stamping. Rarely do I do this so this, in itself, just added to the challenge.


I started off by die cutting Pretty Pink Posh's "Storybook #1" die out of scraps of Black Bazzill, "Terracotta Tile," "Raspberry Fizz," and Aqua card stock. I trimmed the black panel, inlaid the different color die cuts inside like a puzzle and taped it on back so all the pieces would stay together.


I then adhered my color blocked rectangle to the center of a gray, A2 sized, top folding card. I used Mama Elephant's "Happy Script" die to die cut the word sentiment out of Die Cuts With a View silver sparkle paper.


I adhered the "happy" to the card. The last step was to add a strip of white card stock that I had stamped a sentiment from Mama Elephant's "Happy Everything" set in black over the die cut using foam adhesive.


I toyed with adding sequins but decided to just stop. Sometimes I can get carried away when a CAS is best.

I hope you hop on over to Stamping Smiles Designs Tic-Tac-Toe Challenge Blog to play with us. I cannot wait to see what you create!!

Thank you for stopping by. Have a fabulous day!!


Supplies;
Paper-Stamping Up! Gray, PaperTrey Ink "Raspberry Fizz" and "Terracotta Tile," Bazzill Black and Aqua, Hobby Lobby White Card stock, Die Cuts With a View-" "Glitzy Glitter" stack
Dies-Pretty Pink Posh "Storybook #1," Mama Elephant "Happy"
Other-Memento Tuxedo Black Dye Ink, Big Shot, Foam Adhesive, ATG Adhesive, Ranger Multi Matte

Saturday, June 25, 2016

CAS-ual Fridays and Imagine Crafts Blog Hop

Happy Saturday everyone!! I hope you are all enjoying your summer. I know I am but it is slipping away TOO FAST!!!

Today I am excited to share some cards that I created using CAS-ual Fridays Stamps and Imagine Crafts supplies for our BLOG HOP!  You should have come here from Mary's Blog. Please be sure to hop and comment on each Design Team members blog post to be eligible to win two amazing prizes up for grabs.

Imagine Crafts was generous enough to send us some goodies of our choice. I chose the "Melon Medley" Kaleidacolor ink pad and the Fireworks! Spray in "Tangelo" and "Lady Bug."


On my first card, I chose to use just the Kaleidacolor "Melon Medley" ink pad with my stamps. The card may be bright but it reminds me of sunshine and the colors are perfect to cheer up a sick friend.


I used CAS-ual Fridays "Wallflower" stamp set to stamp the flowers down on the bottom of the card with the "Melon Medley" ink. I made sure that I was able to get two different colors on each of the flowers when I stamped them.


Next I used a sponge dauber to add the "Daffodil" color from the Kaleidacolor pad. I made sure that the yellow covered all of my stamped flowers. I then dabbed a bit of the "Cantaloupe" on to a piece of acetate, misted the ink with some water and then splattered orange on to the back of my card.


I did not have the right color orange paper that I wanted to use on this card so I created my own. I cut a strip of white card stock and used the "Cantaloupe" ink from the Kaleidacolor pad to blend the perfect match. I then stamped a sentiment from CAS-ual Fridays "Pretty Posies" set with Memento "Tuxedo Black" ink.


I enjoyed making the outside of my card so much that I decided to stamp a panel for the inside of the card. I used a different flower from CAS-ual Fridays "Wallflower" set to stamps flowers in "Carrot," and the flower middles with "Chartreuse." I then blended "Cantaloupe" ink all around the edges.

For my second card, I chose to use the Kaleidacolor ink pad and the "Tangelo" Fireworks! product for my card.


The first step on this card was to mist the "Tangelo" spray onto a Kraft A2 note card. I have never used this mist before and boy does it pack a punch. It was hard to photograph but it gives a nice shimmer to the kraft card base, which surprised me. I set this aside to dry while I worked on the rest of the card.


I worked on the focal point of the card while the background was drying. I stamped and embossed images from CAS-ual Fridays "Pretty Posies" set onto a small rectangle of white card stock. I then blended the inks from the "Melon Medley" Kaleidacolor over the panel. For the tiny spots in the large flower, I used Q-tips to blend the small spaces. I then mounted the panel onto a piece of black card stock to make it pop.


I created a banner from a green scrap of patterned paper and adhered it to the card front. I then added the matted flower panel using foam adhesive. I embossed a sentiment from CAS-ual Fridays "Wonderful Words" set in white on a black scrap of card stock and adhered it over the inked panel with foam adhesive. My last step was to adhere some sequins in orange and yellow on the stamped rectangle.

On my last card, I wanted the color to be toned down a bit.


First I sprayed a bit of each of the mists onto a piece of acetate, added a bit of water and used the Fireworks! sprays like a watercolor. I painted both colors randomly onto a piece of watercolor paper. I also took the paintbrush and flicked it over the panel using some "Ladybug" Fireworks! to get some splatters.


I used a heat gun to dry the background. I then stamped the "happy" sentiment from CAS-ual Fridays "Shenanigans" stamp set in "Delicata" "Golden Glitz" pigment ink and the "Carrot" color in the Kaleidacolor ink pad. I used foam adhesive to layer the completed panel onto a white A2 card base.


Next I made a nest of gold thread where I wanted to put my sentiment block. I used glue dots to adhere it to the card front. I then stamped the "birthday" sentiment from the CAS-ual Fridays "Shenanigans" stamp set onto a red card stock strip using the "Delicata" pigment ink and heat embossed with gold embossing powder.


I used foam adhesive to give the large sentiment a bit of POP from the card. My last step was to adhere a few gold sequins onto the card front.

I had such fun using all of the Imagine Crafts products with the CAS-ual Fridays stamp sets. I love that the Kaleidacolor pad has so many options on ways to use it. I also loved the Fireworks" sprays. I will definitely getting a few more colors to play with in the future!!

If you like any of the CAS-ual Fridays Stamp sets, please head on over to the CAS-ual Fridays Stamps Store and use my code nora2016 to get 15% off your purchase!!


New up is Katherina's Blog. If you get lost along the way, hop on over to CAS-ual Fridays Stamps Blog or the Imagine Crafts Blog for a complete set of links for the hop.

I thank you for stopping by and making it through this long post. I hope you have a FABULOUS Saturday!!


Supplies:
Imagine Crafts-"Melon Medley" Kaleidacolor ink pad, "Tangelo" and "Ladybug" Fireworks Spray, Memento "Tuxedo Black," Delicata "Golden Glitz" pigment ink, Versamark ink
CAS-ual Fridays Stamps-"Wallflower," "Pretty Posies," "Wonderful Words," and "Shenanigans" stamp sets
Other-Kraft, White, Black, orange and Red card stock-Bazzill, Thread-DMC, Ranger Multi Matte Adhesive, 3M Foam adhesive, Sequins, Sponge Daubers, Q-tips, Ranger gold and white embossing powder, heat gun