Showing posts with label Gift Bags. Show all posts

Sunday, December 8, 2013

Paper Trey Ink Make It Monday Challenge

I am back for another quick post. I am entering Paper Trey Ink's Make it Monday Challenge #143. It was to create a paper project using the style "Modern Whimsy." This was kind of fun but I don't know if I pulled it off.

These are little bags I am sending off to a friend. I have been meaning to do this for WEEKS but just have never found the time. I decided this week that this challenge would be fun to make gift toppers. I knew I wanted to make a vellum flower but for some reason I could not find the vellum I knew I had. Thank goodness I am a craft hoarder because I had some tracing paper and used that instead. I then inked the flower pieces in yellow and pink, punched holes and put them together using a brad in the center to hold them. Didn't they come out pretty?


Besides the flowers, all the other pieces were taken from a box I have full of die cut extras that I have on my desk. I also sometimes stamp extras so I had the leaves all created too. This was so easy and fun to put together!!


I added a button to the center of the pink to make it a bit different from the orange bag. I think this bag is my favorite.


Here is a bit of a close up.

Well, that is it for today. I think two posts in one day is enough!! Have a great rest of the weekend!!

Nora
Supplies:
Stampin Up Die


Monday, February 6, 2012

A Birthday and an Anniversary!

Happy Monday!! I wanted to start the week off right by posting a few things I made last week. I tend to take photos of my projects and then it sits on my camera. However, I pulled them off the camera yesterday to post my Paper Trey Ink's projects so I figured I would post them today.

The first card I created was an anniversary card for a teacher at work. I actually made two cards for him to choose from but only photographed this card. He and his wife were married on Valentine's Day so I wasn't sure if he would like the colors I used on this card or would want to veer away from the traditional red and pink. I should have trusted my gut because he chose this one!! This card was another CASE from someone else's card that I saw on the web. I do not have a link to the original and I apologize.


I used my Silhouette digital cutter to cut out all the hearts and then layered them over each other. I really like how this came out and will be making a similar design for Valentine's Day if I have a chance!! I will also post the inside of the card, though that is very simple.


I did not stamp directly on the inside of this card because I figured if the teacher didn't like it I would just pull the label off and put a Valentine sentiment inside. I am always thinking!!

The next project I created at 4:30 a.m.  Friday morning when I couldn't sleep. Work has had me stressed out as of late and I often wake up really early. I was actually awake at 3:00 a.m. but wouldn't let myself get up until 4:30 a.m. Imagine what I would have gotten done if I had?


I LOVE the colors on this card!! The patterned paper is a scrap of Sassafras Lass paper I had in my scrap drawer. I then used a Paper Trey Ink Mat Stack #3 to stamp and die cut to make the label. Out of all the Mat Stack's, this is my favorite. I keep hoping they will make some additions to the collection because I would buy it!! I then die cut and stamped an image from PTI's Cupcake Collection and layered it over a die cut piece of green cardstock. The bow was tied before I put the label on. I think this is my new favorite card and I just hated to give it away!!

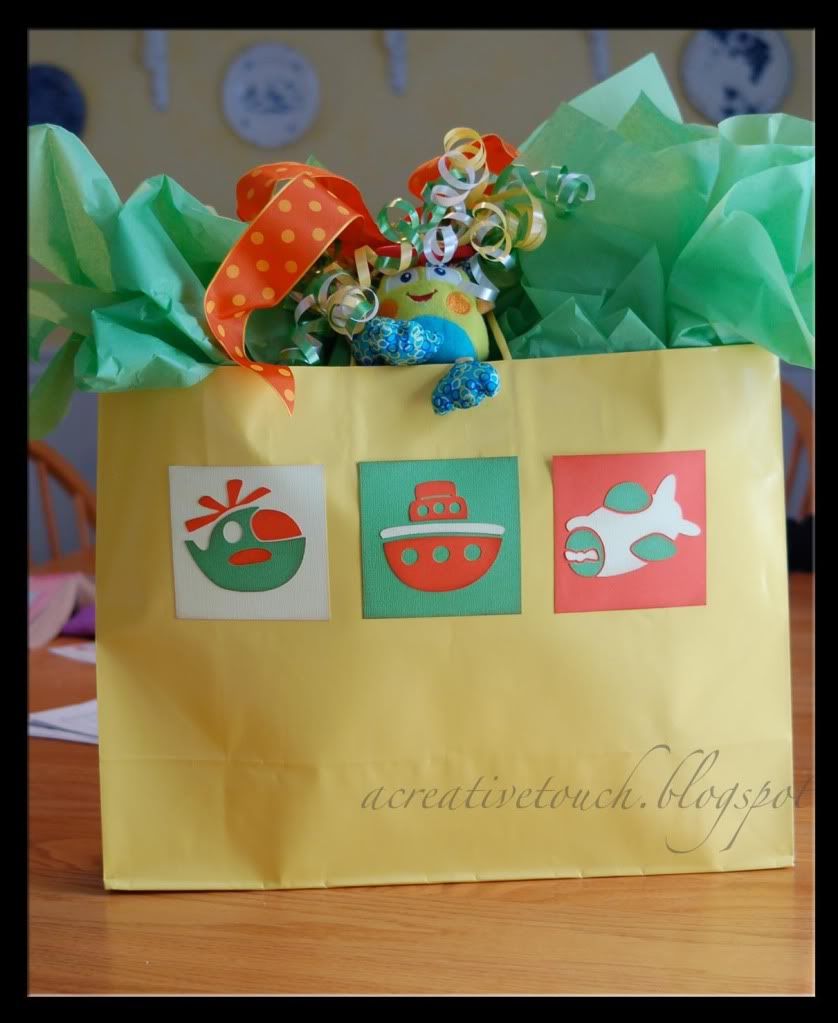
To go with the card, I die cut a bag using my Silhouette digital cutter. I didn't have patterned paper the exact green color that I used above but the one I used was close enough.


I used PTI's Tag Its #10 set to make the little tag in the same colors as the card. I then further tied the two pieces together (and not literally!) with the same ribbon I used on the card.

Charlotte said the little girl loved the bag. It was big enough to fit a gift card and two nail polishes too!!

Thank you for looking. I hope this inspires you to create something yourself this week!!
Nora 

Tuesday, January 18, 2011

A Few Projects

     I finally got around to uploading photos of some of the projects I have been working on. Today I am posting two projects I made for a baby shower I attended on Sunday. 
     For the first project, I used scraps I had left over from scrapbooking, a Suzy's Zoo Stamp and Copic Markers to make a fun baby card. Even though the girl was having a boy, I chose to use yellow and green to give it a soft feel.


     For the bag, I didn't match the card exactly. I chose to use the same color families but decorated a bright yellow gift bag I bought on clearance with images I cut from my Silhouette die cut machine. I haven't used my Silhouette a lot so this was a lot of fun for me to play with.


     I was really happy with how both projects came out-something that is unusual for me. I hope these creations will inspire you to make some of your own. The supplies are used below. Happy Tuesday!
Nora
Supplies for baby card:Basic Grey Patterned Paper (Mokuren from the Kioshi Collection),Bazzill Cardstock (Sunflower Light)Doodlebug Border Stickers, American Crafts Alphabet, Queen and Company Chipboard Alphabet, KI Memories Paper (orange) and Alphabet Stickers (y), Large Corner RounderTim Holtz Vintage Photo Ink, Suzy's Zoo Stamp, Copic Markers, Prima Flower, Offray Ribbon, Paper Trey Ink Select White CardstockSpellbinders Large Scalloped Nestabilities Rectangle Die and Large Nestabilities Rectangle, Momeno Black Ink and Cotton Candy Stickles.


Supplies for Bag: Green, Orange and Yellow Cardstock, Paper Cutter, Tim Holtz Vintage Photo InkSilhouette Digital Craft Cutter and ribbon.